How To Build An Industrial Plumbing Pipe Closet Organizer (Part 1)
Been wondering how to build a plumbing pipe closet organizer? I don’t know if you remember, but approximately eight-and-a-half billion years ago, I started a project.
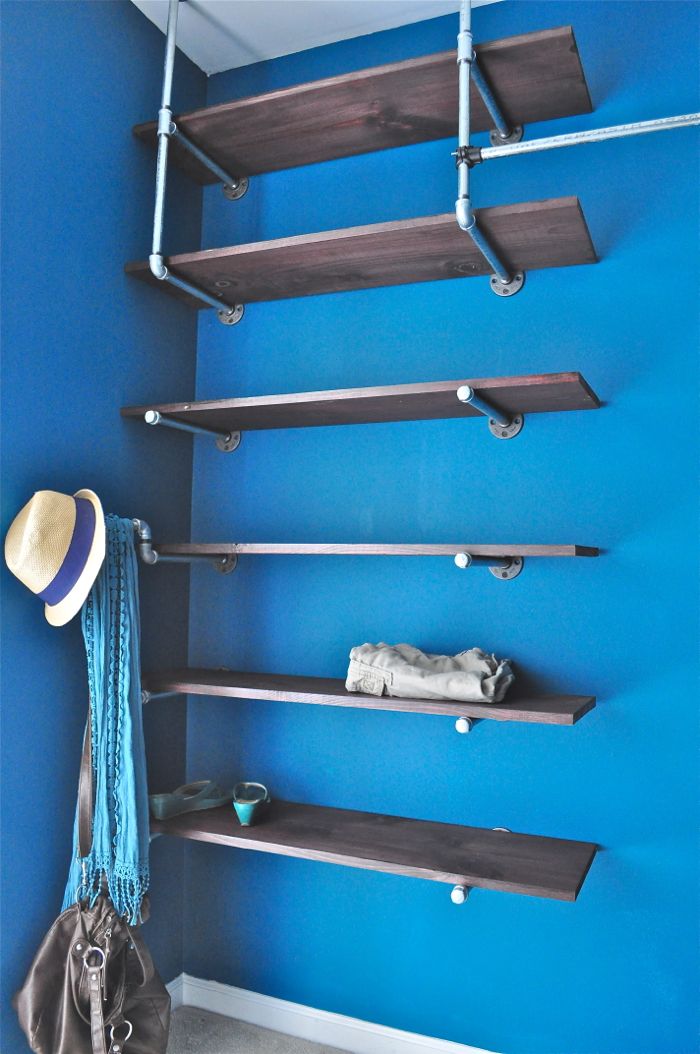
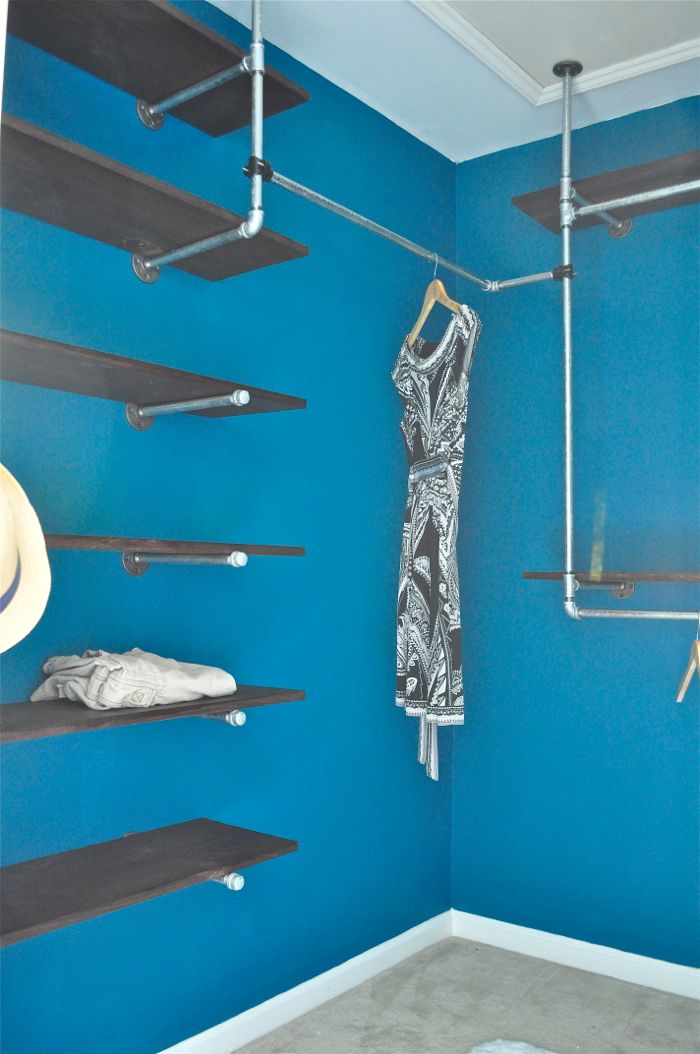
My master closet. You can see it (mostly) finished here.
Looking back, I want to punch myself in the face for several reasons:
One, I did not take a proper “before” shot — you know, the kind with our clothes all willy nilly and scrunched together, dangling from old wire shelving coated in 14 years’ worth of grime.
That kind of “before” shot.
Instead, all I have is this one:
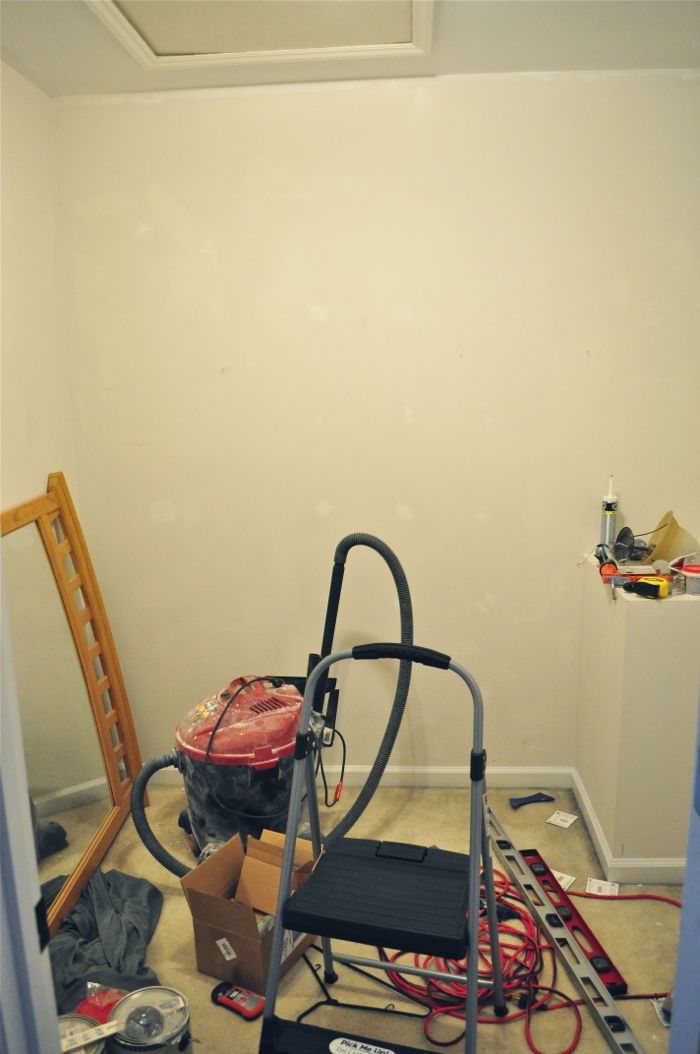
And this one:
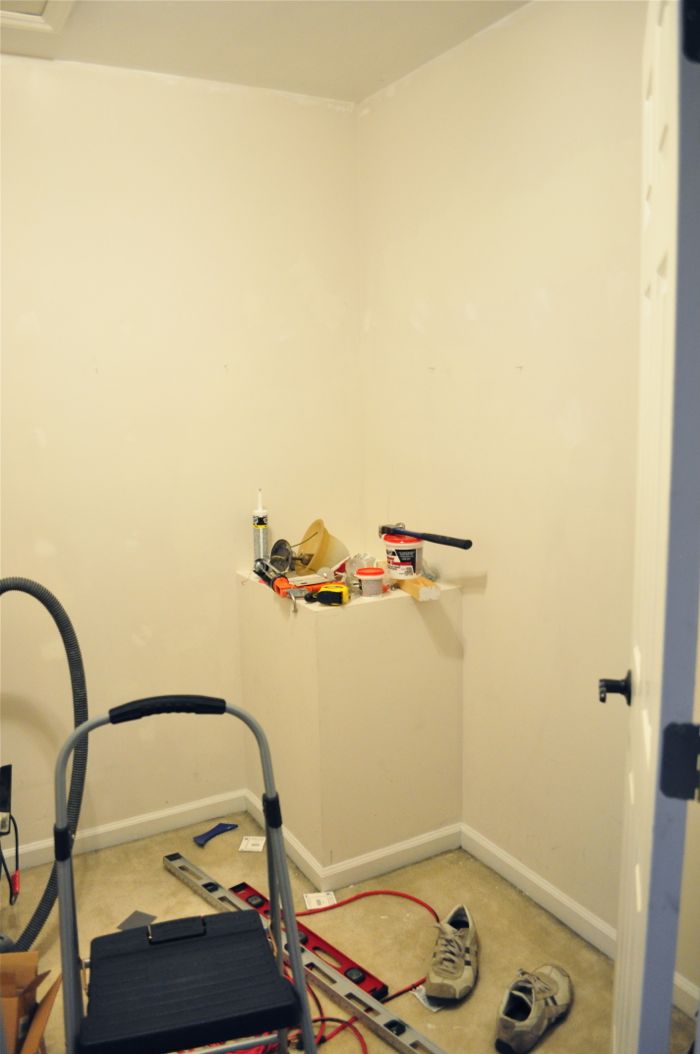
Obviously, at that point the grimy wire shelving had been removed, the popcorn has been scraped from the ceiling, and it had turned into a storage unit for construction supplies.
Two, I bought crappy paint. I figured, what the hell? It’s a closet. I don’t need no expensive stinkin’ paint.
Turns out, I did. The cheap paint at Home Depot — especially in a color as deep and rich as Valspar’s Gypsy Teal — simply did not cover well. And it chips easily.
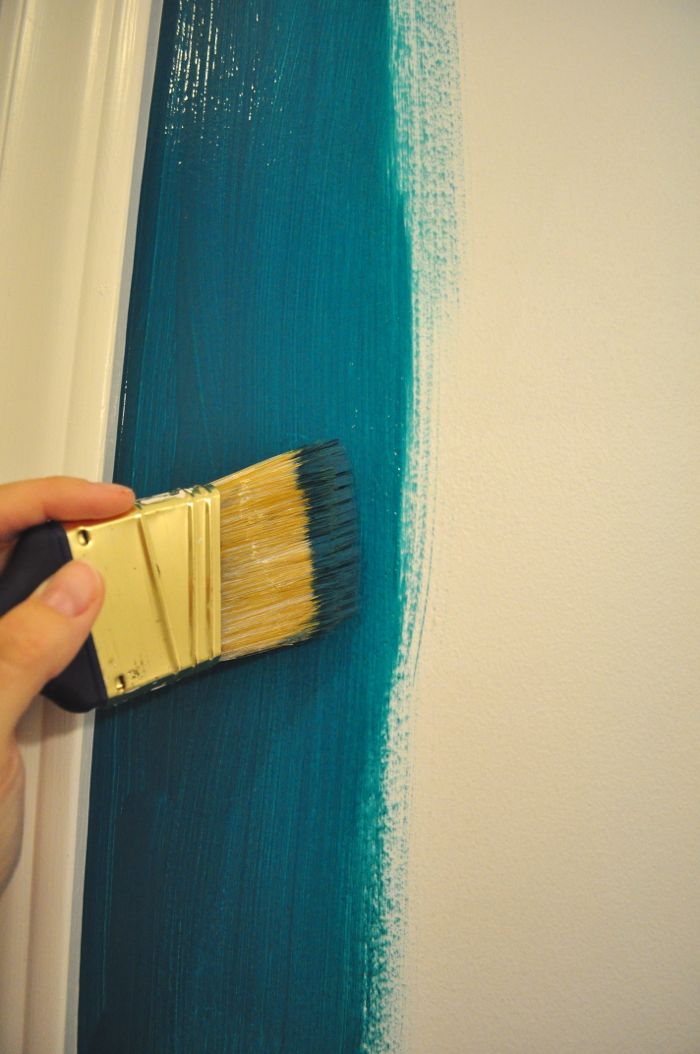
Gorgeous green-blue…
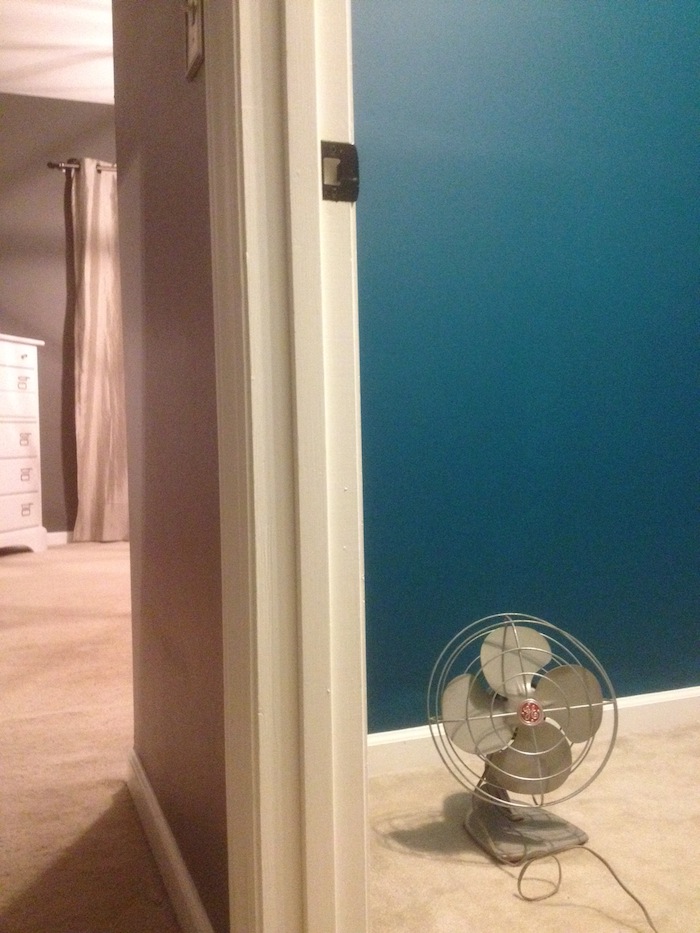
But not the greatest coverage — even after 3 coats! (It’s more green/teal than blue in real life.)
Fortunately, like I said, it’s just a closet. So perfectionism can lapse here.
I think.
(My eye will stop twitching eventually.)
Three, my closet is dark. It’s a closet. No windows and poor lighting means crappy pictures. Some were taken with my phone and others with my camera, but either way, they’re generally dark and crappy. Sorry about that.
Four, I way, way underestimated the time this project would take. Among the measurements, calculations, re-measurements, mis-calculations, and Home Depot nipple-buying trips, the number of woman hours spent on this project far exceed the dollar value I saved building this over just buying a prefabricated closet organizer.
That said, I would do it again.
And lucky for you, if you decide to take on this project, I’ve already done most of the hard work — the living, learning, crashing, burning kind of stuff — for you.
As many of you already know, decision of any kind practically paralyzes me. And the sheer number of decisions and possibilities for this project nearly shut it down before I’d finished with the first sheet of graph paper. Ultimately though, I realized: There were several ways to do this project. There were several routes it could take. In the end, the deciding factors for me on just how to tackle this came down to:
a) Keeping it as simple as possible, and
b) Keeping it (almost) as inexpensive as possible.
So. If you want to spend many hours going over various hanging rod positions, pine board sizes, mounting options, etc., by all means. Do your research. But, if you just want to get this project done and not worry about the other possible ways to do it, follow my instructions, making adjustments where necessary to fit your particular space.
For my closet organizer, I was inspired by a few different shelving projects, namely this one:
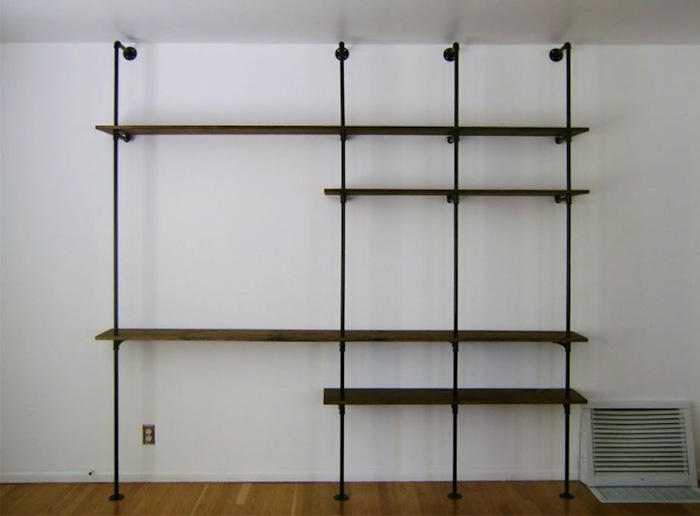
(from TheBrickHouse.com)
and this one:
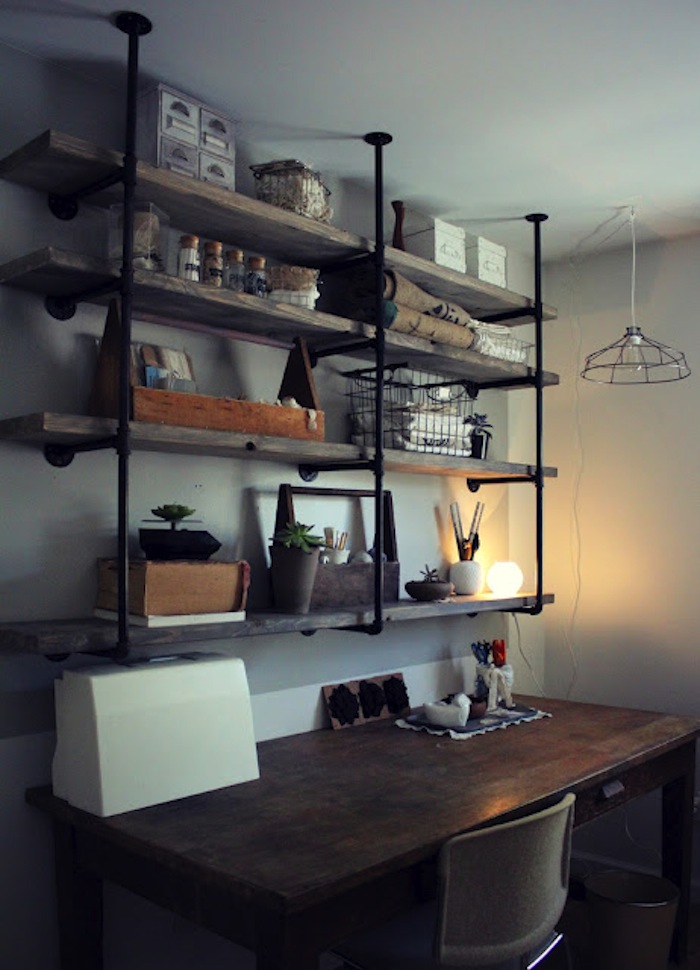
(from SylvieLiv)
and this one:
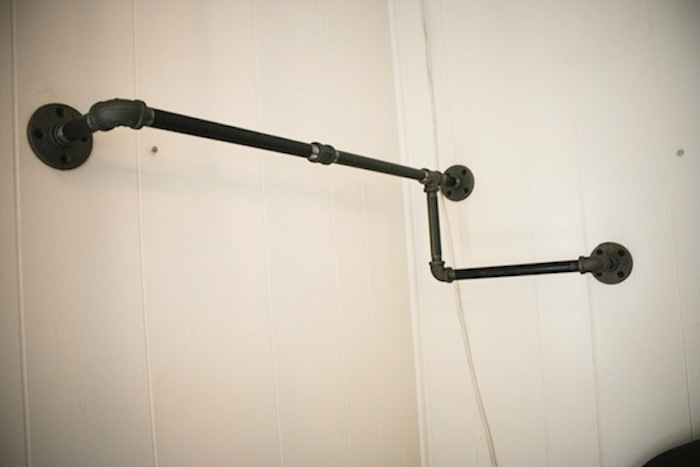
(from ImprovisedLife.com)
After mulling over the designs used by my inspiration projects above, I decided that I would use the shelf support system from the second photo for my shelf units and I’d use the third picture for inspiration for a couple of standalone hanging rods that wouldn’t support shelves.
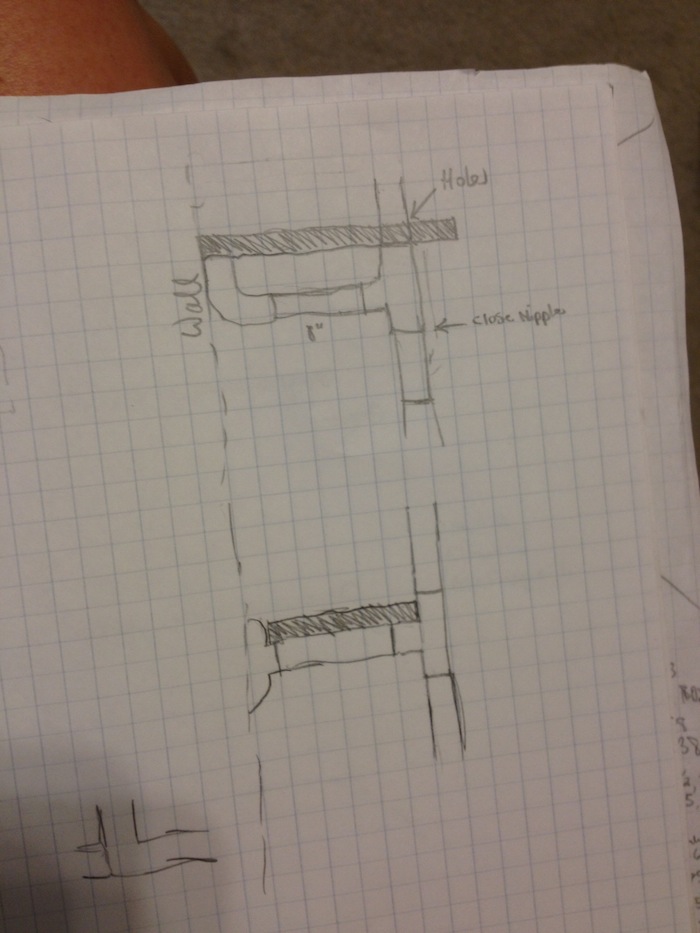
Above, I’ve drawn (side-view) the difference between shelf support systems from the first and second inspiration projects. The first utilizes holes cut through the boards to hold the shelves in place with the vertical pipes with the back of the shelf resting on elbow fittings, while the second lets the shelf rest freely behind the vertical supports directly on pipes that are attached to the wall using flanges. (If you don’t know what elbows and flanges are yet, don’t worry — you will. Because I will explain it. Because I’m awesome like that and I don’t want to see you suffer.)
I decided on the second one because, while the first one is less expensive (elbows are significantly cheaper in the big-box stores than flanges), the level of difficulty and precision involved with drilling holes in the exact right place through my shelves was too daunting to tackle. That, and I thought those shelves would be trickier to get level since their weight rests on fittings (tees and elbows) as opposed to actual pipes.
Step 1: Measure your space & mark your studs.
And while these shelving systems look phenomenal, they differed greatly from what I had in mind on 2 fronts — they weren’t designed to hang clothes, and they only occupied a single wall.
So. Not only did I have to figure out an effective way to add hanging rods (making sure, of course, that there was enough space between the wall and the rod for the hangers to fit), but I had to visualize and design how to best occupy the space on 3 walls — not just one. The only way to do that, of course, was to measure my space.
Sure, you could use some schmancy computer software to do the job, but I find good, old-fashioned graph paper works best for me. It’s easy to use, light weight, portable, erasable, and far less expensive to replace than a laptop when you spill coffee across the surface whilst carting it from room to hardware store and back. Depending on the size of your space, just make each square represent 1, 2, 3, 5, or 6 inches and draw your walls to scale. I find it helpful to do both an aerial view of the entire room as well as elevations (aka. straight-on views) of each wall. Elevations are especially helpful with a closet organizer because vertical space is incredibly important — you don’t want to hang a rod so low that your shirts drag on the floor or a shelf so high that you can’t fit anything on it. So. Take the time and measure everything.
(I have this crazy, oddball cube-like jut-out in the lower-right corner of my closet that houses the air intake from the hallway. This was an annoying obstacle, to say the least, and hopefully you won’t have any such obstruction in your 3-dimensional space.)
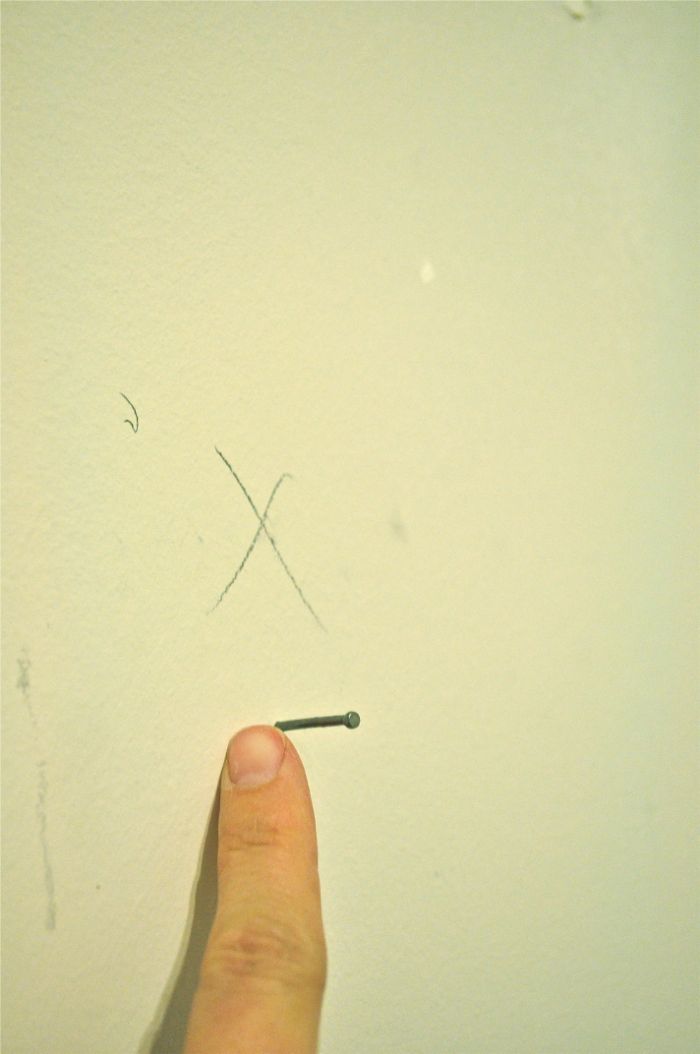
I used a stud finder to locate my studs. If there’s one thing you need to understand about metal pipes, it’s that they’re heavy. Like, really heavy. So it’s best to install them in studs whenever possible. I located my studs and then popped tiny nails into them just to make sure, since my measurements for the organizer would depend on this step. Then, I just painted right over the holes without filling them so I could find them when I was ready to install. I figured since it’s a closet, it really doesn’t matter if there are tiny imperfections in the walls.
Step 2: Know your parts.
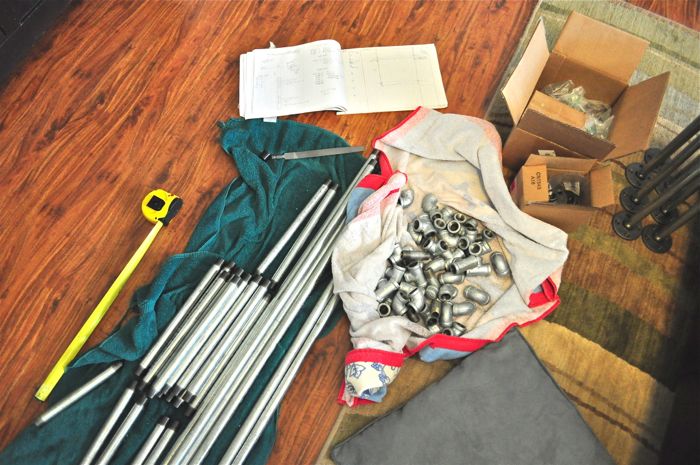
Once you have a grasp of your space, it’s extremely important to understand what parts are available to you in order to create your design.
Now. I’m not sure what’s available to you, but I do know what was available to me. Or at least within the realm of my knowledge, budget, and proximity. And these are the parts I ended up using:
Galvanized Steel Pipes
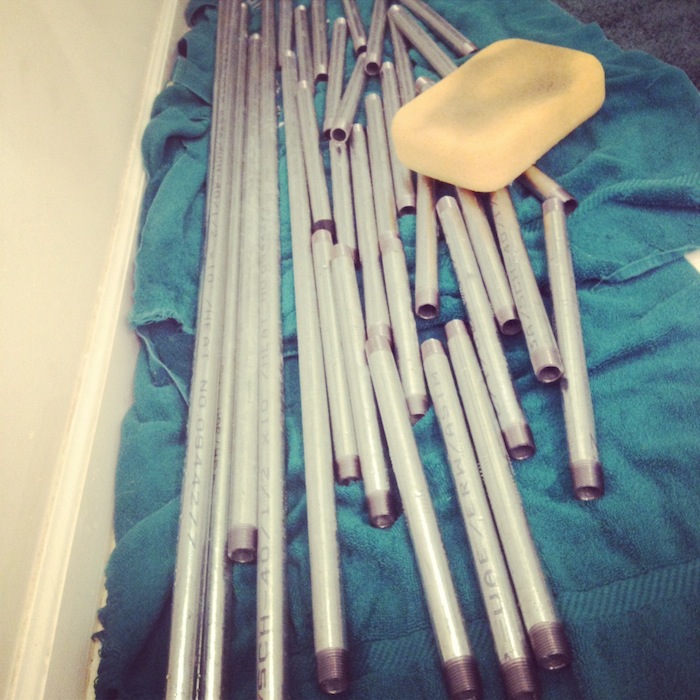
Duh. I hope you would’ve guessed this since, you know, this is a closet organizer made primarily from galvanized steel pipes. But did you know that your local big-box home improvement store likely carries black steel pipes as well? And copper? And PVC? I chose the galvanized steel because I liked the look, but if you don’t care how it looks or just plan on spray painting them (like the first two of my inspiration shelving units I mentioned above), then get the cheaper black pipes.
Galvanized steel pipes come in various lengths and widths. The width I used was 1/2″ (which is actually the diameter of the inside of the pipe, since plumbers are primarily concerned with how much fluid can travel through them). For the lengths, I actually ended up mainly purchasing the 10-foot pipes available in the store and having the employees cut them to length and thread them for free. I cannot tell you the significant amount of money this saved me. I needed many 12″ pipes for this project, because those were the pipes that anchored to the walls and supported the shelves. I could’ve bought the 12″ pipes individually for over $3.00 a piece, or I could’ve looked at the Home Depot employee all doe-eyed and dumb girl-like and asked him to cut me some 26-odd pieces of 12″ pipe from 3 of the 10-footers, each of which cost $13.42 (for the entire 10-foot length). They don’t even force you to use the leftover pipe (they just charge you by the foot), but I ended up needing it (and then some) for rods and such.
If you know anything about me, know this: I am not above acting ignorant to score a deal. Though, truth be told, the Home Depot employee was more than happy to help me anyway. He got paid the same no matter what.
Flanges
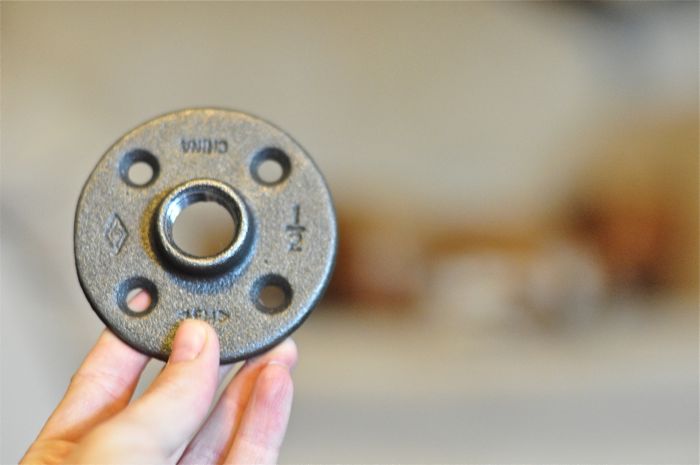
Like I mentioned before, I opted to use flanges anchored to the walls to support my shelves. In the first inspiration project, she only used 2 flanges to anchor the entire unit to the wall at the very top — everything else was just floating. I just felt better knowing that each shelf support would be directly anchored to the wall, so I mustered my courage to fork over the >$7 a piece for galvanized steel flanges, when it occurred to me to check online. Score! I ended up finding black flanges (which are likely available in the box store as well), for much cheaper than the silver galvanized steel ones. For a price difference like that, I figured I could compromise on looks a little. And now that it’s done, I hardly notice they’re black (more of a charcoal gray, really) compared to the silver pipes.
I bought these.
Elbows
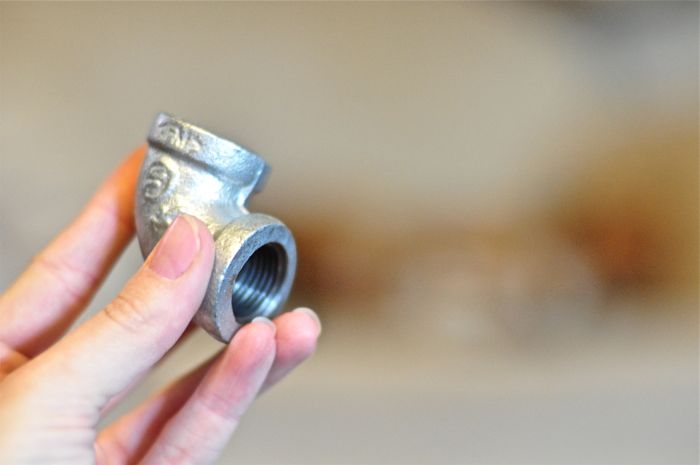
These are easy. The elbows put bends in your pipes.
*You can order them here.
Tees
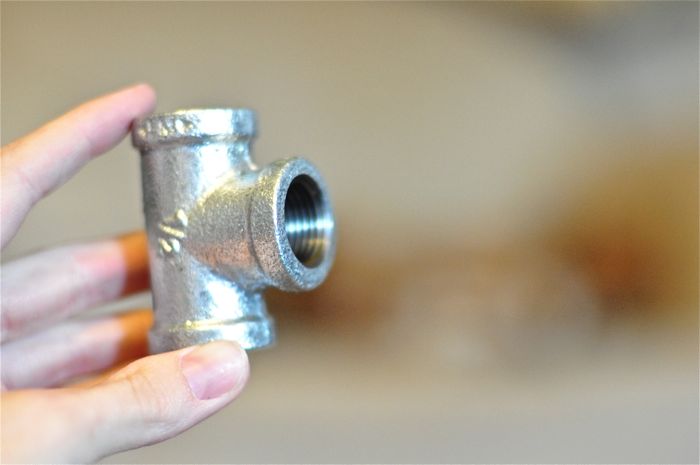
I used these wherever I needed a shelf support pipe to connect to a wall, and in some cases to connect the pipes where clothes hangers would go.
*You can order them here.
Caps

Oops, not quite.
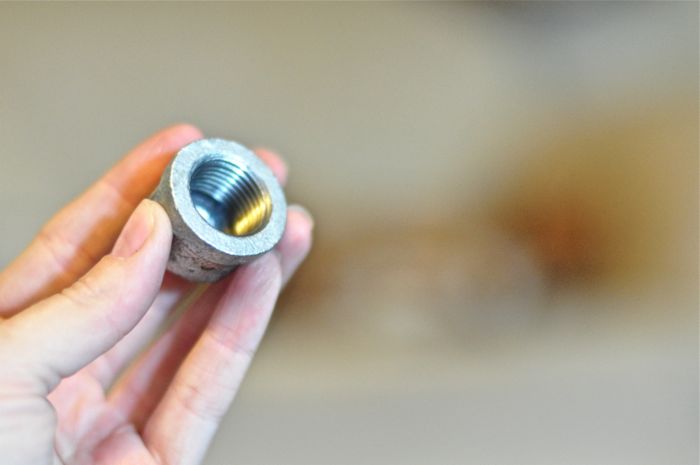
There we go.
You can use these to close off open ends of pipes.
*You can order them here.
Close Nipples
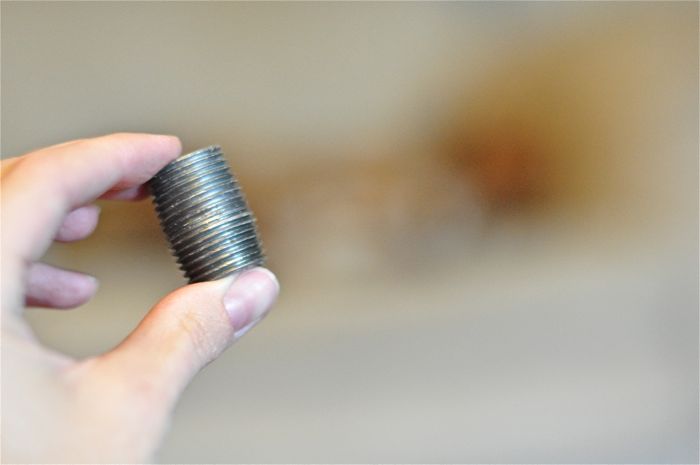
Yep, that’s a fun one. This is basically a very short length of pipe that’s completely threaded (there’s no smooth part of the pipe). I used these to connect female fittings to other female fittings, like tees to other tees or tees to elbows or elbows to elbows, or heads, to shoulders knees and toes, knees and toes.
*You can order them here.
Uhh… Far Nipples? Or Maybe Just Nipples
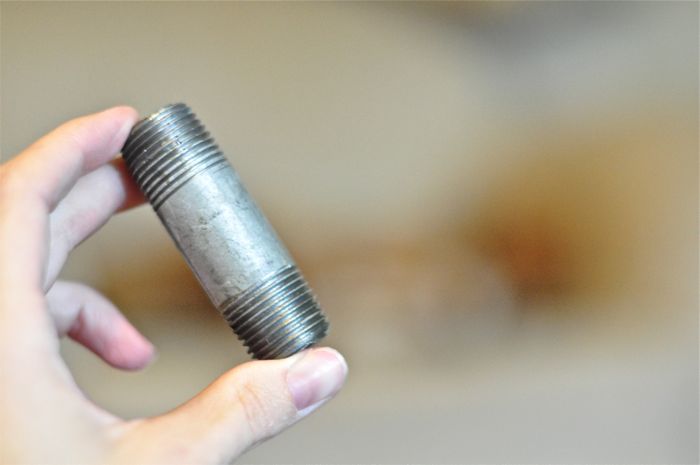
Technically, I believe this term is used for any pipe that is threaded on both ends. But I use it mainly for the shorter ones (har, har). Any short pieces I needed, I bought (as opposed to asking the Home Depot employee to cut them). The one exception was a 7″ I needed him to cut because that was not a pre-cut length.
*UPDATE: It’s been brought to my attention that some Home Depots won’t cut the pipe. If that’s the case, I’d strongly urge you to look for the lengths you need online — you might be able to get a better deal!
Anatomy 101
Just a brief explanation: Pipes and nipples are threaded on the ends (meaning they have those lines on the outside of each end so you can screw stuff onto them). These are also known as male parts. All of the other pieces I described (flanges, elbows, and tees) have the threading on the inside, making them female parts. (Oh, it is using all of my self-control right now to not start making sex jokes.) Now. Anatomically speaking, and only when it comes to plumbing fixtures, you can only screw male parts to female parts. Therefore, you can’t connect 2 fittings without the use of a nipple.
Must. Not. Make. Sex joke.
Step 3: Design.
In order to keep it simple, I opted for 4 basic (and standalone) hanging/shelving elements in my closet, rather than trying to build a single, massive, connected unit. Trust me on this — after going through many complicated designs, I realized that the threat of the questionable aspects (would my flanges hit the studs? did I measure the space correctly? would I overlook something important?) far outweighed the fact that keeping it simpler would make it less aesthetically pleasing. Eventually, I told myself, come on. It’s a closet — not the ceiling of the Sisteen Chapel. It has to be functional, it has to be economical, and it would be cool if it didn’t come crashing to the floor under the weight of a plastic hanger.
Building 4 different types of standalone units made this project easier, less expensive, and more adaptable to change when problems occurred. Which they did.
These are the types of units I built:
1) Basic Shelf Support
These were easy. Each support consisted of 1 flange, 1 (12″) pipe, and 1 cap. Simple! I used these on the left wall as sort of a “free form” approach to the shelving. Although I love what my inspiration projects did by using vertical pipes up the sides, I simply didn’t have that kind of money to blow on something strictly ornamental. So I opted for these simple, “homemade” brackets.
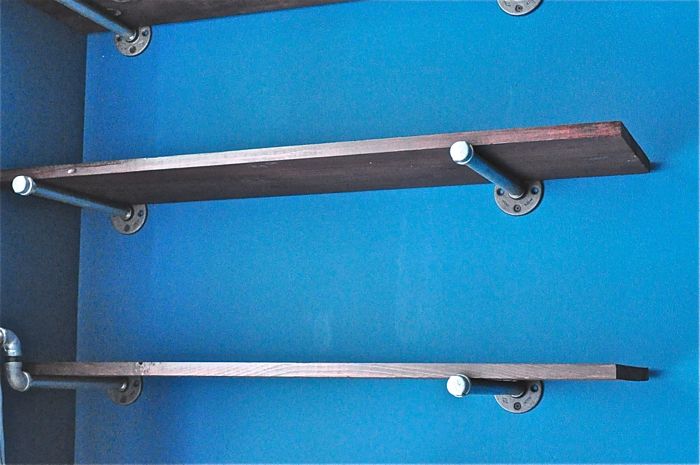
2) Shelf Support with Vertical Rods
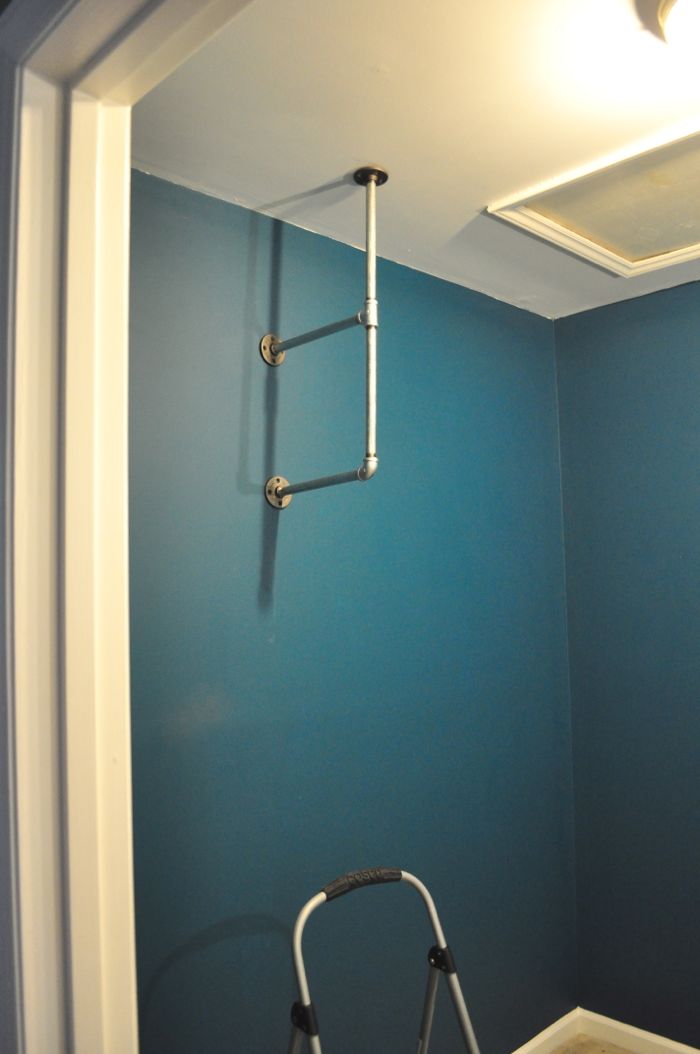
I used 2 of these for my top 2 shelves on the left wall so I could use one of the vertical rods to support a dress hanging rod I intended to install later. The vertical pipes that go up to the ceiling are not actually attached to the ceiling. Those flanges are just for decoration.
3) Standalone Hanger Rods (No Shelf)
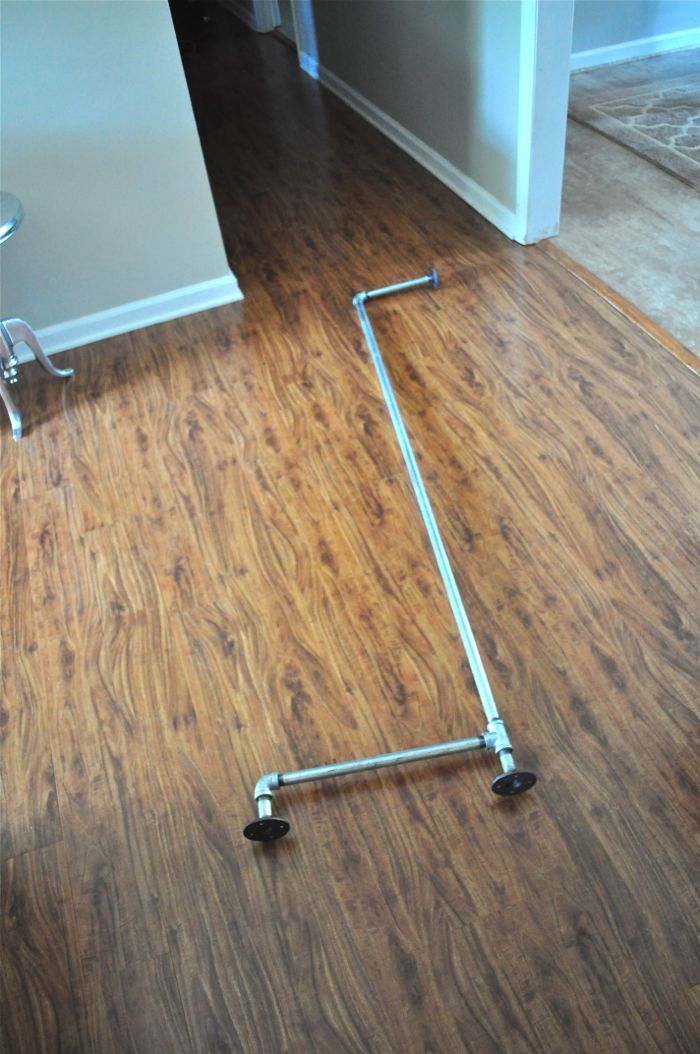
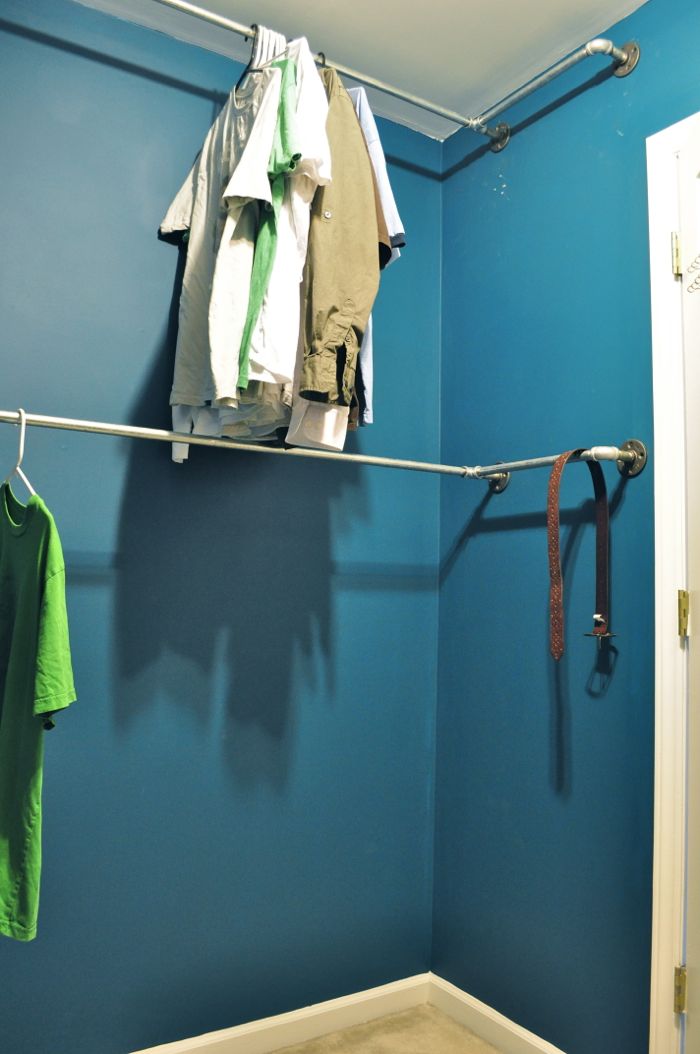
I can’t get a great picture of these actually inside the closet due to their location on the right wall behind the door, but they are built like the 3rd inspiration project, attaching to 2 walls. I have 2 of them — one very near the ceiling, and the other further down (far enough down to hang Justin’s shirts on the top one, which I calculated by first mounting the top one, then literally hanging one of his shirts on it with a hanger to see how far down I needed to install the second one).
I’ll admit — the only part of these mounted into a stud is the far left flange (top of the picture). I used anchors for both flanges on the right side, and overall, it feels pretty solid.

My closet organizer hanging buddies. (My best friend’s adorable husband and baby.)
Also, since my closet walls are not exactly square, these required some finessing (screwing and unscrewing) to get the flanges on the right to sit flush with the wall.
4) Large Shelf/Hanger Combo
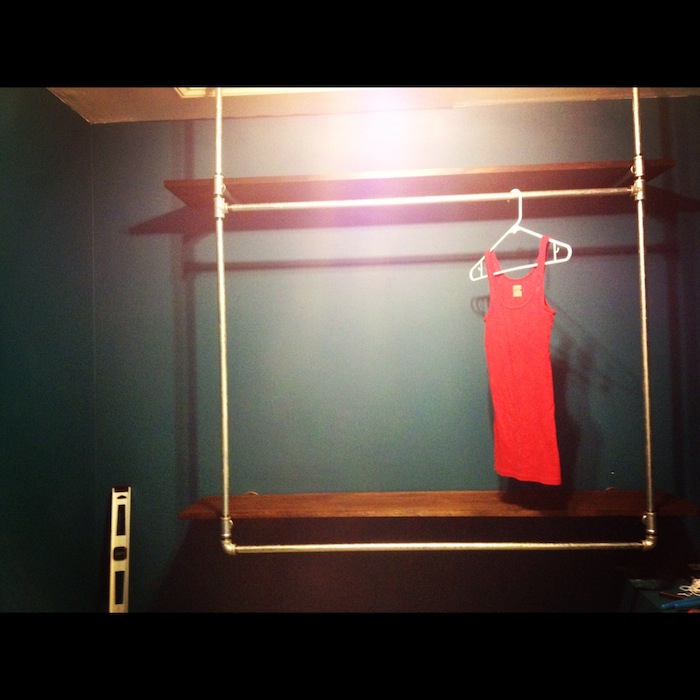
This is what I built for the back wall. I thought this piece would be the most difficult, and while it did take more time than the others to design so it would mount into studs (I had to have the horizontal pipes re-cut at Home Depot due to a miscalculation on my part), the assembly was easy and the mounting, with the help of a dear friend, actually went more smoothly than any of the other pieces (except the basic shelf supports).
Important note: That top bar going across was tricky. Basically, I assembled the entire perimeter of the unit, saving that bar for last. Due to the nature of pipe threading, you technically can’t make any “closed circuits.” This means that as I screwed one side of that bar in, the other side was simultaneously unscrewing itself. It was like a 3-way gone horribly, horribly wrong. (Crap. Couldn’t resist the sex joke.) Fortunately, this bar does not need to be screwed ALL the way in on both sides in order to be sturdy. I found this out when I tried disassembling the unit in order to get the horizontal bars cut shorter so the flanges would line up with studs — it wouldn’t come apart! At least, not easily. So I took comfort in knowing that while that middle bar is not tight and can be turned, it effectively can not physically be removed while the unit is mounted.
Again, my vertical pipes that go up to the ceiling are not actually attached to the ceiling. Those flanges are just decorative.
Tips:
Each fitting adds approximately 1/2″ to your overall length. This means that a flange anchored to the wall, plus a 12″ shelf support pipe, plus an elbow fitting, means your overall unit is about 13″ away from the wall. (This works out perfectly, leaving just enough space to slide in a 12″ pine board for a shelf.)
As another example, I originally used 2 (48″) horizontal bars on the large back unit for my hanger rods. Unfortunately, when I assembled the whole thing, the tee fittings on either end added 1/2″ a piece to the overall width. Since the studs where I was going to mount it were 48″ apart, my unit was too wide and I had to cut the horizontal pipes down to 47″. Understanding this could help you immensely when it comes to planning your project.
Not all of my pipes and fittings are screwed on super tight. Sometimes, in order to get an elbow or a tee to face the way I needed, I didn’t screw it on as tight as it could go. Of course, this will affect the length of your overall project. So just pay attention. Play around. In the case of the large shelf/hanger combo unit on the back wall, it was important that the vertical heights be similar on each side so that the shelves would be level.
Step 4: Supplies
Once you know what kind of units you plan on making and how big they need to be, it’s time to gather your supplies! For everything I described above, here are lists of what I needed:
General Supplies:
- Kobalt 8″ Half Round Metal File (for filing sharp “teeth” marks from cut pipes)
- Dish Soap and Sponge (for degreasing pipes)
- Drill
- Screws (I bought these # 6 x 1-5/8 in. Drywall Screws from Home Depot)
- Anchors (for any place your flanges aren’t anchored to a wall stud)
- Level
Left Wall Shelving Unit, not including that tall pipe floating off to the right and the scarf/hat hanger (all 1/2″ thick pipes):
- (14) Flanges – 12 for the shelf supports and 2 for the ceiling (just decoration – not attached)
- (16) 12″ Pipes (12 for shelf supports and 4 vertical)
- (2) Tee Fittings (for the top shelf)
- (2) Elbow Fittings (for the second-to-the-top shelf)
- (8) Caps (for the bottom 4 shelves)
- (2) 10′ Pine Boards (cut to 80″ shelves)
2 hanging units on the right wall:
- (2) 60″ Pipes
- (2) 15″ Pipes
- (2) 9″ Pipes
- (2) 2″ Pipes
- (2) Tees
- (4) Elbows
Back wall unit:
- (2) 48″ Pipes (for the horizontal hanging rods)
- (2) 36″ Pipes (for the vertical supports)
- (6) 12″ Pipes (4 shelf supports and 2 vertical)
- (6) Tees
- (2) Elbows
- (4) Close Nipples
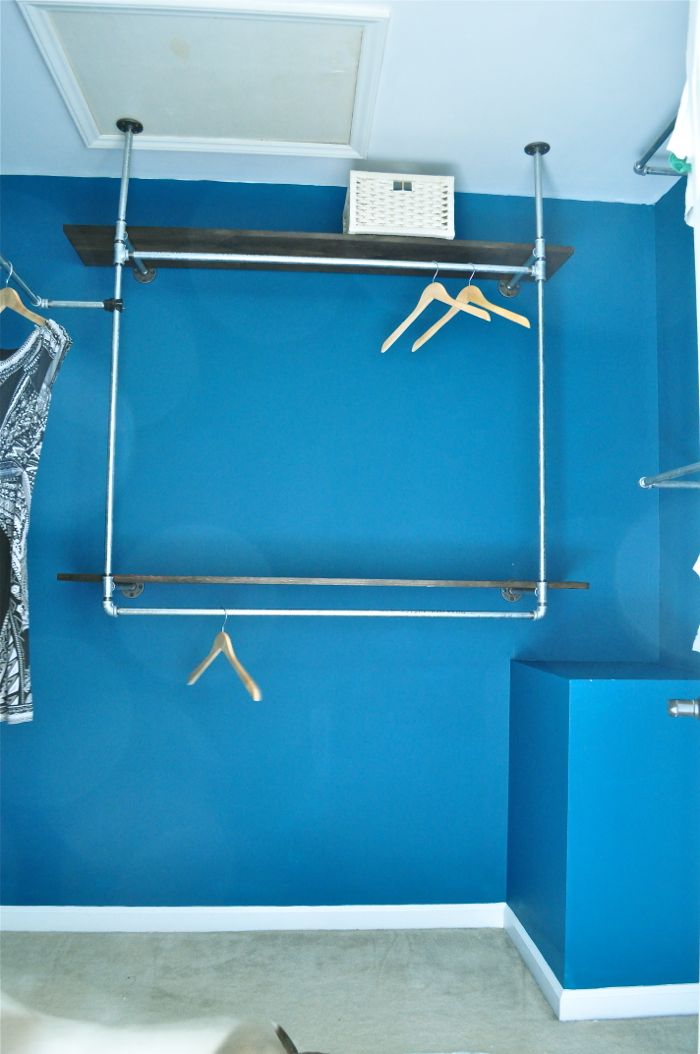
Back wall unit.
Aannnnd I think this might be a good place to stop. I have more to cover — like installation and some of the fun little extras that you haven’t yet seen, but I think this is the longest post in the history of ever, and if you’re not the slightest bit interested in building one of these, you’ve probably vowed by now to never read my site again.
And I hope that’s not the case.
If you are interested, stay tuned.
Click RIGHT HERE to see Part 2 and final “after” shots!
UPDATE: If you want to see a reader’s AMAZING take on an industrial closet, check out her copycat project. It’s gorgeous!!
*This post contains affiliate links.

Comments
Oh my god. I can’t believe you did this. Looks great, but wow. All those steps. I probably would have got as far as buying all the stuff and putting it in the closet before I decided to sit on the floor and cry. Good for you. Seriously.
I was torn between making this post super super detailed or making it really short and easy to read. I opted for the former because I spent SO much time figuring all this stuff out and I didn’t want someone else to have to do the same. But maybe I’ll do a “condensed” version do it doesn’t look quite so complicated. Because it’s really not, once you understand how it all fits together. :)
Awesome projects !! It looks really simple and nice :) Thankssss !!!
[…] And, well, okay. I’ll admit that one’s not quite done yet either. I still have to add the cool light fixture I bought and these awesome wall hook thingies, but I decided not to spend any more time on it until 2013 just in case the world ends this Friday. But you can see Part 1 of how I did this (it’s not as hard as I made it sound — I need to work on my direction-giving skills) right here. […]
[…] the last time I talked about this thing was August of 2012, when I gave you all kinds of great details about how to prep your closet for […]
This is pretty extensive and amazing. Good work!
Why thank you!
Good ideas!! :-)
Thanks, Judy! :)
I wish I had found this article before I started my very similar project. I have been to Home Depot 7 times so far. between the primer, paint, brushes, pipes and fittings, i’m down almost $300. And I was told by the gentleman at home depot that if i purchased the anchors, I didn’t need to find studs because the anchors support over 100lbs of weight each. lies. when I hung up my clothes, the entire thing started pulling from the wall. then i was frustrated and over home depot so I went to a mom and pop hardware store and was sold some anchors to fix to the studs only to get home and they be too short. FML! LOL
Oh, nooo!!! So sorry you’re going through all of that. With pipes that heavy, it seriously is best to go for studs. But yeah… if you do anchors, they gotta be pretty heavy duty. What a pain!! Let me know if you get yours together after going through this tutorial — I’d love to see a picture when you’re done!
[…] emailed me and told me she’d made an industrial chic closet organizer inspired by the one I built out of steel plumbing pipes for our old house, and […]
I can’t thank you enough for your post! This saved me so much time and agony plus saved from having to make multiple home store runs. We just moved into a new house and the master bedroom closet has nothing in it. No shelves and no rods. It’s a blank slate. With your post I was able to quickly design a system and knew what I was looking dor when I went ro the home supply store. Thank you thank you thank you!!!
That makes me so happy to hear, Kristi!! I put hours into those posts, so it’s awesome when someone tells me they helped. I’d love to see pictures of your project when it’s done! You could either post them to the Facebook page or send them to my email: Katie(at)Domestiphobia(dot)com. We’ve moved since then, but I MISS that closet!
this is amazing!! thank you so much for posting the details as i will be using them to do this in my living room. i can’t paint my wall. what color paint or stain did u use for the shelves themselves? they look almost metallic. i wonder if it is because of the awesome blue color of walls? i will be using reclaimed wood mostly pallet wood.
Hi Elaine, thanks for stopping by! The shelves aren’t actually metallic – probably just look shiny because of the stain sheen? I used Minwax stain in Mahogany. All of the details for assembling/installing this project are here in part 2: http://www.domestiphobia.net/2013/04/04/how-to-build-an-industrial-chic-closet-organizer-part-2-aka-my-closet-is-still-cooler-than-me/
Send me some pictures via email or my Facebook page when you’re done — I love to see what people come up with!
Woooow super informative!!!
We are totally impressed!! You did an awesome job and your suggestions are great.
Just wanted to let you know that galvanized steel contains lead from the zinc coating that is applied. It can be up to 2% lead or 20,000 ppm. For reference, children’s products are required to be 90 ppm or less in the US. You can google for more info on this, but our closets have galvanized steel closet rods and I got a positive lead test result from testing it.
Could you please link to your source? I did a quick search and found that the coating of older steel pipes (between 1889 and 1960) might contain lead, but not the pipes that I bought several years ago. Further, these were installed in a closet. We weren’t drinking water from them.
https://www.liebertpub.com/doi/abs/10.1089/ees.2015.0073?
http://web.distran.com/blog/everything-you-will-ever-need-to-know-about-hot-dip-galvanizing
http://www.chathamnc.org/home/showdocument?id=22727
This last link has entire sections devoted to galvanized pipes, galvanized metal items, and galvanized closet rods, mentioning specifically that the motion of scraping hangers along the rod creates lead-containing dust that can get on the clothes.
After I learned about this, I bought a home test kit and our closet rods tested strongly positive for lead. I hate to think about the dust created by scraping the zinc/lead coating with the hangers, especially as I have a young child who stores her toys in the closet. I felt like I should pass this info along in case it helps someone.
Interesting! What I’m gathering from these is that the primary lead concerns still stem from drinking water from galvanized pipes — and namely when the pipes further upstream are the old lead-based kind. It also sounds like the amount of lead on a galvanized pipe coating will depend entirely on the grade of zinc they use. In this closet I used plastic hangars and didn’t have any kids when we lived there, and if we still did live there, I don’t think I’d be too worried about this. What’s freakier to me is that they can still use lead in these when they’re intended for drinking water! To me, using them for their primary function seems more of a health concern! That said, I definitely want to leave this comment up so people can do their own research to determine whether they feel comfortable using these products as building materials.
Hilarious! I got side tracked by the side jokes.