
How To Design Your Kitchen Layout Like A Professional.
Okay. So I don’t actually know about “rules” for a kitchen layout. And I’m certainly not a professional. But I’ve remodeled two of my own kitchens, and so far I have a 100% satisfaction rating when it comes to layout. That makes me an expert of my own domain. And basically, what I learned is that you can try to follow hard-set rules if you want, but you also have to account for what your space allows. Where’s the main flow of traffic? Are there doorways in the way? Do you want to move the existing plumbing? If you’re not hiring a professional to design your kitchen, you’re probably on a bit of a restrictive budget, and that’s why these questions are important.
And you know what? Triangle, schmiangle. Kitchens come in all different shapes and sizes, and if you’re attempting to design the layout yourself, you have to get inside your own head.
Go on. Don’t be afraid.
If you’re anything like me, it’s a little discombobulated in there — not messy, per se, but definitely somewhat disorganized and still smelling like the 571 gallons of Bath and Bodyworks Vanilla Bean body lotion that my skin absorbed between 1997 and 2001.
My vanilla bean lotion brought the boys to the yard.
But, just like the stacks of seemingly haphazard paperwork on my desk, everything has its place. So go to the place where you store all of the records of your kitchen habits — you know, the secret mental video files of whether or not you pull all of the place settings out at once, whether you prefer to store boxed foods separately from non-refrigerated produce, and how much space you tend to cover when you prep. (Are you a spread-it-out Sally, or a compact Carl?) All of these tidbits will help you determine whether you need more cabinet space, or more room to move. Open shelves for easy access? Drawers? Do you really need that island, or when you bend over to dig through all of your fabulous new drawer bases, do you really like the room to bend over? And when you’re trying to get from the sink to the stove, do you want to have to walk around something to get there?
For our first kitchen, we were able to start from scratch with custom cabinets. This meant that standard sizes didn’t matter much, I could solidify my love affair with glorious drawer bases, and we had a clean slate when it came to space. Our current kitchen was a bit more complicated since we were working with existing cabinet boxes. So.
Step 1: Understand what you’re working with.
Listen. The chefs on Top Chef would never be able to create anything delicious on-the-fly if they didn’t understand the ingredients they were given, just like you wouldn’t be able to design a workable layout if you didn’t know the size of your space or materials.
First measure out your space and draw it (to scale) on graph paper, including the locations of doors and windows. Then, if you’re using existing cabinets, measure every box so you know what you have to work with. If you’re buying builder-grade, look up the brand to determine standard sizes. And, if you’re lucky enough to go custom, talk with your cabinet maker about what sizes he recommends.
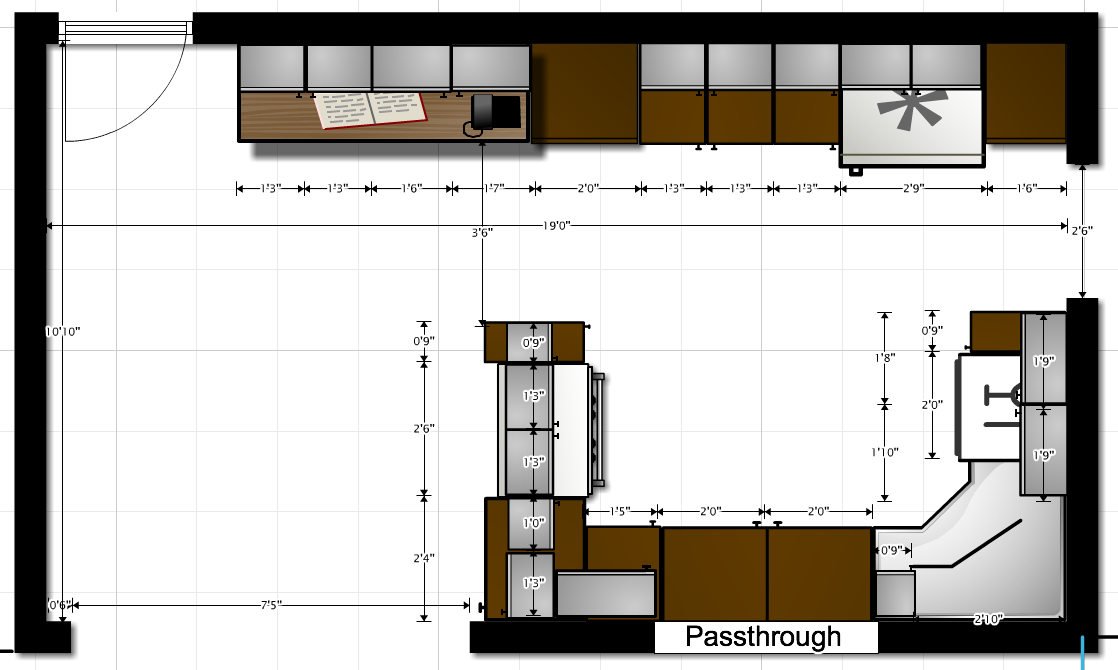
I used a computer program to lay out my original kitchen, but I actually prefer using graph paper.
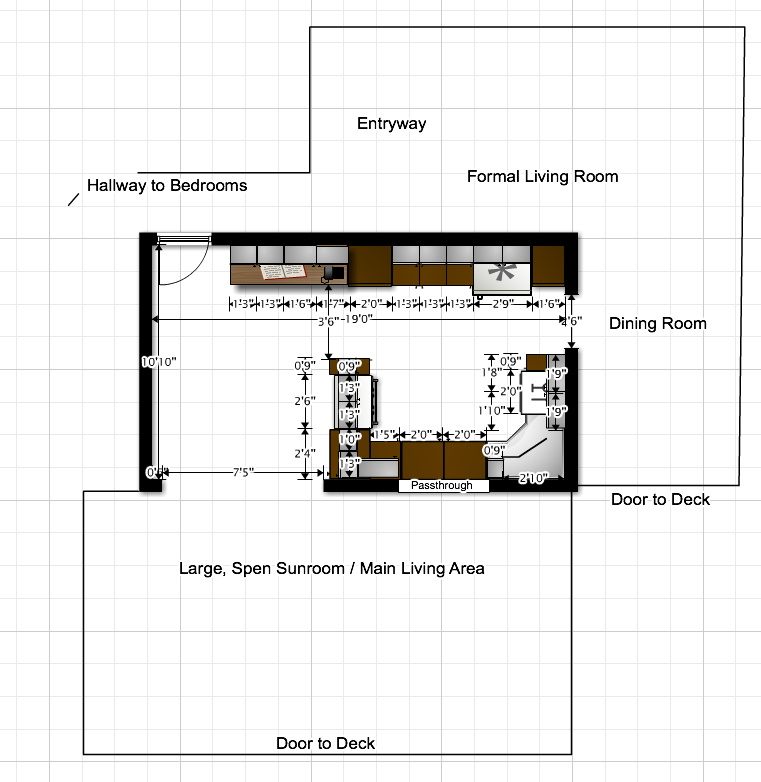
It’s also a good idea to understand how your kitchen is laid out in relation to the other rooms of your home — this is how we decided to forgo the eat-in portion of our kitchen and use it mainly for work space, since we prefer to do our formal dining in the dining room, and our casual dining in the sun room where we watch television like the rest of ‘murica.
Pro tip: Don’t forget to think vertically! You’ll need to know your ceiling height to determine how tall your wall cabinets can be. It’s pretty standard in the U.S. to have around 18″ between the countertop and the bottom of the wall cabinets. (Don’t forget to factor in the thickness of your counters!) If your wall cabinets aren’t going all the way to the ceiling, this isn’t a huge deal.
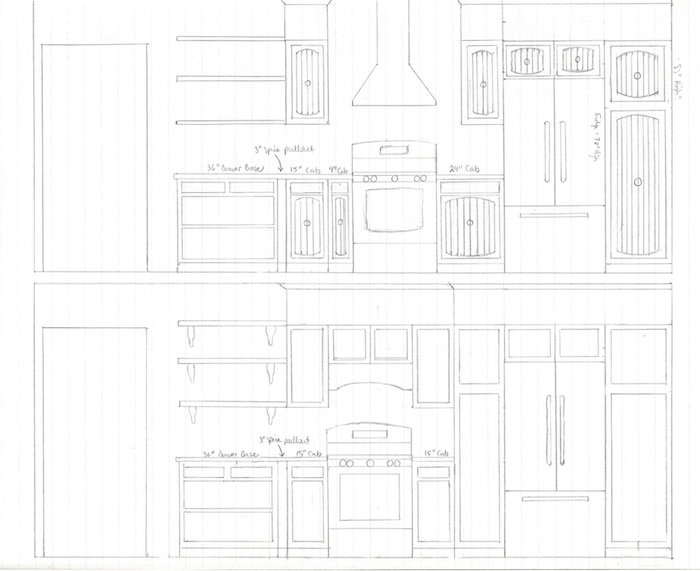
Step 2: Play around with design ideas and think about how you use the space.
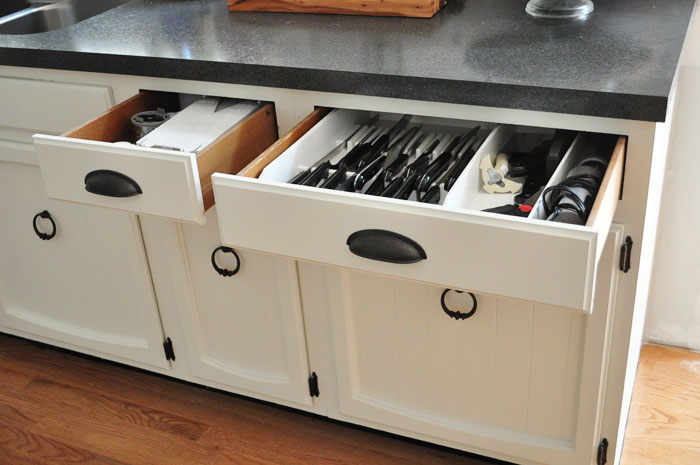
Grab that graph paper and get to work! If you’re dealing with existing cabinets, it helps to have a list of your boxes according to width that you can cross out as you use them. If you’re keeping one area of the kitchen the same, it’s best to start with that. For example, we kept our sink wall mostly the same, with the exception of removing the peninsula that jutted out into the room and blocked traffic flow from the sun room. When I drew that wall without the peninsula, I knew I wanted a wide base cabinet on the end of the run that could store my knife organizer. I also knew I wanted a base that was wide enough to store a trash can next to the sink. So I “borrowed” one 15″ base cabinet from the other side of the kitchen for the trash pullout, which left enough room to rotate the wide base cabinet from the peninsula and put it against the wall for my knives.
Pro tip: What about your personal space? Do you want guests all up in your business while you’re trying to cook, or would you rather create a space where they’ll be inclined to sit or gather without getting in your way? Peninsulas and kitchen carts work wonders for helping guests feel like they’re part of the action without flowing into your work zones.
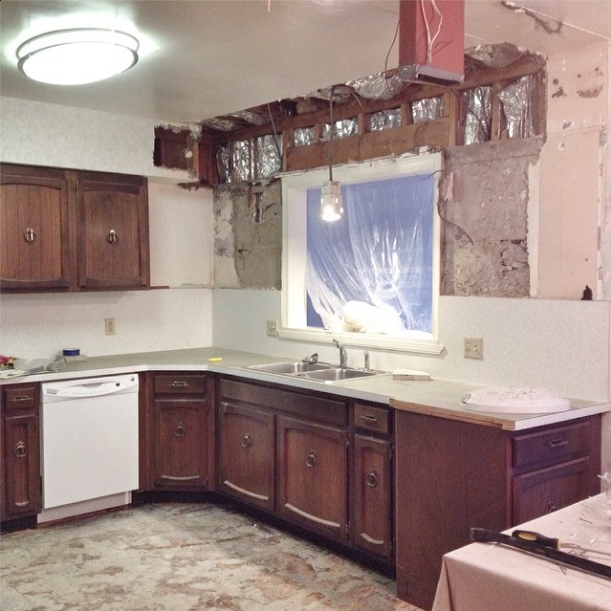
(That cabinet on the end is the one we rotated once we removed the counter.)
The idea of kitchen “zones” is nothing new, but take some time to really think about it. Given enough room, you’ll probably want a:
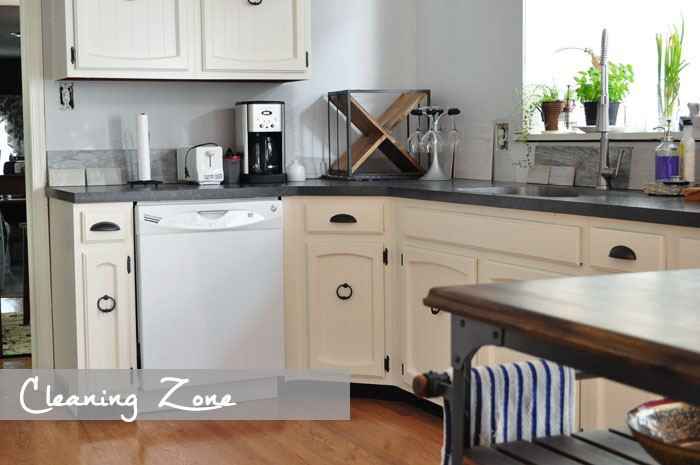
Cleaning Zone — This, of course, includes the sink, trash can, and dishwasher if you’re lucky enough to have one. These should all be in close proximity of one another so that when it comes to post-meal cleanup, you can just scrape food scraps into the trash, rinse in the sink, then toss into the dishwasher without having to traipse across the entire kitchen. I also keep my mini salad spinner in this zone. It’s just convenient.
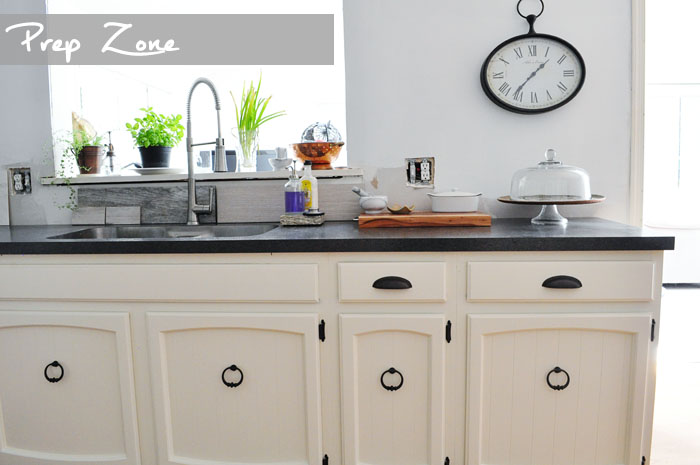
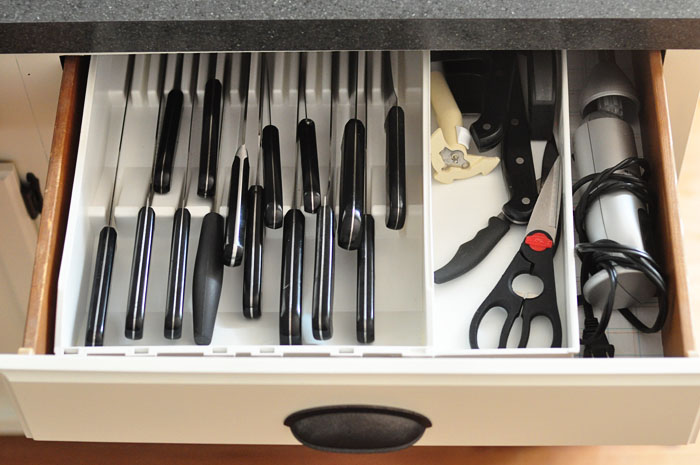
Prep Zone — A good prep zone (the space used for chopping, dicing, mincing, and otherwise stabbing your produce) needs plenty of counter space as well as storage for your knives and cutting boards. I like my prep zone close to the cleaning zone so I can go immediately from washing veggies to cutting them and easily toss scraps directly into the trash. I keep my colander and cutting boards under the sink, and I store other “chopping” devices, like my mandolin, my food processor, and my immersion blender, in this end cabinet.
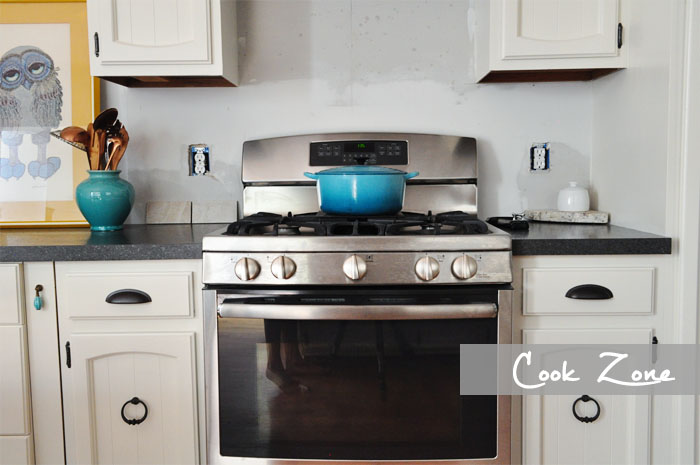
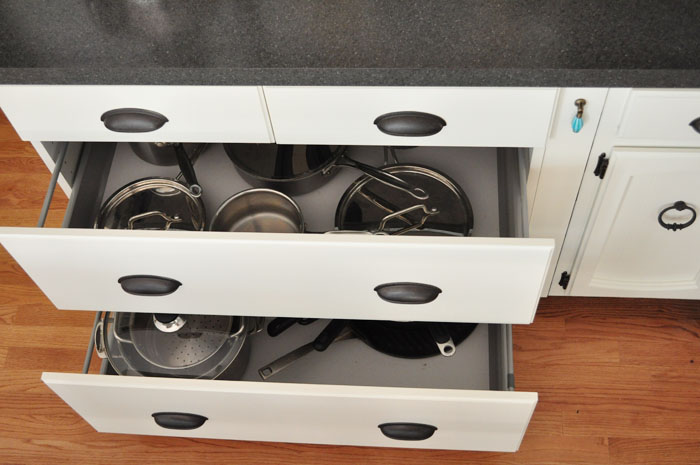
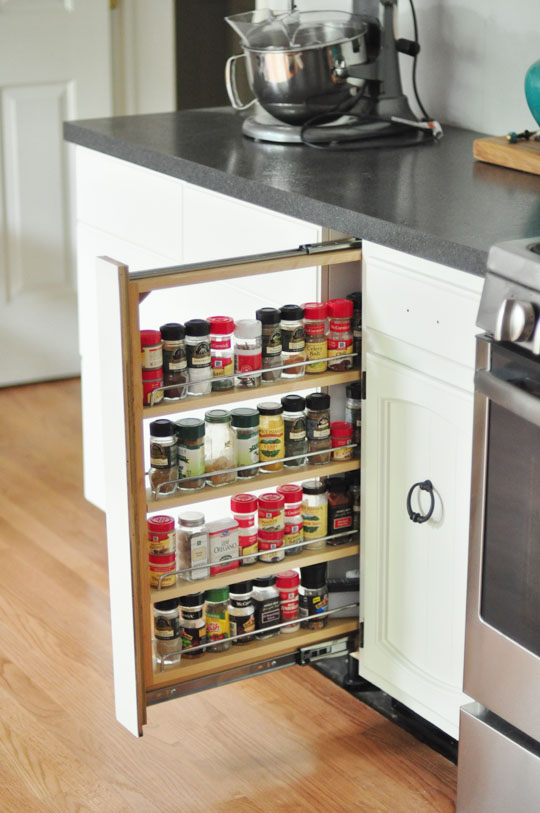
Cook Zone — I’ve seen some pretty funky kitchens, especially in newer construction, with the stove on one end of the room and the oven(s) on the other. The microwave might even be in a third, far-off location. Not me. I want to be able to get my defrosted chicken from the microwave to the stove to the oven in as few steps as possible. In our last house, however, I didn’t love having the microwave over the stove. So in this house, we put it inside the pantry to the right of the refrigerator since there wasn’t enough room in the narrow one to the left (which meant including an outlet there). You also want to make sure you have a place to store those pots, pans, and spices nearby. (I LOVE having drawers for my pots and pans, which is why we added the IKEA cabinet, and my pull-out spice rack is brilliant!)
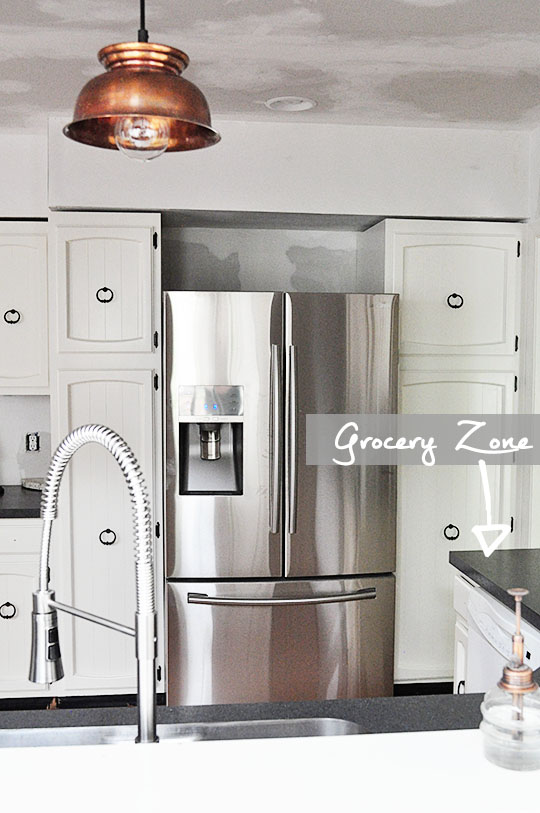
Grocery Zone — It is imperative — imperative — that you have counter space across from (or at least next to) your refrigerator. Why? When you get home, tired after a long day, and you’re lugging a bag of groceries, the last thing you want to do is continue to lug those groceries, one-by-one, across the kitchen to the refrigerator. Same goes for the pantry. So make sure you have ample counter space for grocery bag droppage nearby.
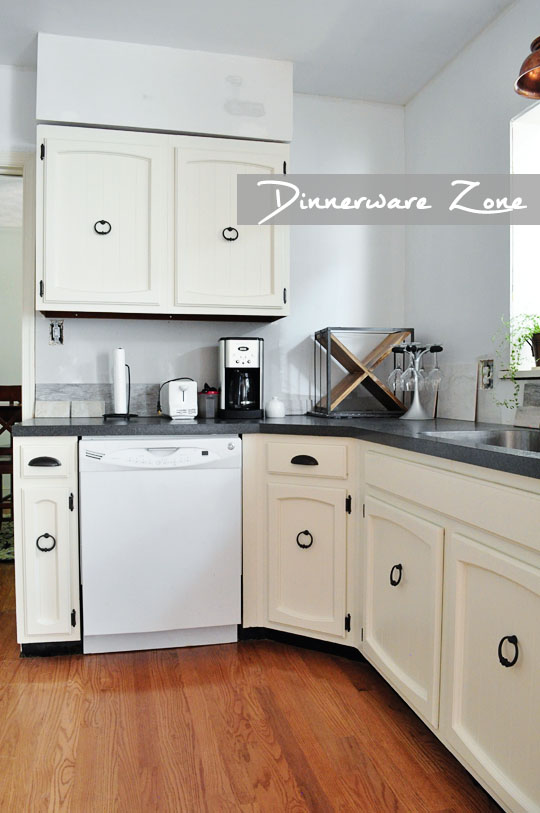
Dinnerware Zone — Think about it. When you’re getting ready to set the table, it’s easiest if your plates, bowls, glasses, and utensils are all within reaching distance. I loved having my plates and bowls in a drawer base at the old house, but space dictated that they get a wall cabinet in this one. There will also be open shelving to the right for wine glass/bottle storage, and the utensils are located in that diagonal drawer.
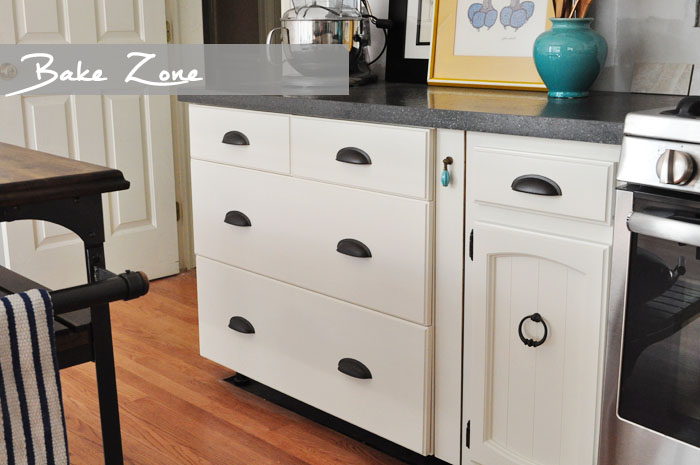
Bake Zone — If you’re big into baking (my husband makes cheesecakes, for crying out loud), you’ll want to consider including a bake zone. For us, this entails space to store our stand mixer (counter top or under-cabinet), storage for mixing bowls and utensils, and, if you can help it, storage for flour, baking soda, vanilla, chocolate chips, etc. all in the nearby vicinity. This is primarily what we use our pantry to the left of the fridge for, as well as the top drawers of the IKEA cabinet. Plus, that huge length of counter space to the left of the stove is perfect for laying out large cookie sheets or cooling racks.
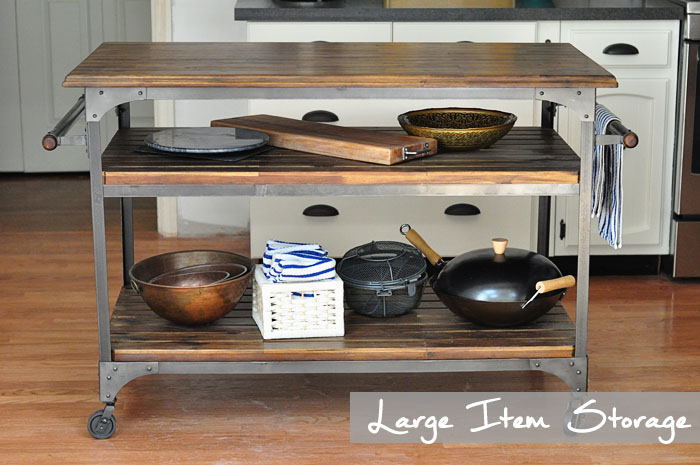
Large Item Storage — If you’re… um… eccentric like us, you might find you’ve accumulated some larger specialty kitchen items over the years, and that’s totally okay. Our particular collection is what led us to turn the eat-in portion of our kitchen into more work space by adding a kitchen cart to store things like our vegetable grill basket, a large wok, some pretty copper mixing bowls, a cake stand, and an extra cutting board. For example. Corner base cabinets with lazy susans (or super susans) work nicely for this as well, if the door is wide enough.
Step 3: Get a second (and third, and fourth) opinion.
If you have access to a designer, possibly where you’re purchasing your cabinets from, use it. Otherwise, check out the Kitchen Forum on Gardenweb. They helped me immensely with both of my kitchens. There are so many things to think about, from electricity to ventilation to lighting to plumbing to storage, and it helps to have extra eyes on your progression. And don’t forget to check local regulations and building codes. Some areas have rules about how many outlets you need per linear foot, etc., so you will have to plan accordingly.
Step 4: Don’t be afraid to change your mind.
I originally wanted wall shelves directly above our IKEA cabinet, but after using the space for some time, I feel like shelves might get in the way and are an added expense we don’t need to incur there. Instead, hanging some fun art might be exactly what we need to liven up the room. Now I just need to decide which one…
The point, though, is that you can — and should — be flexible as the project progresses. Some ideas won’t come to you until you’re in the thick of things.
Step 5: Be willing to compromise.
Just like buying a house, unless you have an unlimited budget and can afford to have everything custom-built to your exact specifications, you’ll likely have to make some compromises when it comes to your design. For example, I don’t love having my refrigerator so close to the dining room doorway because it impedes traffic flow. Ideally, we’d have that wall completely reversed, using the island as a “landing space” for groceries. But that would’ve required moving the vent for the stove hood even further and moving the plumbing for the refrigerator, which was beyond the scope of this project.
Overall, though, the space still has great functionality and flows much better than it did before.
What would you add to this list? Would you design your own kitchen or hire a professional?
You might also be interested in:
How I really feel about granite
How to paint your kitchen cabinets
Why we chose laminate counters
Comments
bookmarking this for one day when i finally get around to homeownership :)
Haha so relieved my long-winded how-to post will be useful to SOMEONE! :)
Nice job!
How did I miss this one?! Glad I checked in.
Ha, me too! I’ve missed you! It’s getting there, slowly but surely…