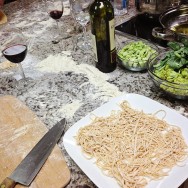
Some friends of ours invited us to a pasta making class at a small apothecary-style shop called The Flavor Exchange in Southern Pines, North Carolina on Saturday. Read the rest of this gem…
Sounds quaint, I know. Like knitting my own socks or preserving my own peaches or churning my own butter.
But the thing is, I like granola. It’s a fantastic breakfast, it’s healthy-ish, and it’s crazy easy to make.
I mean, basically you mix a bunch of stuff together, then mix a bunch of other stuff together, then mix the two mixtures together, then bake.
Heck. You don’t even have to bake it if you don’t really want to.
To make it, you will need pretty much anything you want. You can use the recipe below as a guide, but don’t be afraid to get a little crazy. Like agave nectar instead of honey? Use it. Prefer vegetable oil to coconut oil? Be my guest. Crazy about oat bran? Substitute for some of the ground flax and toss it on in. If you want your granola to be more sticky and less crumbly, make more of the “wet” part (step 2) and cook a little less.
This can get a little pricy, depending on the ingredients you choose, but it makes a lot. If you were to buy the same amount from the store, you’d not only be spending mucho deniro, but you’d be getting all kinds of not-so-awesome added sugars and preservatives and all of that crap that makes us feel slow and drudgy instead of awesome and powerful.
Here’s what I used in my last batch:
4 cups oats
3/4 cup wheat germ
3/4 cup ground flax
1/2 cup sunflower seeds
1/2 cup chopped almonds
1/2 cup chopped pecans
1/2 cup chopped walnuts
3/4 tsp. salt
1/4 cup brown sugar
1/4 cup maple syrup
1/2 cup honey
1/2 cup coconut oil (vegetable oil works, too)
1/2 Tablespoon cinnamon
1/2 Tablespoon vanilla extract
Optional additions:
Raisins
Craisins
Chocolate chips
Butterscotch chips, etc.
1) Mix the first 7 ingredients (oats, wheat germ, flax, sunflower seeds, and nuts) together in a very large mixing bowl.
2) Mix the last 7 ingredients (salt, sugar, syrup, honey, oil, cinnamon, and vanilla) together in a sauce pan, heat over medium-high heat, and bring to a boil for 1 minute.
3) Pour the wet stuff into the bowl with the dry stuff and stir to combine.
4) Line a baking sheet with foil or parchment paper, then spread the mixture evenly and bake at 300-degrees F for 30-40 minutes, stirring halfway through. It will keep cooking for a bit after you remove it, so don’t worry if it’s not completely crunchy before you take it out. If you like it softer, bake it less. There really are no rules — just don’t burn it. That’s easy to do, so watch closely as you start to near the end of your cooking time.
Once you take it out, add your raisins or chocolate or whatever your little heart desires. I prefer mine plain.
Let it cool on the sheet before storing it in an air-tight container.
5) Serve however you’d like! My favorite is over vanilla or plain yogurt with sliced strawberries.
Mmmm. All I have left to do is put my hair in dreads and buy some hemp pants and I can officially call myself crunchy.
But really, with granola like this, that’s not a bad way to be.
Also, it will make you feel awesome and powerful. I promise.
There are political figures trying to tell me what I can and can’t do with my body, there are people trying to sell me my own intellectual property, and there are princes getting naked all over Vegas but really, no one’s blaming Harry on that last one because who doesn’t want to get naked all over Vegas?
~*crickets*~
I think there’s just such an overload of fodder out there right now — and such a lack of focus on my part — that I tend to get overwhelmed and rather than talk to anyone ever, I instead opt to curl up on my sofa with a couple of mangy mutts, a glass of Zinfandel, and a streamed movie on Netflix that I didn’t realize was subtitled until 10 minutes in.
In other words, I have a lot of time to think.
There comes a time in most unpaid, extreme ADD blog writers’ “careers,” when the writer must evaluate the situation and make a choice. MY situation is that I’ve been doing this for almost 2 1/2 years, and barely anyone reads Domestiphobia.
Like at all.
And I love those of you who do — you’re like the validation I never got in high school. The prom date, the braces removal, and the boob development all in one, confidence-boosting package. (I actually did end up getting those last two — just not until it was too late to be enjoyed in high school.) It makes me feel like maybe I do have a niche. Like maybe there are some people in this world who get me, and even if you don’t, you still like watching me through that thick zoo glass from the relative safety and comfort of your swivel office chair.
And that’s okay, too.
So that’s my situation.
Therefore my choices, as I see them, are to:
a) Keep doing what I’m doing
b) Stop
c) Pick a focus and work to improve
or
d) Eat a sandwich.
I’m pretty sure, if you know me at all, (and if you’ve been reading for any length of time, rest assured that you DO know me), then you know which one I choose.
Even so, I just don’t cook as often. See, I still like to eat well. But as many of you singletons have been telling me over the years, I’m learning that it’s hard to stay motivated when you come home to an empty house. It’s hard to want to cook, when you’re the only one there to enjoy it.
But then, when I stop to think about it, I realize — one of my favorite foods is a hot dog. A thick, juicy, grill-marked, real meat dog on a crisp toasted bun.
But the baby — and the having of it — wasn’t actually the main focus of the dream.
The main focus of the dream was how I kept forgetting that I had a baby.
Like… I would go to the grocery store to buy milk and bacon, apparently, and suddenly I would remember that I left the baby at home. And did my dream self freak out about the fact that I’d forgotten my helpless baby and left it to fend for itself at home in the bassinet or whatever they call those frilly rocking things where babies sleep?
No.
My dream self just said, damn… I forgot my baby and then continued comparing one brand of ultra thick-cut hickory smoked bacon to another brand of reduced-fat maple flavored. And if you even have to guess which one my dream self picked, then you really don’t know me as well as I thought you did.
And then I dreamt about blogging. I had all of these fantastic post ideas that of course my dream self neglected to write down for my awake self to remember because it’s apparently as equally negligent of its writing needs as I am. Anyway. As my dream self was typing out one such brilliant post, it dawned on me that I completely forgot to tell the readers that I’d had a baby.
It was such an insignificant part of my existence that it wasn’t even blog worthy.
So, somewhere in the middle of my post about people pods or my crappy taste in music or vaginas on my kindle or any other such nonsense, I typed something to the effect of, “Oh, yeah! And I had a baby. I can’t believe I forgot to tell you. Oops. So about this road trip…”
Tell me.
What does this mean?
Was it simply because my new co-worker brought her doe-eyed pudgesicle of a pants-pooper into the office and I went grocery shopping the other day?
Or could it be more?
Could my dream self actually be mocking me?
Does it know what a crappy parent I’d be and is attempting to prove it to me via segmented black and white subconscious thought streams?
I mean, really. I know I would be a terrible parent. I don’t need my self to tell me that. Mockery from my own Id?
Kind of effed up.
It’s like my subconscious thinks I carelessly flit from one thing to the next with little regard for whatever I just left behind, no matter how profound it may be.
So about this bacon.
I did buy some, and so far I’ve put it to good use. I would go so far as to say that bacon is probably a staple when cooking for one — it can be added to almost anything (salads, meats, fish, pastas, etc.) for an instant slap of delicious flavor. Just don’t go overboard with it.
For my first meal as a pseudo-single person, table for one, I knew exactly what I wanted to make for dinner.
Pasta alla Carbonara.
Sounds fancy, right?
Well. It’s not. According to Wikipedia, it may have first been made as a “hearty meal for Italian charcoal workers.” In the States, it’s sometimes referred to as “coal miners’ spaghetti.” It’s a simple, rustic, back-to-basics pasta dish that takes all of 10-15 minutes to prepare. The basic dish requires some type of pasta (usually spaghetti or fettuccini), some type of pork (bacon, pancetta, or the traditional guanciale), a hard cheese (like Parmigiano-Reggiano), eggs, and black pepper.
That’s it!
Of course, the internet is full of variation recipes that call for different herbs, spices, and a slew of other veggies and accouterments, and of course over time I’ve developed my own bastardized version that I’m sharing here. It’s a perfect “dinner for one” because you can add anything you want, and the amounts can be easily adjusted to make as little or as much as you’d like. You really can’t mess it up. The amounts below are guesstimates, and you likely will have leftovers. If you don’t want leftovers, just cut it back!
1/2-ish pound of dried pasta (I think I used a little less)
2-3 slices of bacon
1/3-ish cup of pasta water
2 egg yolks
1/3-ish cup of frozen corn
1 large clove of garlic
1/4-ish cup of Parmesan cheese that you grate yourself, plus extra for garnish (I actually used a hard cheese called Grana Padano, which I had from another recipe, but good ol’ Parm will do the trick)
Black pepper to taste
1. Boil a pot of salted water and add your pasta. Cook until al dente. In non-fancy terms, it shouldn’t be complete mush.
2. Stick the raw bacon in a pan and turn the heat to medium-high. My grocery store was out of the bacon I looooove to buy, Carolina Pride, which always cooks up deliciously even and perfect, so I was stuck with this:
This stuff, whatever it is, didn’t understand my style of set-it-and-forget-it cooking, so it decided to burn the second I walked away.
I’m pretty sure it’s the bacon’s fault — not mine. I cooked some more and used the burnt stuff, too.
Hey. Waste not, want not.
2. While the bacon is cooking, separate your eggs. It’s not as hard as it sounds. Just crack the egg, split it in half, and let the yolk slide back and forth between the two shell halves while letting the white drip out. Soon you should be left with just yolk!
Mix the yolks with a fork.
Steal some of your pasta water (1/4-1/3 of a cup) by dipping a measuring cup directly into the pot, and slowly add that to the egg while mixing with the fork. This tempers the egg slowly so it doesn’t get all crazy cooked and coagulated. You don’t want to end up with scrambled egg in your pasta.
Then grate some cheese into it and stir until it melts into the hot water/yolk mixture.
3. Once the bacon is cooked, set it aside and add some minced garlic and corn to the hot bacon grease.
Stir around for just a couple of minutes until the corn is lightly cooked and the garlic is fragrant. (This would be wonderful with fresh corn off the cob, but I use what I have. And what I have is frozen corn.)
4. Crumble the bacon, add it to the pan, and stir it around.
5. Drain the cooked pasta and add it to the pan, stirring everything with tongs or a fork to cook and combine.
6. Remove the pan from the heat and stir in the yolk sauce. It will cook slowly, without scrambling, and give your pasta a rich, slick flavor. It’s incredible.
‘Scuse the intense blur, but you get the idea.
7. Add plenty of black pepper, dish onto a plate or into a pasta bowl, and pour yourself a glass of wine.
Toast to taking the time to cook for yourself. Be happy you’re treating yourself right, even when no one else is around to see it.
Sleep well, and dream about forgetting your baby.
Hey.
We can’t all be perfect and sometimes the bacon does get burned.
Oh, and also because it’s like this journal where I can expose all of my innards to the outside world.
Sometimes I have to think really long and hard about the serious things I want to post — things like my quarter-life crisis and joblessness and depression and wanderlust — but I can also track certain life milestones, recipes I like, little things I’ve accomplished around the house, and random thoughts I have.
For example, it’s my day off today, and this morning I’ve already been very productive. I took each of my mutts for a dip in the lake (without getting attacked by dogs that resemble mop heads or pushed ass-backwards into the water); I caught up on some light blog reading; I tried cyber stalking my little sister’s new boyfriend, but apparently the man is like a steel vault; I ate a piece of toast with some of this fantastic Vintage Bee creamed honey (3rd down on the page) that I acquired from a wine-tasting festival this summer (I know — I couldn’t believe I bought something besides wine either); and I also ate 4 bites of cold, leftover crispy burrito from last night — straight from the fridge.
Hey, if I want to eat cold leftovers for breakfast, that’s my prerogative.
And you don’t discover these things until you experiment a little.
So, are you interested in making your own burritos so you can eat them cold with a warm cup of coffee? I’m going to assume you answered yes, since I really wouldn’t understand the alternative.
I got the recipe from a site called Mel’s Kitchen Cafe. She actually calls them “Crispy Southwest Chicken Wraps,” but I tend to think “burrito” is a better word, since “wrap” makes me think of whole-wheat or sundried tomato tortillas with turkey, avocado, sprouts, and other things you might eat when you want to feel healthy. But burritos? Burritos make me think of beans, rice, southwest seasonings, roasted chicken and sour cream — warm things that fill my belly and make me smile.
And that’s exactly what these puppies do.
To make them, you will need:
1 cup cooked rice (I used brown basmati, but really you could use whatever you have lying around)
1 cup cooked, shredded chicken (I bought one of those roasted chickens from the grocery store, since Justin likes to use the leftovers to make chicken salad for lunches. Plus, I’m lazy.)
1 can black beans, drained and rinsed
1 green onion, diced
1/2 red bell pepper, diced
1/4 cup cilantro, chopped
Juice from 1 lime
1/2 Tablespoon chili powder
1 teaspoon ground cumin
1/2 teaspoon garlic salt
2 cups shredded cheese (like Mel, I used cheddar and monterey jack)
Sour cream (Mel says this is optional, I say it’s not. Though I’m not sure I’d win if we had a street fight over it because while I might be scrappy, she has 4 sons.)
Tortillas! This recipe will fill about 6 “burrito size” tortillas. (Totally forgot these on the list when I first wrote the post — thanks, Katie!)
The awesome thing about this recipe is that as long as you have the rice and seasonings, you can really play with the other ingredients as much as you want.
As per usual, especially with any type of taco/wrap recipe for some reason, my photos of the end product are terrible. One problem is that I don’t have time to cook when it’s light outside. So, I’d highly recommend visiting Mel’s Kitchen Cafe if you want to see the deliciousness that really comes out of this in the end.
1) Start cooking your rice. While that’s happening, chop up the green onion, 1/2 of a bell pepper, and 1/4 cup of cilantro.
Go ahead and grate the cheese at this point, too.
Cooking is all about time management.
And wine drinking.
But mostly time management.
2) Once the rice is finished cooking, stick it in a bowl and add all of the remaining ingredients except the cheese, sour cream, and torillas.
1/2 Tablespoon of chili powder…
1 teaspoon of cumin…
1/2 teaspoon of garlic salt…
Lime juice… this is ESSENTIAL. Don’t leave this out!
Mix…
Chicken…
Normally, this is where you would add the black beans. Unless, of course, you set them in the sink to drain after rinsing and completely forgot about them until after your first batch of burritos was already cooked. Then you would need to add them to whatever filling you have left. Oops.
3) Layer the cheese on a tortilla, then give it a couple dollops of sour cream (do NOT skip the sour cream!), then add the filling mixture.
4) Roll ’em on up, then coat the burritos with cooking spray and cook for a few minutes per side in a skillet that you preheated over medium heat.
They should get nice, goldeny, and crisp. And messy.
Give ’em a little poorly placed cilantro hat if you want to get fancy.
Sure, they’re not as adorable as baby burritos, but you can eat them, which makes them even better than a baby burrito in my humble opinion.