Navigate / search

The Longer I’m Married, The Dumber I Get.

We were riding the train back from Denver.

Storm clouds were rolling in fast, and every so often a bright streak of lightning left me wondering if inside a metal box with metal wheels on metal tracks was the safest place to be sitting.

My mom fretted over the fact that we’d left Lexie outside, while Ed reassured her that the huge porch roof and open sun room left plenty of places for the small pup to take shelter.

Get there get there get there, I thought.

Justin squeezed my leg.

Outside, the rail yards looked gloomy and foreboding.  Like the set of a scary movie.  I heard warning bells and saw an intersection quickly approaching — protective red-and-white striped arms lowering to block passage.  My heart raced as we didn’t slow down — we’re going to zoom right through!

Oh, wait.

We are the train.

Of course we wouldn’t stop for the train warning.

I laughed out loud, and the other three looked at me quizzically.

“It’s nothing –” I stammered.  “I just panicked for a second when I thought we weren’t stopping for the train.”

Blank stares.

“But then I realized… you know… that we’re on the train.”

I heard the lady who’d been sitting with her husband and young child across the aisle snicker.

They laughed.  Banter ensued.  Somehow, as seems to be usual for conversations with my mother these days, the talk turned to kids.  When are you having some?  I want to be a grandmother.  You’re not getting any younger, you know.

Yes.  I know.

“I just don’t know if I can handle it!  Especially while Justin’s in the military.  Having kids takes work.  And brains.  And I’m sorry, but it just seems like the longer I’m married, the dumber I get.”

Justin laughed.

“It’s true!” I said.  “I don’t need to think as much, now that I’m married.  Stuff just gets done.  Why would I want to screw all that up with a kid?”

The woman across the aisle actually gave me a knowing nod and a wink.

And yes, while the whole idea seems ludicrous to say out loud, there’s some merit here.

You see, it has been over 85 hours since Justin has vacated the premises, and already I’ve had to get my man on no less than 3 times.

No, that’s not as inappropriate as it sounds.

What I mean is that I’ve had to do tasks that are deemed “man territory” in most heterosexual relationships — tasks that men (and single and/or apparently more self-sufficient women) manage to handle with the ease that comes with long-term established expertise but that I, through some glitchy wire that has progressively made me less self-sufficient since the moment I said, “I do,” never bothered to learn.

Take, for example, the vacuum cleaner.

While the task of vacuuming has usually befallen to me via some unspoken marital code, (the same code that keeps Justin up to his elbows in soggy gutter leaves, moldy refrigerator leftovers, and drain hair goo), Justin is usually the one who cleans the vacuum itself.  Dog dander, carpet fuzz, and dead skin cells just aren’t my thang, so I never bothered with it.

That is, after all, why we get married, isn’t it?

So we can legally bind ourselves to someone who will do the tasks we like the least?

Okay, and maybe for love and commitment and stanky morning breath and all that jazz too.

But an unspoken bonus is the division of labor.  And while a couple may never actually sit down to discuss how said labor gets divided, it is my understanding that the roles generally evolve over time.  Which is how I’ve become the vacuumer, but Justin is the vacuumer of the vacuum.

You dig?

So when I set about my task of vacuuming yesterday, I reached an impasse upon completion.  I could, as usual, put the vacuum back in the closet where it magically gets emptied and cleaned before its next use, or I could clean it myself. I was pretty sure the more desirable of the 2 options — the one where I do no work at all — wouldn’t be effective this time since the vacuum fairy is currently wielding military camouflage in some far off land, so I was stuck with Option 2.  Figure it out myself.

Damn.

I emptied the bin with no trouble at all (I already knew how to do that — I just didn’t have to do that since it fell on the other side of the Division of Labor line). But then I noticed an unhealthy buildup of lint and who-knows-what-else around this grid suction thingie inside the bin.

And I couldn’t get to it.

So I tried this latch thing, and that didn’t work.

Then I tried this other latch thing, and that didn’t work.

Then I tried a combination of latch things and, you guessed it, I still could not penetrate the plastic force field of frustration.

I thought about pulling out the screwdriver set or just banging it on the ground, but then I remembered how well that solution didn’t work out when I used it on my printer, so I dusted off the one tool I haven’t had to use in the past 6 years — the reason I’ve gotten progressively dumber since my nuptials — which is the other half of my noggin.

Enter Google.

And YouTube.

And a bottle of beer.  (I may or may not have had to use a jar-opening tool to unscrew the cap.)

And all of the modern-day research tools I have at my disposal to solve a problem.

And there was my solution.  It was painfully simple.  I should have felt incredibly stupid.  But I didn’t.  Instead, I felt a bit of that swelling pride that comes when you figure something out on your own.  When you get your hands dirty.  When you can’t just call for the vacuum fairy to come do it for you.

I will be the first to admit that marriage, in a way, has made me lazy.  It’s made it far too easy for me to whine for help when I can’t figure something out in less than 12 seconds.  Which, it turns out, is an excellent way to regress.

And that’s not really what this whole living thing is all about.

It’s easy to become dependent on another person — especially when you happen to live with that person, and especially when you happen to sleep with that person.  And, while it’s always nice to have a crutch on-hand if you really need one, isn’t it better to strengthen your legs and learn how to walk on your own?

In the clarity that comes when calling your significant other is no longer an option — that, aside from helpful friends and neighbors who love you but not enough to come over and remove the spider from your bathroom at 3 a.m. — I’m learning that eliminating the need in a relationship does not eliminate romance.  In fact, clearing away all that mucky dependency leaves room for something much more interesting — true intimacy.  Encouragement.  Maybe even admiration.

So.

Maybe you’re the type who already does everything on your own, and now you have a headache from rolling your eyes throughout the duration of reading this post.

But maybe you’re not.

Maybe you’re like me.  You have a short attention span.  You ask for help before even thinking about whether the task at hand is something you can achieve on your own.

If so, I want you to try something.  Try not asking for help.  At least not until you really need it.

It’s a little scary.

It’s a lot frustrating.

But, in the end, it’s how we grow.

You Can Hardly Call It A Tease If It’s Completely Naked, Can You?

If I had a dollar for everything I’ve told you I would post about but have never actually posted about, I’d be able to buy… like… two Starbucks lattes.

Grandes.

But there’s one thing I’m particularly itching to share.

And of course, since it’s still not finished, I can only give you a peek.

A teaser, if you will.

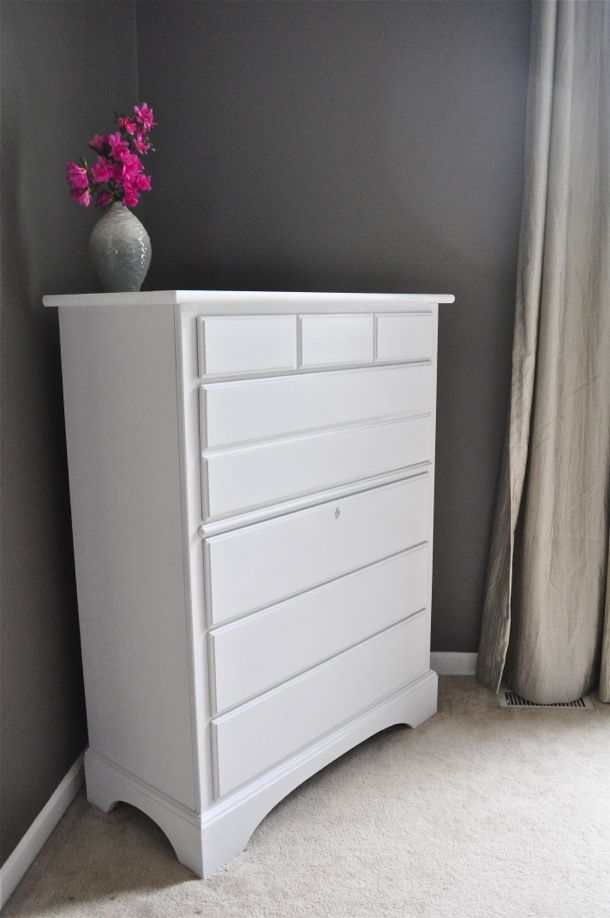
DIY Chalk Paint Dresser

A hardwareless peek.

It might just be because she’s completely naked, but I think she’s pretty sexy.

You?

The Unfortunate Thing About Being Me. And Also, A Project.

First, I want to thank those of you who shared the things you keep around for when you’re feeling blue in the comments of yesterday’s post.  They were touching, heartfelt, and most important, they made me feel like much less of a freak.

Now.

The unfortunate thing about being me sometimes, is that there are so many things I want to be, that there’s never enough time to learn it all, and I pretty much end up half-assing everything as a result.

Except writing.

I’m so terrified of writing anything “real,” like a book, or a polished magazine article, that I don’t even half-ass it.  I no-ass it.  I don’t ass it even a little bit.

But for everything else, I always just go part-way.  I learn a little bit of a language.  I learn a little bit about photography.  I learn a little about cooking.  About cleaning.  About DIY projects and crafts.  I can work on websites a little.  Edit a little in Photoshop.  Train my dogs to drag me only a little way down the street when they take off after a squirrel.

In my very first blog post, I talked about a career counselor I had in college who got angry at me when I refused to write a paper for him that detailed my future career goals.  The problem is that I didn’t know what I wanted to be, so how could I possibly write a paper about it?  Add to that my abhorrence of making plans, my compulsive need to take advantage of opportunities as they arise, and my debilitating fear of commitment, and we have the ingredients for mixing together the indecisive, flighty, and noncommittal soup that is my soul.

I swatted away that counselor’s insistence like he was some pesky, know-it-all, gnat.  I somehow knew that if I just followed the direction life seemed to be taking me, everything would work out as it should, and some dream career would eventually fall on my doorstep.

Well, crap.

That didn’t happen.

Nor did I turn into a “master of all trades,” like I somehow thought I’d become.  The thing is, becoming a master of anything takes time, determination, and commitment.  (The exception, of course, being some sickening child protégé who only has to look at a piano before he composes his first symphony, but I’m not talking about that because frankly, it’s depressing and unfair.)

This is all probably pretty obvious to most people, but it’s taken me a bit longer to figure that out.

Mrs. Maetzold never gave me a “Speedy Learner” certificate, after all.

And now we know why.

And, as much as I’d like to think that I can just start making myself a schedule or a list of goals and everything will start falling into place, I’m pretty certain that once it’s thoroughly mixed, the ingredients of my soul soup can’t really be separated again.  So I guess that would make it a compound — not a mixture — for you chemistry buffs.

So I’m going to continue to carry on, learning things bit-by-bit as I tend to do.

What’s the latest little project to catch my attention?

It’s making these:

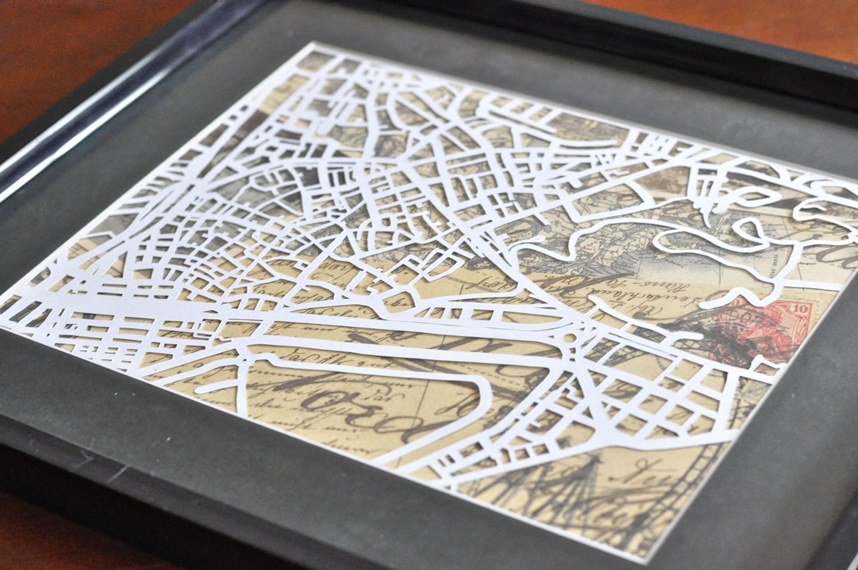
DIY Map Cutout Art

You’re probably wondering what that is.

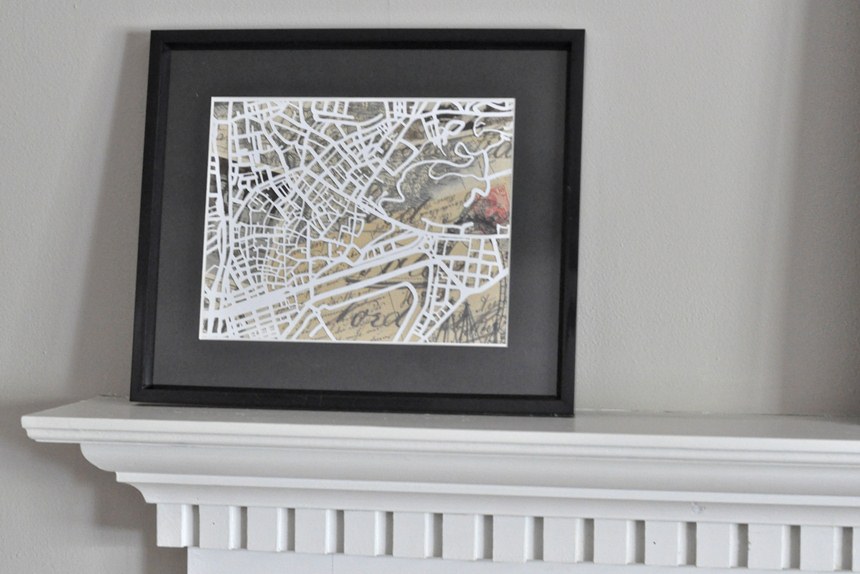
That is a map of the city of Malaga, Spain, that I printed on card stock and then cut out the streets to give as a gift to our hosts when we visited them there a couple of months ago.

Huh?

See, since I’m out of work right now, we wanted to give them something nice-yet-inexpensive to commemorate the time they’ve lived in that beautiful city.  Since I love maps, but nice ones are expensive to buy, I thought I’d make them one.

First, I used Mapquest.com to zoom into an area of the city I wanted to print.  The closer you zoom, the more complicated the streets tend to get.  Then I saved the image and used a photo processing tool (like Photoshop) to crop it to slightly smaller than the size of my frame (or the inside of the frame mat).  Then I opened the image in MS Word or Publisher, reversed it, and printed it out.

NOTE:  It’s important to reverse the image so it prints backwards.  That way, then you cut it out, you can flip it over and none of the print lines or colors show.

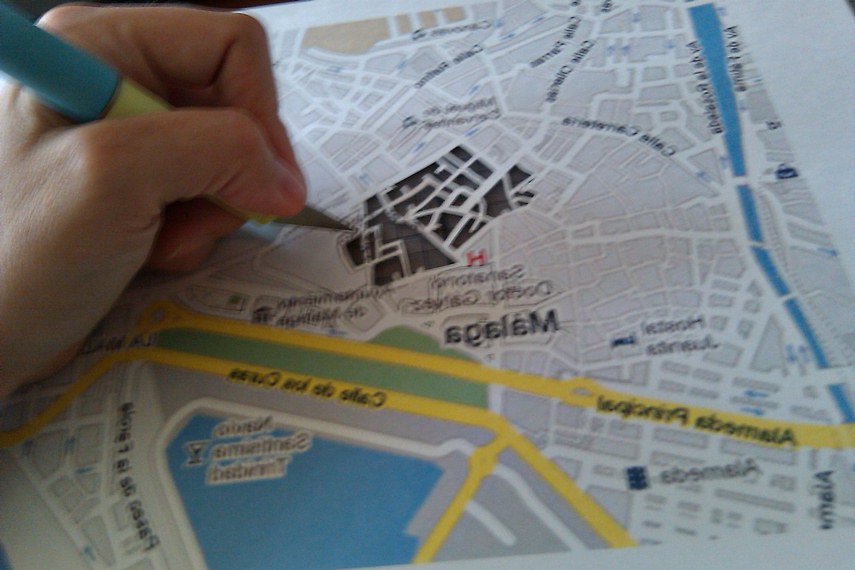
The next step was tedious.  I used a craft knife and a mat I bought at Target to cut around every road.

How to cut out a map

Sorry for the blurry photo — I took this with my camera phone.  I went through a lot of wine and episodes of Sex and the City to get this done.  And I might have thrown a mild fit when I set a new blade for my craft knife on the paper and some kind of oil that was on it seeped through and ruined my 75% completed piece and I had to start over.

But we don’t like to talk about that.

Finally, I put a piece of scrapbook paper behind it as a backdrop and stuck it in a frame.

How to make a map cutout

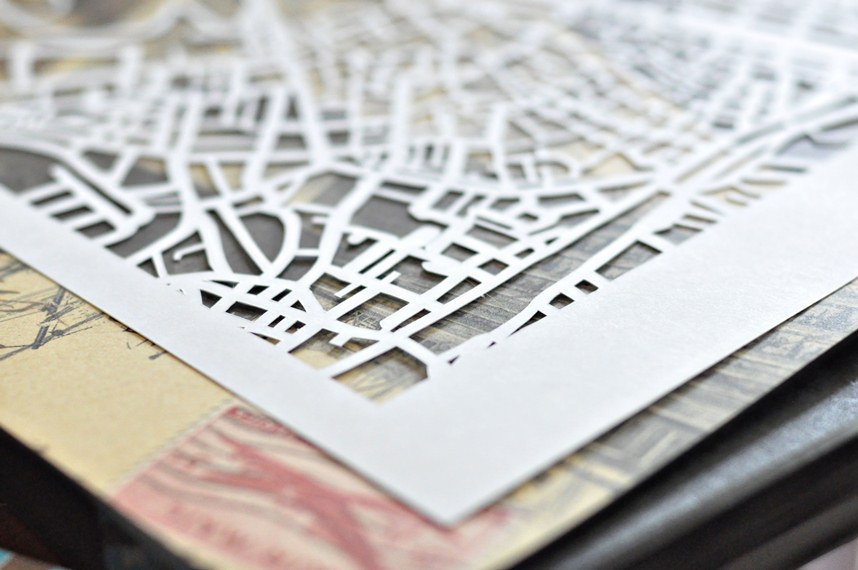
Cut-out map laying on scrapbook paper.

Framed Map Cutout

Framed map closeup.

I’ve done some earlier versions, but the above map of Malaga is by far the most intricate.

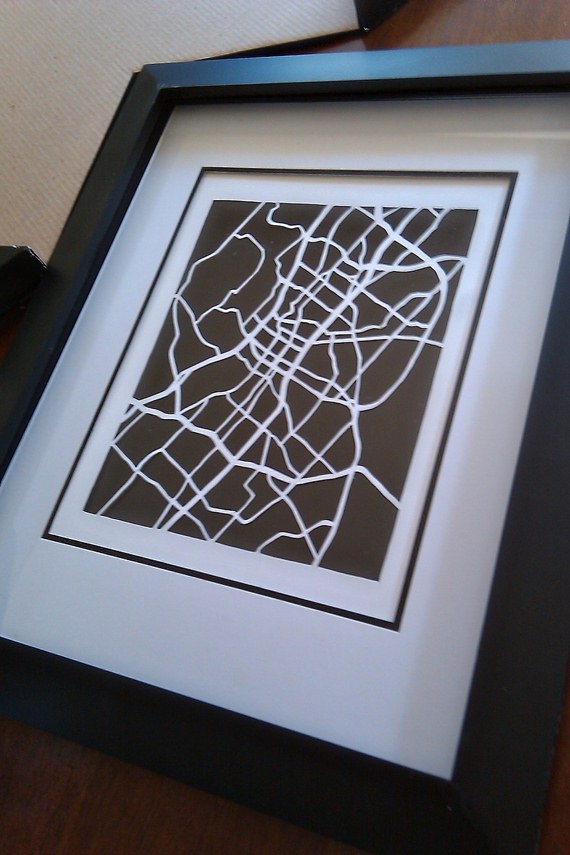
DIY Map Cutout

Map of Austin, TX was made for Aaron and Bec, our hosts in Costa Rica who are finally realizing their dream of starting a life in Austin.  (Sorry, photo taken with my camera phone.)

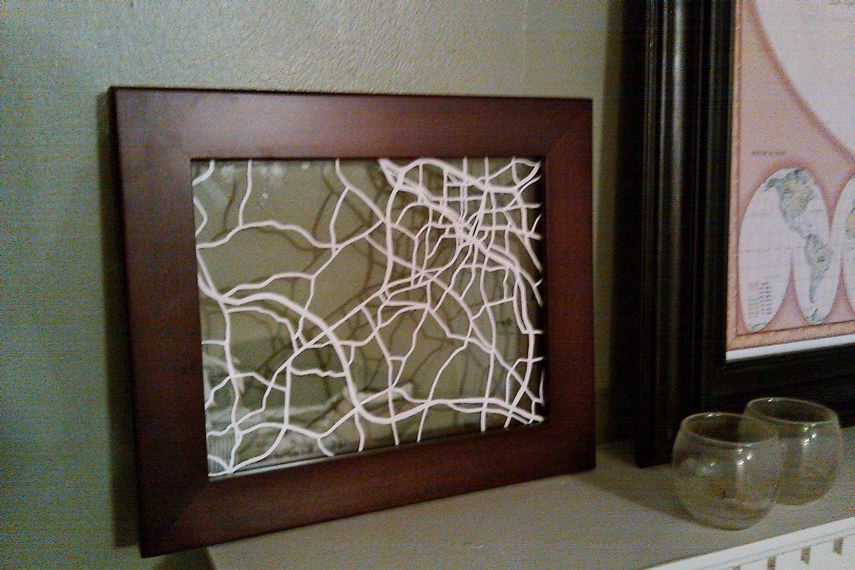
DIY Map cut-out art

Map of Durham, NC where my friend Alaina and her husband are starting their family.  This is in a see-through glass frame.  (Sorry, blurry photo taken with my camera phone.)

DIY Map Cutout Art

And finally, Malaga, Spain.

I’d like to make some of these for our own home and the places we’ve traveled, and I’m sure I will be making more as gifts.  The great thing is that it’s sentimental for the recipient, and they can easily change out the frame, mat, or scrapbook paper to reflect their own personal style.

Is this a project you think you’d tackle yourself?  What kind of gifts do you like to give people?  Also, if you’re interested in having me make one of these for you because you simply don’t have this kind of time, let me know because I do have the time and I do need to generate some income.

Is this something you’d hang in your house?

Painting 101: Bring Your Own Beer

I woke up this morning to more of this.

And some of this.

And a bit of this.

It’s less than inspiring, I can assure you.

Though it is kind of fun watching the confused looks on my dogs’ faces as they slip and slide across the yard.

When I assess the gray skies, icy roads, and pine tree boughs drooping under the weight of ice and snow, I come to 2 conclusions:

1)  Global climate change is not a myth, and

2)  I’m not leaving the house.  Ever.  Again.  (Unless someone wants to buy me a pair of snow pants, long johns, mittens, a scarf, and a hat.  I’ve somehow managed to purge these items from my wardrobe since my days of living in Minnesota, which is a bummer because I think the only fun thing to do in this weather is find a proper hill and go sledding, but that’s only if you own snow pants and have access to a warm mug of hot chocolate when you get home.  And I just so happen to have a little something called Snickerdoodle hot chocolate.  And if you ever visit me, I might just share some with you.)

It’s days like these when I wish I’d thought ahead about other home projects that we’ll need to finish before we can ever hope to sell this place.  Like painting.

It was just before I left for Miami when I promised you a post about painting.  That was sometime back in 2010.  (Does that sound weird to anyone else?  2010 still sounds like The Future, doesn’t it?)

Anyway.  Do any of you even care about painting?

Is it one of those mundane DIY home projects that seems pretty self-explanatory and this is a complete waste of my time?

Well, it might be because I have this insane habit of complicating things and a fear of making concrete decisions, but in my experience, painting a room always turns more laborious and time-consuming than I originally presume.  But I have improved significantly over the past few years, and now I can knock out an average size room by myself during a long afternoon.

First, the tools.  To paint a room in your home, you will need:

  • Paint – Have an idea of the room dimensions when you go to the paint store.  The clerk will be able to tell you how many gallons you need to cover around 2 coats of paint.  I honestly don’t really have a preference when it comes to brand, but keep in mind that almost any paint color can be matched to almost any paint brand.  You will also need to pick a color and sheen.  The shinier the sheen (i.e. gloss, semi-gloss, satin, eggshell, etc.), the more imperfections in your wall tend to show through.  That’s why I’ve learned to pick “flat” as my sheen for the walls.  I think I picked eggshell for the kitchen, simply because glossier sheens do tend to wipe down easier.
  • Primer – If you’re painting over a bold existing wall color, you’ll want to start with a coat (or 2) of primer.  Paint experts will probably recommend that you use it regardless.  We always use it on our ceilings after we remove popcorn, because the bare drywall soaks it up like a sponge.  And we’d rather the drywall soak up inexpensive primer than paint.  Nowadays you can actually get paint that’s mixed with primer, but I have yet to try one of those products.
  • Paint Key & Stir Sticks – Seems obvious, but you’ll be surprised at how often people forget these two items.  The paint key is a little metal tool used to open the paint can (also works well as a bottle opener), and the stir sticks are those wooden sticks used to stir the paint if, like me, you buy the paint with the intention of using it right away but instead let it sit in your laundry room for weeks before you build up the energy to actually clear out and paint a room.  Most paint supply stores will provide these items at no charge.
  • Roller & Tray – Pick a decent roller handle and a package of nice-quality rolls.  I don’t use the foam rolls, and I pick something that says it’s made for smooth surfaces.  Because… you know… my walls are smooth.  And I hate cleaning paint trays.  So.  Even though it is arguably the less eco-friendly option, I buy the thin, disposable tray liners that sit inside a regular paint tray.  Just think of how much water I’m saving by not spending an hour trying to wash out a tray!
  • Paint Brush/Edger – This is for painting around your trim.  I’ve used one of those flat edgers before, which tends to work pretty well.  However, it’s annoying if you get too much paint on it (which happens to me a lot), so nowadays I prefer this perfect little short-handled brush to paint around the trim.

Paint edger

Short-handled paint brush.  This is the Wooster “Shortcut” brush, and I picked it up on a whim at the Home Depot paint counter.  This baby handled like a PRO.  I could easily cut-in around the trim without getting any paint ON the trim itself.  The best part?  I saved a ton of time and money from not having to use painter’s tape.

  • Painter’s Tape (optional) – With the use of a brush like the one above, I strongly urge you to try painting around the room without using tape.  However, if you still feel the need, splurge on something called Frog Tape over the typical blue tape.  I found that frog tape peels off much more cleanly with a lot less paint seepage.

Tip:  Remove the tape before the paint completely dries – it’s less likely you’ll peel your paint off with the tape.

  • Drop Cloth (optional) – You can easily avoid drippage by not overloading your paint roller, but if you want to be on the safe side, invest in a drop cloth to protect  your floors.
  • Helpers (optional) – These can make or break a project.  You decide whether it’s worth the risk.

So here’s what you need to do to have a perfectly painted room:

1.  Clear out the room.  If some furniture is large, you can just push it towards the middle.  But the emptier the room, the easier it is to paint.  Also be sure to remove your light switch and outlet cover plates.  It’s very simple to do with a screwdriver, and your finished room will look much cleaner by painting under the switch plates rather than over them.

2.  Fill-in any holes in the wall with mud and a putty knife.  No, not mud from your backyard.  I love, love love this DAP Fast ‘N Final Lightweight Spackling putty.  It’s the consistency of cool whip or a light frosting, and is SO easy to apply.  It goes on incredibly smooth and you can paint right over without even sanding!  It’s perfect for me, since I’m terrible at planning ahead.  (Although the reviewers on Amazon beg to differ.  Maybe I’m just a spackling pro?)

3.  Open up your paint, give it a good stir, and use your short-handle brush or edger to start painting around the trim.  I fill a small container with paint so I can easily carry it around the room with me rather than continuously running back over to the gallon bucket to fill my brush.  You’ll want to paint smoothly around every window and doorway, and also along the ceiling (or crown molding) and baseboards, and even down the inside corners of the room and around all of the light switches and outlets.  Also get any narrow spaces (like between a doorway and a wall) that are too narrow for the roller.  Basically, you’re outlining the entire room where it will be difficult for the roller to reach.

Yes, it’s tedious.  No, it’s not fun.  But get some good music crankin’, put on your big boy/girl panties, and muscle up.

THEN, do it again.  That’s right – you’re going to want to do 2 coats of this trim paint to ensure even coverage.  Don’t worry, though – the second coat goes much more quickly than the first.  You probably won’t need to worry about drying time.  By the time you finish the first coat, the place where you started will likely be dry enough to start round 2.

You can see in the above photo that I opted out of using primer this time.  The color I chose was darker than the other sample colors on the wall, and the walls were already fairly smooth.  Plus, I was just plain lazy. But the Glidden interior paint (my first time using this brand) seems to be holding up pretty well!  You can also see our ceilings were not-yet painted.  Normally I would recommend painting the ceilings before the walls, but I am not the ceiling painter of the house and was tired of waiting, so I went ahead with the walls first.

4.  Now that you’ve completed all of your tedious tracing, it’s time to color it in!  Fill the deep part of your paint tray with the paint, load up your roller (but not too much – you don’t want massive paint drippage), and start applying it to the walls.  I think it’s debatable about whether you should paint in a “W” pattern or straight up and down – in the end, you just want to make sure you get a nice, even look without any streaks or drips.  I use the “W” method.

And again, you’re going to do 2 coats.  If you took your time painting around the trim, this part should be a breeze.  And the paint might look uneven as you roll it on, but pay attention as it dries – it should even out and you shouldn’t see any streaks when it’s completely dry.

Now is not the time to quit.  You will get a decent shoulder workout.  This may be the time you decide to crack open a motivational beer.  When I feel like I want to quit because I’m covered in sweat and paint and my hands feel like they might snap off at the wrist, I know in my heart that it’s time for a beer.

In the end, it’s completely worth it.  There’s a huge sense of satisfaction that comes from transforming sterile, hospital-like white walls into something warm that can highlight trim work, photography, art, or just makes you feel more at home.

But I will stand by my original assessment that HGTV is full of CRAP, and this is not something you would want to do over and over again if you don’t like the color.  Choose wisely, my friends.

5.  Clean, clean, clean!  When you’re finished painting, you will be so tempted to just drop everything in the middle of the floor and call it a day.  But cleanup isn’t so bad if you used a drop cloth and a disposable paint tray.  The most important step is cleaning your paint brush.  Run it under warm water while gently pressing and flattening the bristles on the bottom of the sink.  Keep going until the water runs clear.  THEN, give the brush some good whacks on the edge of the counter or on a paper towel.  This will fluff the bristles back up and get your brush ready to use for the next go ’round.

Sooo… remember to fluff your brush by whacking it to get it ready for use.  (Man, why can’t I seem to avoid porn references in this blog??  It’s like I don’t even have to try.)