All the Trimmings
Back when we had all that water damage to our kitchen floor, we decided to have our back door replaced. It wasn’t cheap, but it really was the smartest thing to do.
Unfortunately, once he replaced the door, our install guy told us he couldn’t re-use the brand new trim we had just put around the door. You see, the new door was elevated a bit from where the old one had been, so the trim we had installed right after we initially put down our new kitchen floors was no longer viable. Too short. Go back to the kiddie rides.
Have no fear, though – installing trim is very easy. And this time, I took pictures.
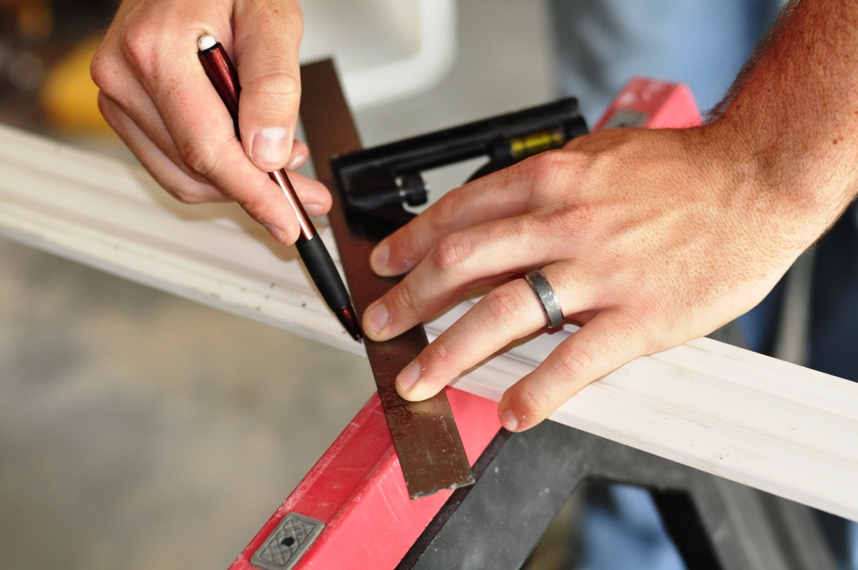
*You do not need any fancy tools to do this project. A simple hand saw, hammer, and tri-miter square will do the trick. Even though we have a miter saw and a nail gun, the hubs opted for some old fashioned manual labor for this one.
1) Measure the height of your doorway, and mark that height on your door trim. Use the tri-miter square (basically a tool that can measure 90 and 45-degree angles) to mark a 45-degree angle UP from the height of your door frame.
2) Use a hand saw (or any saw of your choosing) to cut your line. As much as I love using (and watching the hubs use) power tools, there’s something… primal about seeing someone use good-old muscle to work on a project. Plus, it’s the environmentally-friendly alternative to immediately turning to electricity to do the work for us.
I realize it looks like the hubs is sawing off his own thumb in this picture. I assure you, he’s not.
See? Told you he wasn’t sawing off his thumb.
3) Hold up your cut pieces of trim to ensure they’re the right fit.
This picture is mildly embarrassing, because it really highlights the fact that we need to paint ALL of our trim. That will be a *fun* weekend project. But hey, if I don’t put all the embarrassing stuff out there, then where’s the motivation to fix it? Certainly not in my own sense of home-owning pride. Blech.
4) Hammer those trim pieces into place. We used 2 1/2″ nails.
Here is where a proper trim nail gun would certainly come in handy.
Once the nail head gets close to the trim, you could easily damage your trim by accidentally nicking it with the hammer. The hubs used a tool called a “punch” to help him concentrate the force of the hammer directly on the nail head while keeping the bulky end of the hammer away from the trim. (I actually know what this tool is called because I used to fix and sell watches for a living. A punch is a common tool used for adjusting the size of a watch band. Little bit of trivia.)
And that’s all there is to it!
I could easily have done this myself. But then who would’ve taken the pictures? One of these days I’ll have to hand my precious baby (aka. my camera) over to the hubs so you can see that I too, can do some of these so-called “manly” things around the house. Drills aren’t as scary as they look.
But this time, I can’t say the hubs did a bad job.
Refinishing or installing new trim is a quick, simple and relatively inexpensive way to update your home and give it a fresh look. If you have any trim tips of your own, please share!


Comments
I say relish being on camera duty whenever you can! Good job on the trim!
Kelly
Thanks! That means a lot, coming from someone who actually knows what she’s doing. :) And I do relish camera duty, but I also like getting my hands dirty every now and then. It’s good for venting frustration and keeps me from beating my husband. ;)