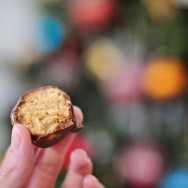
I was going to name this post something like “My Mother’s Secret Balls” or “Real Domestiphobes Like Balls Any Time Of Year,” but I didn’t. Which I think it a true testament to how far I’ve come, maturity-wise, since that time I kept talking about nipples.
Yesterday was one of those rainy, icky days during which my motivation level seems to directly correlate with the amount of the sun’s rays that reach the surface of the earth in my locale — which, incidentally, was approximately zero.
This weekend was dreary. The kind of dreary that makes daily personal hygiene tasks like flossing my hair, combing my teeth, showering, and getting dressed seem entirely optional. The kind of weekend where the sun doesn’t shine, not one little bit, and a certain amount of comfort food is required to get you through.
After all, would winter be winter without muffin tops?
Wait, not that kind.
I’m talking about the kind of muffin top you get in a bakery — the kind that inspired Elaine and her boss on Seinfeld to open a bakery that sells only the tops. The kind with the glorious dome that spills out of the cups and spreads out across the surface of the pan, rising up with puffy, cake-like perfection, and comes fully adorned with a sugary dusting of streusel crumbles.
Okay, so maybe the first kind of muffin top still applies.
Damn.
But we can’t be good all of the time — that would be inhuman. And if we have the secret to creating muffins with proper tops right at home, we can’t very well let that go to waste on a sunless weekend.
The secret, it turns out, is an extra thick batter.
I know. That’s probably been keeping you up at nights. I feel your pain.
But there’s no denying that there’s something about those tops. Something delicious. Decadent. An added pouf of awesomeness that the muffin stump just can’t provide.
I know it. Elaine knew it. And now you’ll know it, too.
This recipe provides the key. I did make some suggested changes based on the comments, particularly with the streusel topping, but I love how mine turned out.
To make them like I did, you will need:
3 cups all-purpose flour
1 1/2 cups white sugar
1 teaspoon salt
4 teaspoons baking powder
2/3 cups vegetable oil
2 eggs
1/3 cups milk (or less)
2 cups fresh blueberries
For the topping, you will need:
2/3 cup brown sugar
1/4 cup flour
2 Tablespoons butter
1/4 tsp. cinnamon
*This makes 12 BIG muffins. Seriously. These muffins are BIG. Cut this recipe in half if you know what’s good for you. Of course, if you know what’s good for you, you won’t be making these at all. So I’ll just stop talking now.
**Okay, I lied. I’m still talking. Because I also need to tell you to IGNORE the crappy photographs. I haven’t been posting many recipes as of late because it’s too dark to get any decent pictures. I thought, by making muffins in the morning, that I’d actually have some light, but like I said. Dreary weekend. Total bummer.
Now. This is a bit difficult, so pay attention. (It’s really not difficult at all.)
1) Preheat your oven to 400-degrees F and spray your muffin tin liberally with cooking spray. Actually, go ahead and grease that puppy the old-fashioned way, because mine still stuck somewhat. Even if you use those paper muffin cup thingies, still grease the top of the pan.
2) Mix your dry ingredients — the flour, white sugar, salt, and baking powder, together in a bowl.
3) Pour 1/3 cup of vegetable oil into a 1 cup measuring cup. Add the egg to that same measuring cup (I beat mine slightly with a fork first), and then fill the cup to the top with milk.
4) Pour the wet ingredients into your bowl of dry ingredients, and — this is EXTREMELY important — DO NOT OVER-MIX.
Yep. Just mix it gently until the batter is barely moist. You might even have a few chunks of flour left, and that is okay.
Everything will be okay.
As long as you don’t over mix.
Then gently fold in your blueberries.
5) Mix the streusel topping ingredients together with a fork.
You should get a crumbly topping.
6) Fill each muffin cup to the brim with your batter. There should be just enough. Then, sprinkle with streusel topping (I had extra) and bake for 20-25 minutes until you can insert a toothpick in the center and it comes out clean.
I was going to take another photo of the finished product this morning, when it was hopefully going to be light, and bright, and sunny, but no. It’s like yesterday. Only… danker.
Because that’s a word, right?
Good thing I have bad photos of muffin tops to cheer me up.
I was kind of extra word babbly yesterday, huh? Sorry about that. I can’t promise it won’t happen again, because I’m pretty sure it will. But today I’ll keep it simple, because I have approximately 671 things I want to get done before Saturday, most of which pertain to Alaina’s upcoming baby shower party, and others for my own personal sanity.
I promised to share with you the absolute best party appetizer of all time — the thing that guarantees instant popularity at any function for the person who brings them. They’re not fancy, and most “foodies” would cringe at their unapologetic use of dried herbs and pre-made biscuit dough, but for some reason, people just can’t get enough of ’em. It is for these tasty little bites that I overcome my fear of refrigerated, popping biscuit tubes time and time again.
The recipe is called Bacon Tomato Tartlets, but you just might want to call them Tartlets in case you’re around anyone who has a fear of tomatoes or bacon. Plus, “tartlets” is just fun to say. Justin hates tomatoes, yet he would gobble up a whole batch of these if I let him. And if you don’t like bacon, then I think you might have problems.
My fantastic neighbor gave me this recipe, and she got it from her fantastic friend, and I’m not sure where it originated before that. I posted the recipe here on Tasty Kitchen, so go give me my first review if you make them!
But only if you think they’re good.
To make them, you will need:
1 (12 oz.) can refrigerated, flaky biscuit dough (This HAS to be the flaky stuff. You’ll see why in a sec.)
6 strips of bacon, cooked and crumbled
1 medium tomato, seeded and diced
3 oz. Mozzarella cheese, shredded (I probably use more like 5 oz. when I’m guesstimating.)
1/2 c. Hellmann’s Real Mayonnaise (I’m pretty sure this has to be Hellmann’s. Don’t argue with me about this, and don’t you dare use that crap they call Miracle Whip. The only miracle is that it doesn’t make me vomit. You have been warned.)
1 tsp. dried basil
1 tsp. dried thyme
1/2 tsp. dried oregano
3/4 tsp. garlic salt
You can see I used 2 Roma tomatoes this time in lieu of 1 medium tomato. Just go with what you have — the ingredients don’t need to be exact.
1) Cook your bacon on the stove until crispy. Even if you normally like chewy bacon, you have to remember that this isn’t about you right now — it’s about the tartlets. And the tartlets need it crispy. Just lay the bacon in a cool skillet (I love to use my cast iron grill pan), turn the heat to medium-high, and let it cook in its own grease for a bit. When the bottom turns brown, flip and do the same to the other side.
mmm… bacon.
Once it’s cooked, crumble it up on a paper towel to soak up the grease.
2) Mix all of the ingredients (except the biscuit dough) together in a bowl.
*TIP: At this point you can cover and refrigerate the mixture for a day or two before preparing the tartlets if you don’t want to make everything the day you need them.
3) Remove the biscuit dough from the refrigerator (this step is easier to do if the dough is cold), try not to jump out of your panties when you pop the tube open, and separate each biscuit into 3 layers. This is why they need to be the flaky kind.
See how they separate naturally?
Spray a mini muffin tin with non-stick spray and use each 1/3 biscuit to line each muffin cup. There will be enough for exactly 24 mini tarts. Aka tartlets. Why is that word so fun??
4) Fill each biscuit cup with your filling mixture and bake at 350-degrees F for 10-12 minutes until the biscuits are lightly browned.
Some might poof up more than others, but it’s very likely no one will notice since they’ll be gone in approximately 4.8 seconds.
And everyone will be like, Where did that extremely popular person go who made those delicious tartlets? I think those were like… the best tartlets I ever tasted in my life. Go tartlets! Tartlets. Tartlets. Tartlets. Why is that word so awesome?
And you can just sit back and bask in the glory.
Just try not to eat them all before you leave the house.
Back in what I like to call the “Golden Days,” when I could eat and eat and eat and never gain an ounce of body fat, back before I discovered wine and beer and the accompanying traces of cellulite that inevitably appear if I don’t pay a visit to Jillian within 24 hours of consumption, back when my butt stayed firm of its own accord, and back before the elves started forgetting to oil my joints at night – particularly in my left knee – which makes me feel like the oldest 28-year-old I know, I liked to bake.
A lot.
I rarely cooked, but boy did I bake. Cookies and cakes and brownies and bars… I felt comfortable baking because everything was precise. As long as I followed the directions, it was hard to mess up. And even when I did mess up, I could eat the mess and it was still tasty, if not pretty.
But now that I’m old enough to consume the empty calories found in alcohol, I try to limit my baking to events and special occasions, because let’s face it – I don’t need the extra calories tempting me while I’m in the house all day long.
Then I stumbled upon this recipe. This perfectly enticing, decadent, chocolaty recipe for double fudge Irish cream cookies that combines baking with alcohol – and not in a miniscule way – and I just had to make them on St. Patrick’s Day.
Because if a day when I’m allowed to pinch people if they aren’t wearing my favorite color isn’t a special occasion, I don’t know what is.
And I realized today that while I’ve been sitting on this recipe (and the extra layer of fat it’s undoubtedly formed on my derrière) for the past couple of weeks, I’m doing myself a disservice.
Because if I have to be fat from making and consuming ridiculously delicious desserts, so should you.
By the way, my photos of the finished product are horrible because I was too busy actually eating the cookies to worry about taking decent pictures. Luckily, Jessica at How Sweet it Is took some amazing photos of her own recipe, and she might give you some healthy recipes and fitness tips to make up for her irresponsible posting of these muy rico delicacies.
The good news is, I bet you can eat just one – they are super rich.
To make them, you will need:
1 cup butter, softened
1 1/2 cups sugar
2 eggs
1 teaspoon vanilla
2 2/3 cups flour
1/2 cup cocoa powder
1 1/4 teaspoon baking soda
1/4 teaspoon salt
1 teaspoon instant coffee powder
8 tablespoons Bailey’s Irish Cream
1 cup white chocolate chips
1/2 cup chocolate chips
1. Cream the softened butter, eggs and vanilla with a wooden spoon until fluffy. I’m pretty adamant about the wooden spoon thing. Sure, you could pull out your fancy, schmancy industrial mixer, but we’re making cookies, people. Cookies should be made like our mothers and grandmothers made ’em.
With love and good old-fashioned elbow grease.
Except not real elbow grease, because that would be gross.
And who has greasy elbows, anyway? If anything, mine tend to get quite dry. If I’m not careful, I’ll end up with “ashy elbows” ala Tyra Banks and I don’t know anyone who wants to look like her.
2. Add the Bailey’s and mix it in, one tablespoon at a time.
Now. If you’re a dough-eater like me, you might think this tastes a little… strong. But stick with me, here. The taste of Bailey’s gets much subtler after the cookies bake.
And yes, I know eating dough with raw egg is bad. But it’s bad in such a good way, you know?
3. Add the flour, cocoa powder, instant coffee (I crumbled mine up in the package a bit first), baking soda, and salt to the bowl.
Mix everything (again, with a wooden spoon – it’s imperative) until combined.
Be careful with the cocoa powder if you’re an enthusiastic mixer, like me. It’s a bitch to get out of clothes. Especially white shorts. Seriously? Who cooks in white shorts?
4. Fold in the white and milk chocolate chips, then cover the bowl and refrigerate the dough for 4-6 hours (I actually refrigerated overnight, and it was still fairly sticky to work with).
5. When you’re ready to bake, preheat your oven to 350-degrees F. Use your hands to roll the dough into balls. I like my balls fairly big (tee-hee). Bake the balls on an ungreased baking sheet for 8-10 minutes. Since my balls were fairly big (tee-hee), my first batch came out slightly under-baked.
I thought that was perfectly fine.
These cookies are moist, with almost a creamy, buttery center, ultra rich and decadent.
Jessica recommends eating these with a glass of Bailey’s, but the richness for me almost requires a glass of cold milk.