Navigate / search

HGTV Lies!

This post is about painting.  And Florida.  But not about painting in Florida, because that would be silly.

I’m leaving tomorrow for some much-needed sister love in Miami.  As evidenced by the pasty, translucent skin of my underarm in the above photo, my sister isn’t the only one I’m craving to see.  Oh Sun, how I’ve missed you!  My Costa Rica tan lines are but a faint shadow of their former selves.  I look outside my window and everything is gray.  I need your vibrancy and colors back in my life.

But more on that in a minute.

First, I must dispel a vicious lie – a lie that’s been portrayed to innocent HGTV viewers over, and over and over again.  Even if you don’t watch HGTV, it’s likely you’re still a victim of this heinous untruth, because it’s often unwittingly spread by various self-proclaimed home improvement experts (aka. people who watch HGTV on a regular basis) to their unsuspecting friends and family.

And here it is, the thing you’re likely to hear at least once during any given hour of HGTV viewing:

Painting a room in your home is one of the EASIEST and LEAST EXPENSIVE things you can do to improve its aesthetic and value.  Oh, and don’t worry if you paint the room and hate the color, because guess what?  You can always paint it AGAIN!  Yippee!!

I just have one thing to say:  Clearly, anyone who can speak these words with any type of honest conviction has never painted an entire room by him/herself.

Okay, I have more than one thing to say, so I’m just gonna say it.  Painting takes work, my friends.  It takes foresight, furniture removal, special tools, patience, and often a certain type of meticulous skill for which most people are unprepared because they’re continuously lied to about just how easy it is!

And inexpensive?  Not really.  You need to invest in decent brushes that won’t expel bristles into your paint, paint that properly cooperates with your walls, painter’s tape (if you don’t trust yourself to cleanly cut-in without getting paint on your trim), drop cloths (if you don’t trust yourself not to spill), a roller tray, and rollers.  Depending on the size of your room, all of this can add up.

And unless you have a painting buddy, it takes a bit of time and can be difficult to stay motivated.

Quick note about the above photo:  Clearly, I have no concern about using a drop cloth because that carpet needs to be replaced anyway.  And that weird beige thing my dog is sitting on?  That’s the wingless, legless, headless remains of a rubber chicken.  And the purple bits scattered around the floor?  Let’s just say the rubber duck fared even worse than the chicken.

Have I thoroughly discouraged you from painting yet?  Okay, I’m sorry.  That wasn’t my intention.  If it’s any consolation, I’ve painted most of the rooms in our house (Justin does the ceilings – lucky guy).  It’s totally doable.  I’m just tired of seeing people go into the project with unrealistic expectations.

When I get back from Miami, I’ll write up a nice little post about some of the painting tricks I’ve learned over the past few years.  When you know what you’re doing, the task isn’t terribly daunting.  And with the proper skill, you can save a bit of money on supplies.  BUT, if you’re anything like me, you still wouldn’t exactly call it fun.

What would I call fun?  Visiting my little sister in Miami!

It’s been over a year since I visited Kelly, and I can’t tell you how much I’m looking forward to this trip.

Last time I rode a boat.

And looked at Christmas lights.

And almost got in a fight with a feisty Latina.  I don’t care how old you are – cutting in line is simply not cool.  But that’s a story for another time.

Who knows what Miami has in store for me this year?  All I know is there will be drinks.  There will be music.  And there will be CAKE, because my baby sister is turning 24!

Catch ya on the flip-side.

Happy Hallo-schwing! (Or, Asphinctersayswhat?)

Ever since I was old enough to understand what it was all about, I’ve loved Halloween.  It’s a holiday where you get to dress up, stay out late, gorge on candy, and you don’t have to buy your ungrateful family members gifts (kidding, guys!).

So what’s not to love?

In fact, the only slight drawbacks to the holiday nowadays are the fact that (a) costumes cost roughly the same price as a black market kidney and (b) every women’s costume—whether it’s mechanic, dentist, or offshore oil rigman—requires fishnets and a push-up bra.

I’ve never been the type to dress up as a slutty cheerleader or slutty witch or slutty fairy on Halloween–not that I’m a hater.  In fact, I’m fully of the if-you’ve-got-it-flaunt-it-cause-it-sure-ain’t-going-to-be-flauntable-forever school of thought.  But my personal beef has always been more with the utilitarian aspect of these types of costumes.

The equation in my head goes a little something like this:  Delicate exposed flesh + 30 degree temps + five hours of bar crawling = Hells to the no.

While I fully appreciate the “You go, girl!”-ness of showing off the goods in the spirit of Halloween, I’m not passionate enough about it to risk losing said goods to hypothermia just to prove I had ’em to show off in the first place.  That’s a little too The Gift of the Magi for my liking.

Besides, I almost always go for the gag—the more silly, dorky and ridiculous, the better.  So given all these factors, when I finally find a costume I like, I will proceed to wear its ass out.  No lie–I will trot out that  bad boy year after year until either its vital components begin to disintegrate or I am no longer able to tell in which decade the Halloween photos were taken.

Here’s my lifetime progression of Halloween costumes:

– Tiger.  Worn age 1.  Comfortable, stylish, flattering.  I’d still be wearing it to this day if I could fit into it.

– Black cat.  Worn ages 4 to 10.  Crafted with minimal parental oversight, this unelaborate getup featured a black headband with ears I made out of paper Scotch-taped to it, a black leotard, black tights and a tail pinned to the seat of my britches.  Which, when you think about it, is basically every slutty adult cat costume, too.

– Mouse.  Worn ages 10 to 12.  Same costume as above, just different-shaped ears.  The cat tail made it somewhat confusing.

– From ages 12 to 17, I was far too cool to be bothered to dress up for Halloween, so I guess I just went as a punk-ass teenager.

– Flapper.  Worn age 18.  The store-bought costume was thin, insanely itchy and, three weeks later, I was still picking sparkles out of some unlikely nooks and crannies (uh, hello, like my ears, people?  Geez.).  In the spirit of the holiday, the day after Halloween I gave it to Goodwill so that next year it could go forth and haunt other poor, hapless victims.

– Nerd.  Worn ages 20 to 25.  This costume went the distance because it was comfortable, cheap and, c’mon, awesome.  Since I was a broke, unemployed college student at the time (unlike the broke, unemployed adult I am now), I went to Goodwill and bought men’s plaid pants, thick black-rimmed glasses, and a tie with ducks on it for like $4.  I then added white tape to the glasses, gelled my hair down into a slick part, acted like myself all night–and bam!

A word of caution, though:  Be sure to wear full-coverage underwear because you will be fending off unprovoked wedgies from friends and the occasional creepy stranger all night long.

– Princess Toadstool.  Worn age 28.  I think we all know by now that I’m not the princess type, but the hubs and our good friend Kevin were hell-bent on dressing up as Mario and Luigi, so it was either be her or Toad, and I don’t need to draw any more undue attention to the ginormous-ness of my head by wearing a gigantic, phallic-like mushroom cap, thank you very much.

And, yes, that is a blowup doll taped down on the table behind us.  It was that kind of party.

This year’s costume, however, is by far one of my favorites:

Wayne’s World!  Party time!  Excellent!

This was a last-minute Hail Mary idea–there was a party Saturday night and it was Saturday afternoon and neither my friend Christine nor I had any idea what we were going to be yet.

And the best part is this entire look cost me about $10.  I already had the plain black shirt and Chuck Taylors, but I found the flannel for $3 at Goodwill.  Then I went to Michael’s and bought iron-transfer letters and a black hat for $6 and had myself a little Crafty Craftertons moment.

And since I had some letters left over, I went the extra mile and made a T-shirt that says “Schwing!”

How ’bout them apples, Martha Stewart?

Happy Halloween, everybody!

(PS:  The title’s a Wayne’s World reference:

“Asphinctersayswhat?”

“What?”

“Exactly.”

Now go forth and prosper with that information.)

Katie – 1; Metal Frame – 0

The promised monkey post is coming soon.

I SWEAR.

But I had to share this with you.  Now that I’m back home, I’ve been trying to distract myself with various projects I’ve been putting off around the house.  We’re going to be having several house guests over the next week or so, and it’s time some of these things get finished.

So.  I love maps.  I love looking at them, using them – hell, I MADE them for a living at one point in my life.  GPS?  No thanks.  Maps – yes, the foldy, papery kind – are far superior.

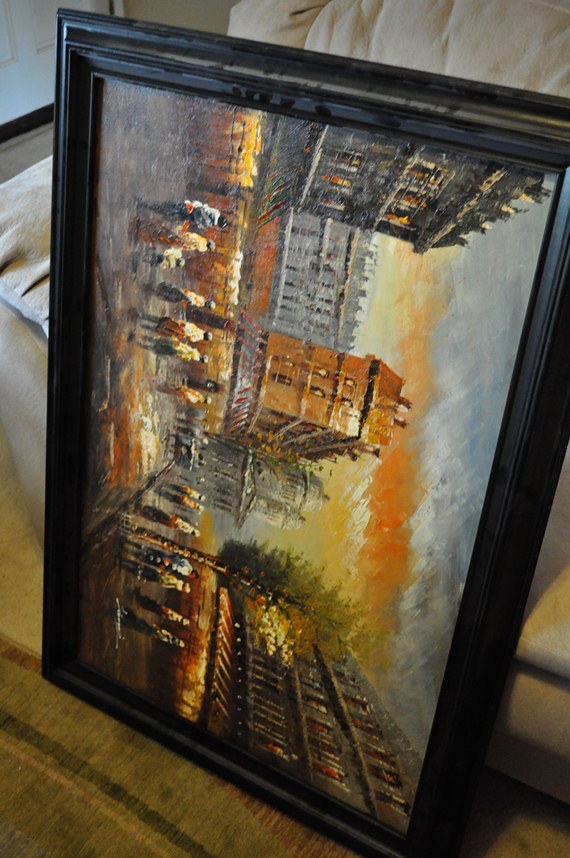
I’ve had this world map that my sister-in-law gave me for Christmas for years now, and I’ve never hung it anywhere.  The map itself is beautiful, and I didn’t think the black metal frame did it justice.  Enter this horrible reproduction painting I bought on a whim a couple of years ago and also never hung.

Yes, that is dust from 2 years of closet banishment.

I noticed the frame happens to be the perfect size for my map.  Easy switch, right?

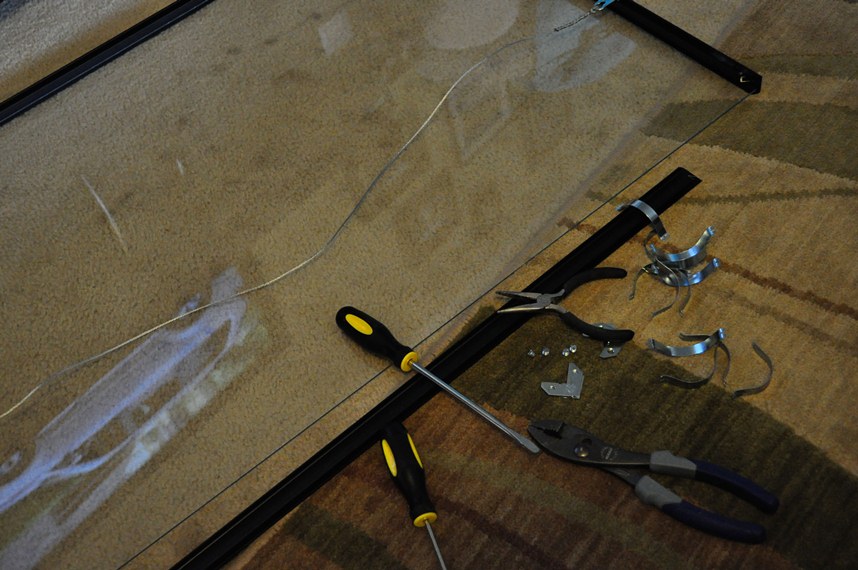
Not so much.

It took an embarrassing amount of time, but finally – finally – I won.

I may not have been a fan of the metal frame, but no one can say it wasn’t quality.

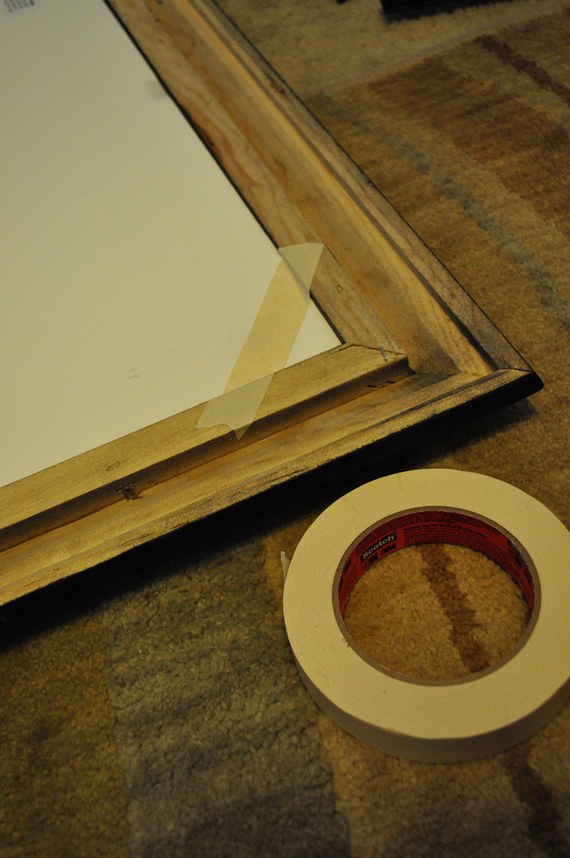
Speaking of quality, I didn’t actually have a way to attach the map to the wood frame.  Enter the masking tape.

Classy,  no?

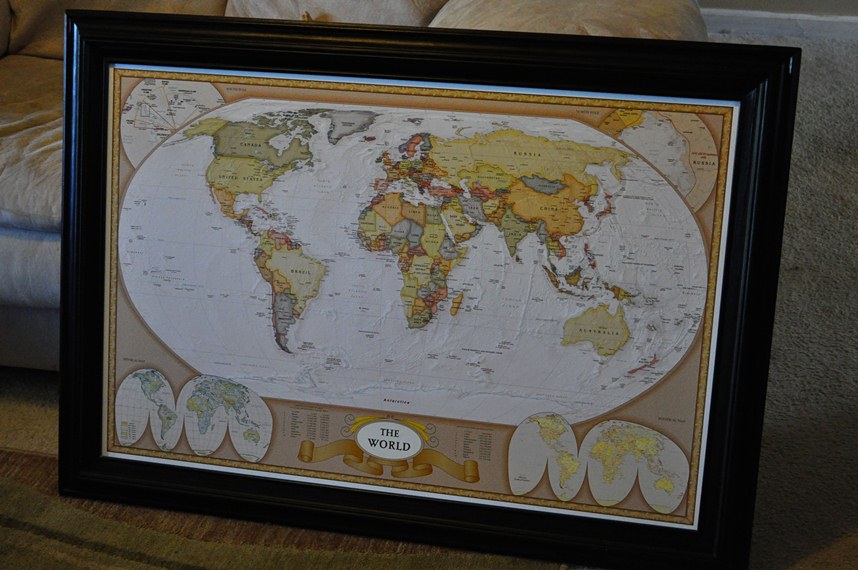
In the end, I think it was well worth the effort.

Go me!

Now.  Is it too early for a beer?

Feel-Good Monday: How to Swindle Your Neighbors

When I woke up this morning, the first thought that went through my head was, “Why am I still here?!”

I know that’s not an ideal mantra to start the day, but I couldn’t help it.  I wasn’t supposed to be laying in my own bed.  I was supposed to be sitting at the airport, waiting to get on my flight to Central America.  But now as I sit at my kitchen table, breathing in the aroma of my freshly brewing coffee, I’m realizing – if I was supposed to be there, I’d be there.

By the way, if you’re curious, here is a demonstration of how I drink my coffee (excuse the extra wide aperture and shaky hand.  I obviously hadn’t yet consumed any of the much-needed coffee at the time – which was a few minutes ago – these pictures were taken):

First pour cream into bottom of cup.

katie's coffee cup

Then pour coffee.

katie's coffee

Finally, dump in prolific amounts of sugar.

katie's sugar

Basically, the resulting beverage should taste like sugar-laden cream with a hint of coffee.  I like the smell better than anything.

Now back to our regularly scheduled program.

So.  I guess the fact that I’m sitting here drinking a cup of coffee-flavored cream instead of having my naked body scanned in 3D at the airport means I need to figure out what to do with my unexpected, extra un-paid week.

If I really feel like getting dirty, I could paint all of our trim or clean out the garage – two things that could desperately use my attention.  And knowing me, I might just decide to start one of those projects late Thursday afternoon when I should be getting ready for the long drive up to Frederick, MD so I can chill with Erin for a couple of days before we leave.  I find I work best under pressure.

But considering I still need to pack and take care of a few other mundane things before I head out, I should probably stick to small projects for now.

Our neighborhood has a community garage sale twice per year.  Yuck.  There are so many other things I’d rather do with my time than dig through other peoples’ unwanted crap so I can let it sit in my own garage until I donate it to Goodwill because I never did figure out how to affordably reupholster that old chair that would’ve been so perfect if it weren’t covered in that awful maroon velvet or where to hang that one painting that could’ve looked so cool in a retro sort of way if my entire house was cool in a retro sort of way.  Which it’s not.

And yet every six months I find myself getting up at 7 a.m. on a Saturday (which actually isn’t unusual anyway) to get to the “good stuff” before someone else nabs it.  What can I say?  We live in the stix and garage sales bring out my competitive side.

Plus, I love, love, love haggling with people.

At the last sale I snagged this set of mirrors.  The old lady wanted $15 for the pair, but I got her down to $8.  Sucka!

gold mirrors

Now I’m no designer, but I’ve watched enough HGTV to know nothing says style like gilded gold mirrors.  Right??

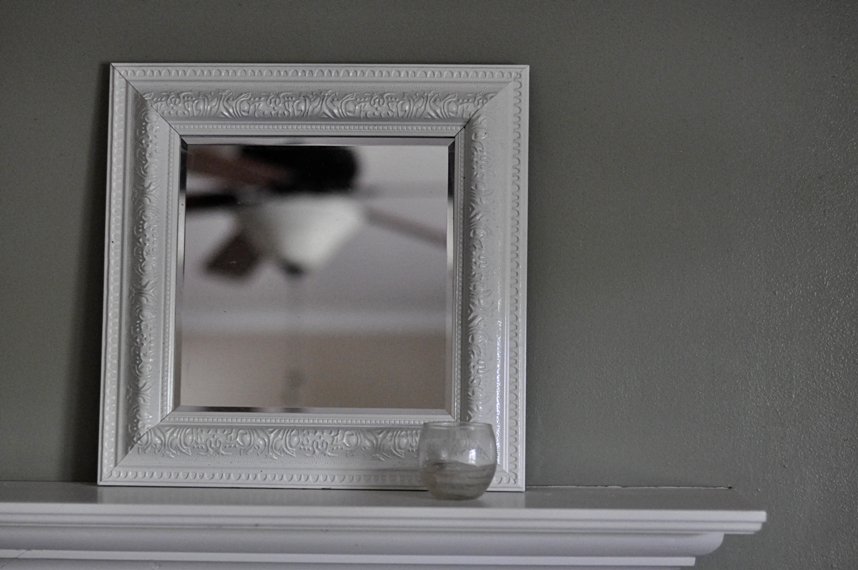
Okay, maybe not.  But I thought they might look cool if I spray painted them, because while the color is awful, the detail is kinda interesting.

mirror detail

So I covered the mirror part in frog tape and newspaper, bought some semi-gloss white spray paint, and went at it.  I don’t really care for spray paint with its non-environmentally friendly qualities.  But.  I wasn’t about to try to take a brush to the little nooks and crannies of these puppies.  In the end, laziness won-out.  But if anyone has “greener” suggestions, I’m open to ’em.

Spray Paint Mirrors

I’m actually pretty happy with the finished product.  Alaina thinks I should sand off some of the white for a more antiqued look.  I think Alaina should get her ass back in her kitchen and get it finished so we can see the final pictures already.  (You know I love you, A!)

What do you think?  I think I’m done.  Unless I decide to paint them a funky teal or something, which I’m seriously considering.

Now, as usual, I just need to figure out where to hang ’em.

finished mirror

Guest Bathroom Befores and Not-Quite-Afters

You don’t have to say it – I already know.  You’re mad because I’ve been lax in my home renovation updates.  And I want you to know that I understand.  It’s okay to be upset.

It’s like 4 months ago I tricked you into thinking this blog was going to have actual DIY projects and before-and-after photos.  I took you out to a nice dinner, opened the car door for you, wore a fancy suit – then, when we started to get comfortable, I began complaining about your cooking, making jokes at your expense, and wearing my holy underpants.

It’s inexcusable, I know.  But the thing is, people change.  Interests change.  And while it’s still incredibly important that we get this house in shape before we have to sell it, I’ve got bigger fish to fry right now than picking out flooring to replace the worn-out carpet in the living room or scraping popcorn off the rest of our ceilings.

But.  That doesn’t mean I can’t show you some things we’ve done already.  There are several rooms in the house that, while not complete, are vastly improved from the day we moved in.

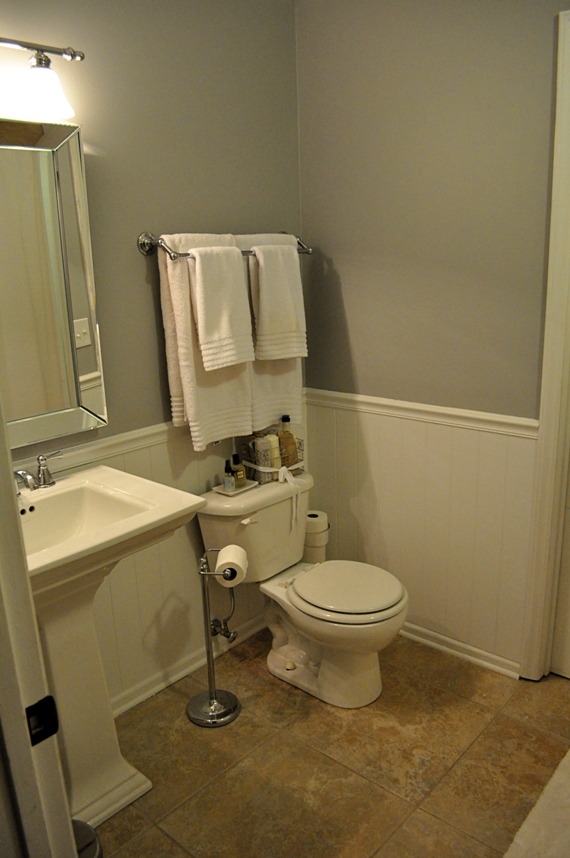
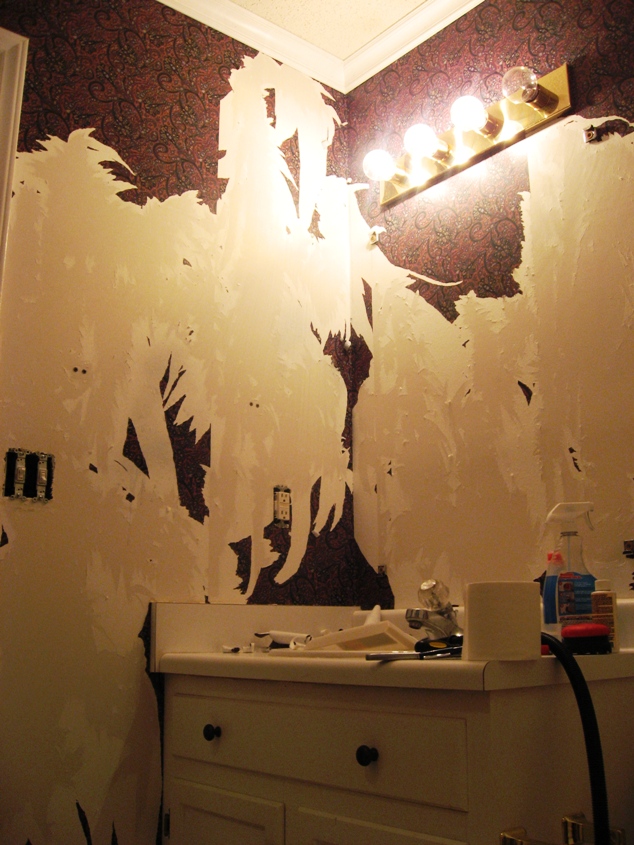
Aside from the remodeled kitchen, our guest bathroom has probably seen the most change.  I showed you how it looked like a crime scene for several months while we attempted – in vain – to remove the maroon paisley wallpaper.  But lucky for us, and our guests, it now looks a whole lot different.

BEFORE:

Guest Bathroom (before)

AFTER:

Guest Bathroom After

DURING:

Kate's Guest Bathroom Wallpaper Removal

AFTER:

DURING:

Kate's Guest Bathroom Crime Scene

AFTER:

DETAILS:

We tiled the floor with porcelain tiles bought at Restore Warehouse for a fraction of what they would’ve cost at a tile store.  The actual DIY process of tiling the floors was not captured in photos.  Let’s just say it consisted of approximately 48 hours of intense stress, sweat, near-filing of divorce papers, and maybe a little blood.

Curved shower curtain rod

We tore out the old brass shower doors and had the nasty yellow tub refinished.  Then we hung this nifty curved shower curtain rod to make the shower extra roomy.

Decorating the Toilet

I haven’t hung anything on the walls yet, but I have decorated my toilet.  Because I’m cool like that.  We added the wainscoting and chair rail (all that white trim on the bottom half of the walls) because when we ripped out the vanity, we may have damaged the drywall.  Just a bit.  So this was our solution.  Happy accident, right?  We only had to re-do it once.

And I bought this nifty cylinder thing to hold the TP.  Pedestal sinks look pretty, but they’re sure not ideal for storage.

And um… we can wash our hands.

Rolled-up Towels

We can dry ’em, too.

Poo-Pourri

And if we find we need to do dirty, smelly things in this pristine new room, then at least we have this.

Any questions?

I’m Not Coming Back (and You Can’t Make Me)

Just thought I’d stop in and let everyone know that I have decided to forego the Frederick apartment and Costa Rica trip and pretty much my life as I know it to live out the rest of my days with my in-laws in Cape Cod.

I haven’t run the idea by them yet, but I’m sure they’d be cool with it.  I mean, who wouldn’t want an unemployed 28-year-old shacking up with them for all of eternity?

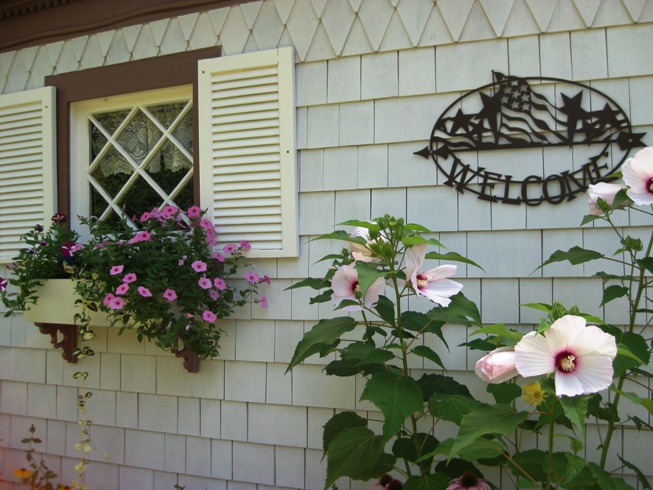
They shouldn’t have a ‘Welcome’ sign if they don’t mean it.

I love visiting Chuckles’ folks.  Aside from being two of the nicest, most laidback people on the face of the Earth, they’ve managed, over 17-odd years, to transform their property into a heavenly piece of mellow, stress-free paradise.

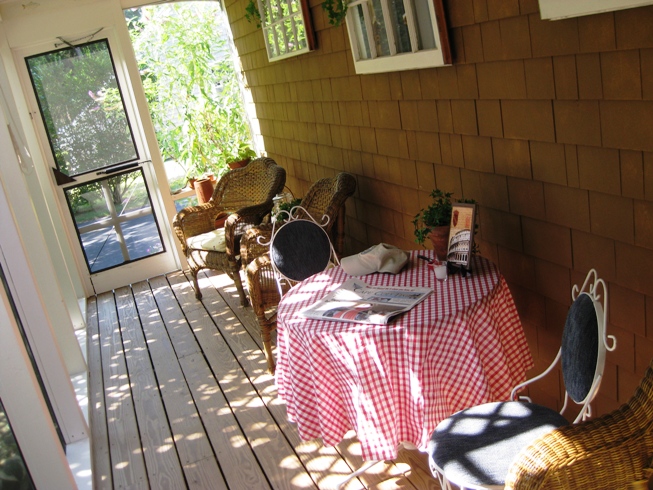
Here’s how a typical morning goes when we visit:  I wake up around 9 a.m. to find freshly ground coffee waiting for me in the kitchen.  Amen.  Then, I shuffle (because that’s the only way I know how to transport myself in the morning) out to the porch where I’m greeted by the warm sun, a cool morning breeze and this…


…and these…

…and these.

And then I proceed to lounge around in my jammies in a drooling, zen-like trance for the better part of the morning until a plate of cheesy scrambled eggs, fluffy waffles topped with fresh fruit and homemade Kahlua whipped cream, and a Bloody Mary that’d make you slap your mama magically appears in front of me. 

And then I silently give thanks that, for some insane reason, Chuckles’ parents keep inviting me up to mercilessly sponge off their polite hospitality.  Obviously, these people haven’t learned enough about me yet.

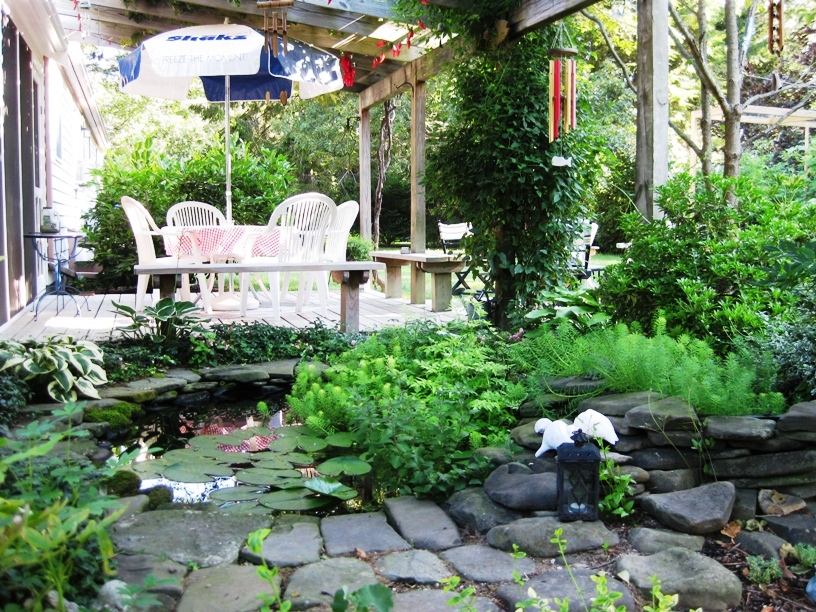
Seriously, I’m not even kidding when I say that being here is the best high you can get without a dealer on speed dial.  Everything about this place is quiet and peaceful and homey and just so frickin’ picturesque, from the flowers Jude planted out front…

…to the vegetable garden Rick cultivated out back with his 10 green thumbs…

…to the stone patio they recently put in by themselves

…everything about this place screams, “CHILL THE FRICK OUT, YOU NEUROTIC HEADCASE.”

And sometimes I need to be bossed around a bit, you know?

“Dude.  You’re, like, totally harshing my mellow with that camera.”
Alaina’s Unique Flooring Solution

Do you all remember my friend Alaina and how we had so much fun demolishing her old kitchen and how she and her husband Dirk started the agonizing task of putting it back together again?  There was another progress check somewhere in there as well.  If you missed it, click on those links to catch up.
 
I asked her once to describe her granite counter-top buying experience for the blog, and now I’ve asked her to describe how she chose and installed her kitchen flooring material.  As with her counter top tale, I will periodically interject in this lovely green italic font, but here, in her words, is the saga of the flooring:
 
Flooring is a touchy subject.  You touch it every day around your house so it needs to meet certain needs.
Our needs (in no particular order):
  • Durable
  • Pretty
  • Easy to install because we don’t want to pay someone more than what the tile is worth to install it
  • Pretty
  • Not a temperature shock when you transition from different floor styles
  • Pretty
Now might be a good time for me to give my quick spiel on kitchen flooring.  Wood and laminate are great flooring materials because they’re warm, soft, smooth, and beautiful.  Unfortunately, they are both (yes, laminate too) susceptible to warping if exposed to water for long periods of time.  Since kitchens can have a considerable amount of water running through them (dishwasher, faucet, refrigerator, etc.), be warned that you’re taking a risk.  Tile, however, is much “safer” when it comes to water.  The drawback with tile is that it’s incredibly hard (this can be rough on your feet and back if you’re standing on it for long periods of time, not to mention the fact that you can kiss any dishes you drop good-bye).
  
Lucky for you (but too late for me), Alaina seems to have found the perfect kitchen flooring solution.
 
Considering all of these requirements of our floor, you might think it’s amazing that we actually picked one.  But we did, and we liked it so much that we purchased it twice!  We recently renovated our converted garage because it still looked, smelled, and leaked like a garage.  Yes, yes it did.  After discovering the source of the leak and fixing that, we gutted the room and fixed it up!  (I really hope to highlight this room renovation at a later date.  It is a fantastic garage conversion – perfect entertaining space, game room, movie theater.)
 
Through that project, we did a lot of research on flooring and found Congoleum DuraCeramic Tile(Sounds like something you’d contract in a trip to the Amazon.)
 
 
This “tile” is a limestone composite that comes in two patterns per color choice to offer variance in the floor.  It’s important to note that this is not a typical tile.  It’s softer than ceramic or porcelain tile, and warm to the touch.  Also, the installation process is quite a bit different than a traditional tile floor.
 

Congoleum DuraCeramic Tiles

 
With our dark cabinets and granite with a lot of movement, we wanted to pick a simple-patterned, light-colored tile.  I returned to my favorite flooring guy, Chad, at CarpetOne here in Durham, NC.  He provided me with every light color tile sample they had in the DuraCeramic, and from those, we picked 3 we liked best.
 
He even let us take those tile samples with us to look at granite so that once I picked my Atlantis granite slabs, I could pick my tile and order it.  We ended up selecting the “Sunny Clay” because it picked up the gold flecks in the granite we purchased.
Congoleum DuraCeramic Sunny Clay
 
Before they could install the new flooring, Alaina and Dirk had to pull up the old flooring.  Let’s stare at Dirk in complete awe for a moment, because ripping up FIVE layers of multi-flavored linoleum is NOT EASY!
 
Step 1:  Vigorous enthusiasm.

Tearing Out Floors

 
Step 2:  Quirky delirium.

Ripping Up Floors

 
Step 3:  Sheer exhaustion with a hint of annoyance directed at the person standing around taking the pictures.

Replacing Subfloor

 
Okay, back to Alaina.
 
We prepped our subfloor by cleaning it as well as we possibly could and actually ended up replacing some of it – due to rot from unnoticed small leaks.  It happens in an older home.
  
Then, in order to tie down some of the dust generated from the drywall, we primed the floor using a latex (not lamb skin?) primer.
 
Typically for a more square room, instructions recommend that you chalk-line the center of the room, but because our kitchen involved several doorways and paths, I did 3 chalk lines:
  • From the back door to the doorway at the bottom of the stairs
  • From the center of the main kitchen area
  • From the center of the doorway into the butler’s pantry

Here’s the nifty little chalk line tool, and uh… the chalk?

Chalk line tool

Then I plotted out all of the tiles so that I would know that the end of a row wouldn’t leave me with a tiny sliver of a tile.  This is a VERY important step, my friends!  As a seasoned tiler myself, you do not want to skip this dry-run, or you could find yourself making some very awkward (and visually unappealing) cuts at the end of a row.

Laying Out Tiles

Laying out duraceramic tiles

Because I had worked with this product before, and I had some more difficult cuts to make around the door trims, I “dry fit” every tile alone my initial path into place.  I made all of the cuts I needed and though it took me a bit longer than I expected, I am definitely happy that I did.  Trim sucks.

Bonus!!  Because these aren’t hard like porcelain or ceramic tiles, you do NOT need a tile saw or nippers to cut these.  A sharp knife will do the trick.

Cutting congoleum duraceramic tiles

Then I FINALLY got started with the glue!  Another big difference between this and traditional tiles – instead of dealing with messy mastic in small sections, Alaina applied special glue to the entire floor before beginning the install.  I glued my way over to the back door and from the butler’s pantry out to the kitchen.  Then I waited for the glue to tack up.  The 45 minute drying time is apparently just a suggestion, because it took more like 2 hours for it to tack up.  It was also raining that day so that might have had something to do with it.

glueing congoleum duraceramic tiles

Then, the first tile was laid into place, and the rest followed shortly after.  I separated my tiles out into the two patterns so that I could ensure I staggered them and turned them so they would look more like a ceramic tile.  (Way to finally make it look like you did some work, A.)

How to install congoleum duraceramic tiles

Dirk was a big help not only laying tile, but keeping me motivated to keep going until we had finished the project!  Oh did Dirk help?  I thought he just stood around taking pictures while you did all the work…

Grouting occurs within 48 hours of setting the tiles.  To do this, get your pre-mixed Congoleum grout, a grout float, a large bucket of water, a sturdy sponge and LOTS of patience.

Grouting congoleum duraceramic tiles

Grouting took almost as long to do as the tile installation, but when it was done, I had a very happy husband.

One final step was to remove the grout haze by taking an ammonia based window cleaner and scrubbing each tile, removing the cleaner with plain water.  And brute strength.

Remove grout from tiles

One more step big step complete!

You can see this is a bit of a tedious DIY process, but the end results are well worth it.  All the beauty and durability of a tile floor, but a much more comfortable standing surface.  Nice work, guys!  We can’t wait to see how everything comes together!

Something Went Right

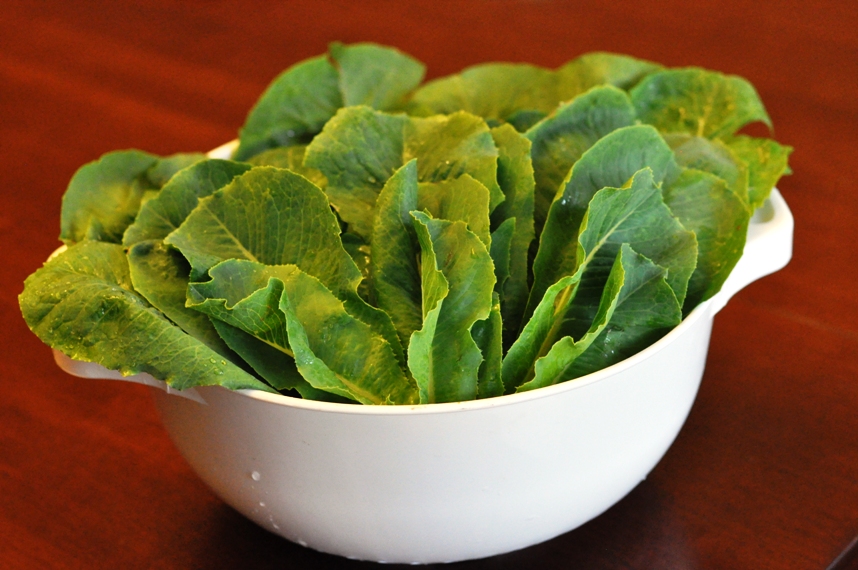
I just made a salad with this:

I grew it myself.

I accidentally touched the cilantro when I went out to cut this.  Now my hands stink.

Note to future self:  Don’t grow cilantro.

Scene of the Crime

For right now, I’m keeping my “Choose My Own Adventure” poll open.  Thanks to those of you who voted so far, and for those of you who’ve stopped by but haven’t, why the f*** not??!  Please go vote immediately.  This is my future we’re talking about.  (Dramatic, much?)

We remodeled our guest bathroom about 2 years ago.

Here’s what it looked like when we moved in (unfortunately I didn’t have a wide-angle lens at the time – or for that matter a DSLR camera – just my little point-and-shoot, so you only get snippets):

Kate's Guest Bathroom Before

The above picture was taken while standing in the bathroom doorway facing slightly left.  The doorway you see ahead/to the right leads into the laundry room with the lovely forest-green aluminum blinds.  (By the way, if you’re ever showing your home for sale, please do not leave the toilet seat up.  It’s unseemly.)

This is looking straight into the bathroom and through to the laundry room.  You can kind-of, sort-of see the fugly, almond-colored bathtub with brass shower doors to the right.

Kate's Guest Bathroom Before

Here’s a better look at that bathtub/shower combo:

Kate's Guest Bathroom Before

We removed the confining shower doors almost immediately after moving in (that tub is tiny), but we were left with an extremely unpleasant shower door residue/fungus/mold-like substance, the likes of which I will share throughout the progression of this remodel.

And we can’t forget the huge-bulb brass light fixture with the charming paisley maroon wallpaper:

Kate's Guest Bathroom Before

The whole thing took us maybe 6 months to complete, and that’s NOT if you count the attached laundry room.  Which is just about done.

Oh, and we still have to paint all of the trim (in the ENTIRE HOUSE!).

Ahem.

Anyway, if you compare this to our kitchen remodel, the hubs and me taking 6 months to complete a project is not a shocker.  In fact, it’s almost timely.

So, did a gruesome murder happen in my bathroom?  Not exactly.  But, here’s what our guest bathroom looked like for probably 5 out of those 6 months:

Kate's Guest Bathroom Crime Scene

As one friend put it, “This looks like a crime scene.”

I promise you I’m not embellishing.  We seriously had guests stay at our home and shower in this bathroom while it looked like this.  It looked like this for a long, long time.

I have no shame.

Kate's Guest Bathroom Wallpaper Removal

What can I say?  We were naive, enthusiastic first-time home-buyers when we made this purchase.  We were excited because only one room had wall paper (this room), and our master bathroom just had a wallpaper border.  We thought we were getting off easy.

But this. room. was. hell.

In all its fury.  In my version of hell, I would be removing paisley maroon wallpaper for all of eternity.

Kate's Guest Bathroom Wallpaper Removal

Here are the tried – and failed –  methods with which we attempted to remove the wallpaper:

  • Dry peeling (simply using a putty knife and our fingers to pull off the stubborn paper)
  • Spritzing with water and then peeling
  • Spritzing with a vinegar/water mixture and then peeling
  • Spritzing with Dif Gel wallpaper stripper (two different formulas) and then peeling
  • Using an electric steamer (borrowed from our neighbors) to harness the power of heat and moisture and then peeling

Nothing worked.  Nothing.

Finally, the hubs ended up taking an orbital sander to the bathroom walls.  He quite literally sanded the whole mess off the surface.  This worked, by the way.

I realize this doesn’t fall withing the traditional code of wallpaper-removal methodology, but you can’t blame us.  We were at our eye-twitchingly wits-end.  My fingernails were navy/maroon paisley.

You. Can’t. Blame. Us.

So no, a murder did not happen in this room (that we know of).  But a double-suicide?

Almost, my friends.

Almost.

Sophisticated Kate

I finally did it.  Bit the bullet.  Achieved a dream (other than this) that I’ve had for awhile. 

I bought some art in Hawaii.  Three pieces, to be exact. 

And for someone as fickle as me, this is quite a big deal.  See, until this point, there are 2 things that have held me back from ever buying art (other than bookstore posters during my college years and mass-produced prints from places like Kirkland’s that end up getting shoved in a corner of my closet because I can’t bring myself to hang something meaningless): 

1.  Money.  Original paintings (since that’s mainly the type of art to which I’m referring), can be gastronomically expensive.  Understandably.  You’re essentially buying a piece of a person’s soul to hang over your mantel for your friends to discuss its merit over a glass of merlot.  Talk about putting yourself out there… 

2.  Indecisiveness.  I can’t decide on a meal to cook more than 3 hours in advance, let alone art that will represent my personality, mood and taste (or lack thereof) for the rest of my life.  It’s too much pressure.  That, and I tend to love practically everything I see.  Who am I to decide which is better than the next? 

But then I realizedmost collections start small.  I don’t have to have a huge original oil painting the size of my mattress in order to be moved.  And my art doesn’t even have to be original, for that matter.  And the indecisive part of me is never going to change.  If my tastes/desires/moods change over the course of my life, then what I buy today will simply represent who I was at that particular moment in time.  And that, my friends, is the point. 

(Am I deep tonight, or what??) 

Okay, two of the pieces are actually very inexpensive prints of real art, but hey.  We’re not made of money. 

I think I was drawn to the first for its colors. 

Kellie MacQuoid Print
(Click photo for link to artist's website)


It’s surreal, almost dreamlike, very calming… with just a hint of trippy.  Perfect. 

Kellie MacQuoid Print
(Click photo for link to artist's website)


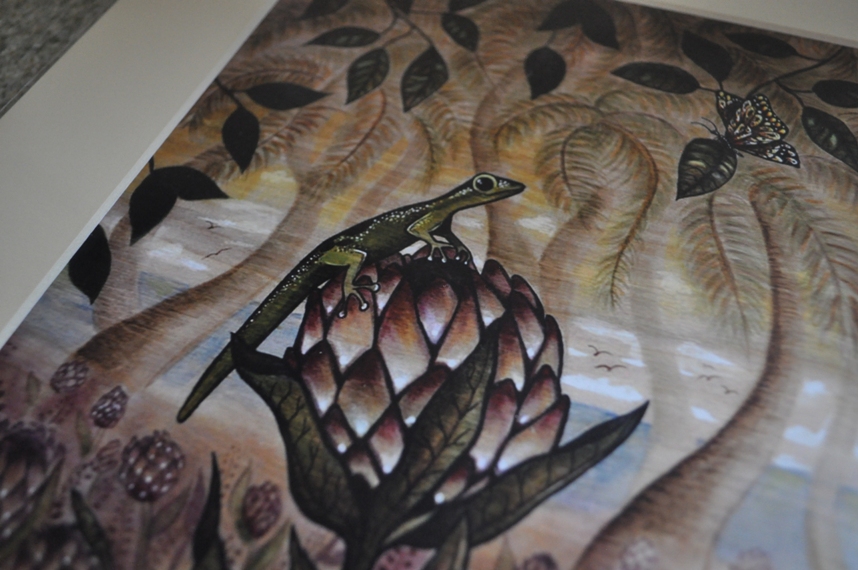
I love the detail with the birds (seagulls?) in the background and the horizontal texture running across the sky and trees.  I love that the flowers look like pink artichokes and the leaves of the ferns aren’t attached to the stems. 

Kellie MacQuoid Print
(Click photo for link to artist's website)


It doesn’t scream Hawaii to me (at least my experience of Hawaii), and that’s okay.  In fact the artist, Kellie MacQuoid, lives in California.  The palm trees… the ocean… the lizard… the inspiration is still clear.  Exotic, coastal beauty.  On acid. 

I would LOVE to own a real one some day.  Or maybe even a giclée (I use this term to try to sound art-smart, which, I assure you, I’m not), if an original is beyond my reach.  It never hurts to dream, right? 

The second print will completely take you inside my head. 

(Ha-ha, no I’m not about to show you a photo of a blank picture frame.  I know what you’re thinking, and you’re mean.

The style seems like a dream.  No details, just memory. 

But really, it’s the subject itself.  The surfer girl… she’s in one of the most beautiful places in the world, she’s got this big ocean in front of her, and all she has to do is jump in.  She’s free to do anything she wants. 

Heather Brown Print
(Click photo for link to artist's website)


I would love to be the girl in the painting.  Heather Brown, the artist, seems like a phenomenal person.  She lives on the island of Oahu, surfs and paints for a living, is absolutely beautiful, and is basically living the dream.  I saw a few of her originals and several giclée prints in some of the Oahu galleries.  I drooled.  But only a little. 

It looks like she signed the matte of the print, although I’m not sure if that’s just a stamp… 

Heather Brown Print
(Click photo for link to artist's website.)


I want to be there again.  And since I can’t (or won’t?), this print might get me close. 

Heather Brown Print
(Click photo for link to artist's website)


Because these prints were a standard size, all it took were some inexpensive frames from Target to complete the look. 

Target Picture Frames


I removed the mattes that came with the frames and used the ones that came with the prints: 


Now all I have to do is hang ’em!  Give me another year or so and I might find the perfect place (ha). 

For now, they’re both in my kitchen, sitting up against our (finally) completed backsplash.  I actually kind of like them in here, because I see them every day. 

And finally, the real painting. 

Ican’tbelieveIownarealpainting!!! 

It’s an original.  (Imagine me saying that with my nose stuck up in the air.) 

I walked into this little gallery in the small, beach-front town of Hale’iwa on Oahu’s North Shore.  Inside the owner displayed works from several artists, including her husband, the local candle maker.  It was the art of Dennis McGeary, however, that caught my eye. 

I was initially drawn to a a large, abstract piece, very similar to those in the top 2 rows of this page.  It appeared different every time I looked at it.  Once I saw a waterfall.  Then an ocean.  Then the wind as I fell from the plane.  Then the mountains.  It was continuous, and I loved it.  I can’t describe it. 

I realized this piece, while extremely reasonably-priced for an original oil painting, was just more than we could justify spending at this point in our lives.  But then I was drawn to a much smaller piece, more decipherable (and less interpretive) in its subject, but still intriguing. 

Dennis McGeary
(Click photo for link to artist's website)


An Oahu coastline.  Tropical forests.  Jagged mountains.  But, when viewed a little differently, a serene underwater-scape.  Colorful coral.  Reflections off the surface. 

Dennis McGeary
(Click photo for link to artist's website)


And look!  Brush strokes!! 

Dennis McGeary Original


I own something with brush strokes besides my painted window trim! 

Dennis McGeary Original


And it has a signature.  A real signature. 

Dennis McGeary


Is it weird I’m so excited about this? 

I’m sorry to get all artsy-fartsy on you tonight, but I can’t help it.  I just finished a glass of red and I’m too sophisticated for words. 

All of this is still made worse by the fact that I still want to move to a van on the North Shore.  I’m still working to convince the hubs it would be a good idea.  We can survive on some rice, our wits, and our passion for life, no?  (Okay, maybe I shouldn’t have read Into the Wild during our vacation.  The combination appears to have been toxic.) 

But I figure first we’ll finish remodeling this place… one thing at a time, right? 

One thing at a time.