Navigate / search

I Dip, You Dip, We Dip*

I know what you’re thinking right now.

“Say what?”  you’re asking yourself.  “Erin’s writing this post?  I didn’t even think she had a kitchen.”

And I know, right?  Everything about this seems to fly in the face of conventional logic.  It’s like we’ve suddenly been thrust into some crazy alternate universe where plants eat people and cats chase dogs and I know anything about food preparation beyond how to read the instructions for microwaving.

Yet here I am, about to give you folks a recipe.

Ok, it probably doesn’t hurt that this is just about the easiest, most foolproof recipe on the face of the planet and requires absolutely no use of the oven, which is good, because that’s where we keep our board games.

Katie introduced me to these dessert balls when she brought them in for a work potluck and a fistfight almost broke out over them (okay, so I started it–but I can’t help that I get territorial about food).  And since I’m going to an honest-to-goodness slumber party tonight, I decided that it would be the perfect occasion to share the disgustingly decadent wealth.

The original recipe can be found on Tasty Kitchen.  But my version comes with witty commentary.  So there.

Anyhoo, hang onto your panties, people, cause away we go…

Chocolate Chip Cookie Dough Truffles

You’ll need to somehow procure the following ingredients.  Go to the grocery store, steal ‘em from your neighbor’s house, whatevs.  I’m not here to judge:

  • 2-½ cups All-purpose Flour
  • 1-½ teaspoon Baking Soda
  • 1 teaspoon Salt
  • 1 cup Butter (at room temperature)
  • ¾ cups White Sugar
  • ¾ cups Packed Brown Sugar
  • 1 teaspoon Vanilla
  • ⅓ cups Milk (or Soy Milk, if you’re feeling funky)
  • 1 cup Mini Semi-sweet Chocolate Chips
  • 14 ounces (weight) Dark Chocolate Candy Coating
  • Waxed Paper and a Baking Sheet or two (this recipe makes about 70 truffles)
  • A few Toothpicks, or some other stabby device

Got everything?  Ok, let’s do this.

1. Dump your butter, sugar and brown sugar into a large bowl and mix with an electric mixer on low to medium speed until everything’s well blended.
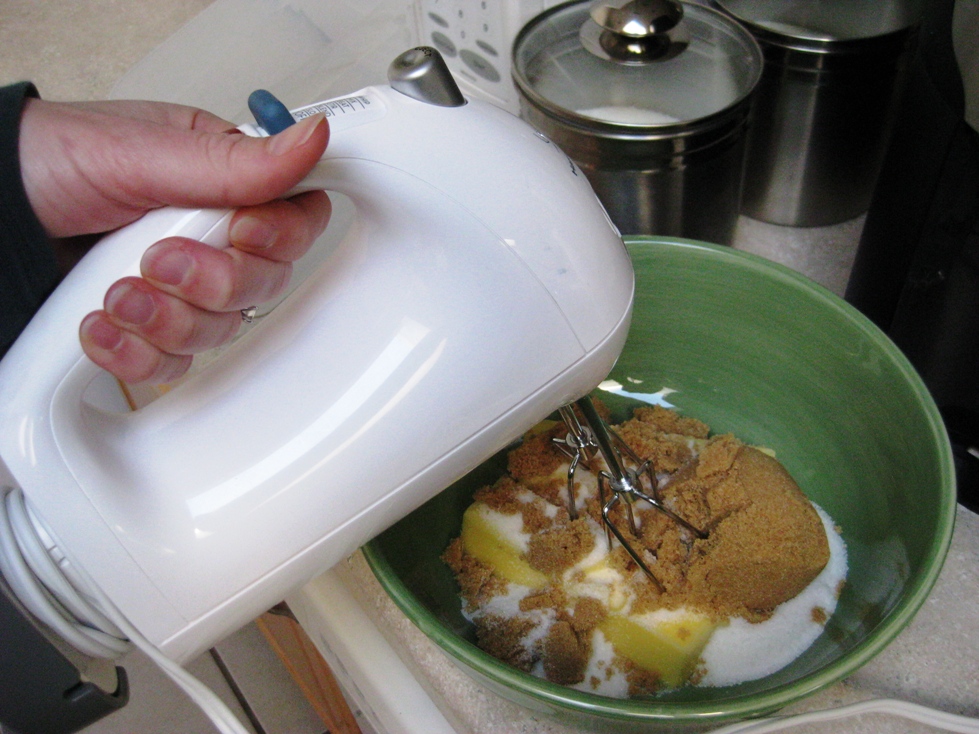
It should look like this:

By the way, this is an egg-less recipe so feel free to eat all the dough you want while you’re making it.  Not that the threat of salmonella has ever stopped anyone before, amiright?

2. Add in the milk and vanilla.
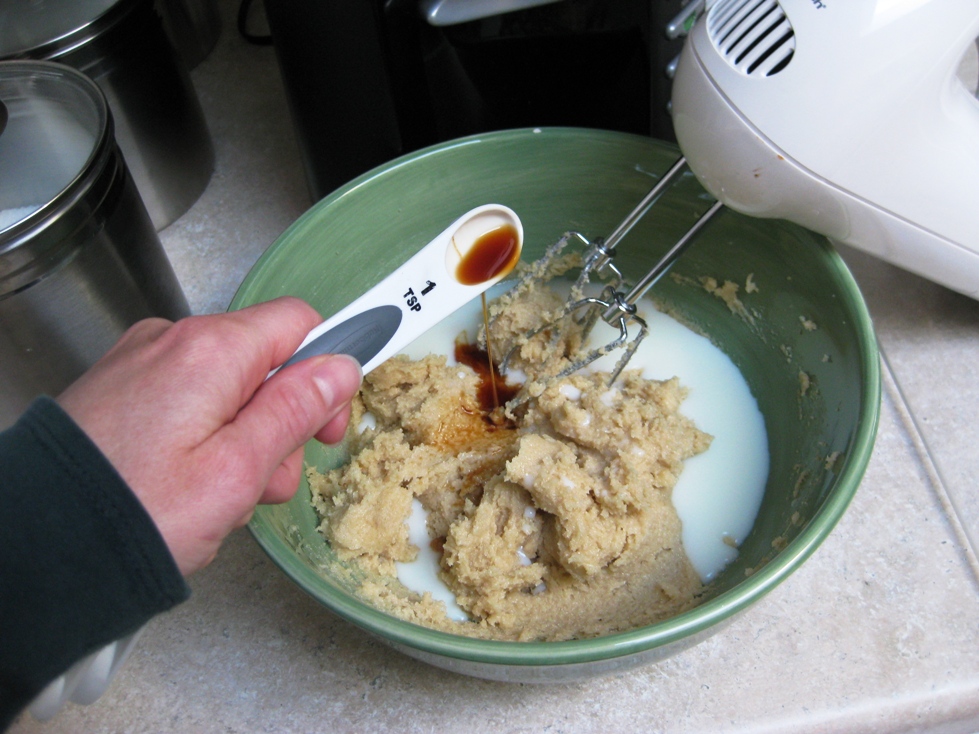
3. Then stir in the baking soda, flour and salt.

Expert Tip:  If your bag of flour still doesn’t open after the third attempt, feel free to go all Hulk Mania on it and accidentally punch a hole in the side of the bag.  It won’t help anything, but it’ll relieve some stress.
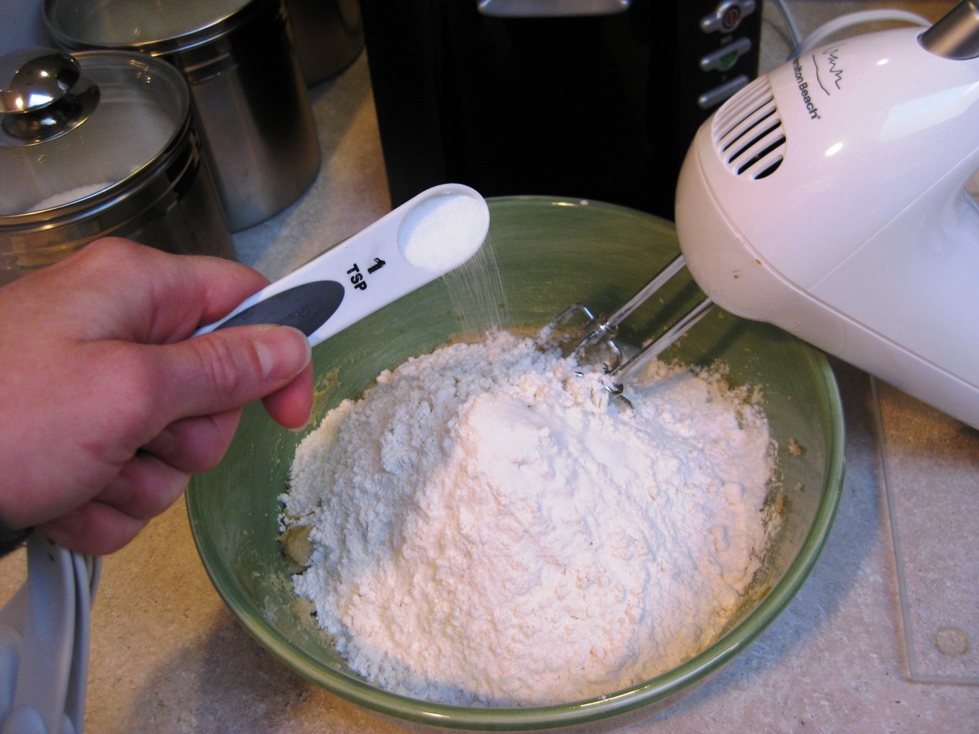
4. Put your bowl in the kitchen sink to contain the mess and mix all that nonsense on low speed until it looks like this:

I get to lick the beater now, right?

5.  Dump in the chocolate chips and spoon-stir until they’re well mixed.

6.  Here’s where you’re going to get a little ‘handsy’ (in a good baking way, not a creepy-stranger-on-the-bus kind of way).  Form one-inch balls of dough and place them on a baking sheet lined with waxed paper.   It may help to lightly coat your hands in flour before trying this.
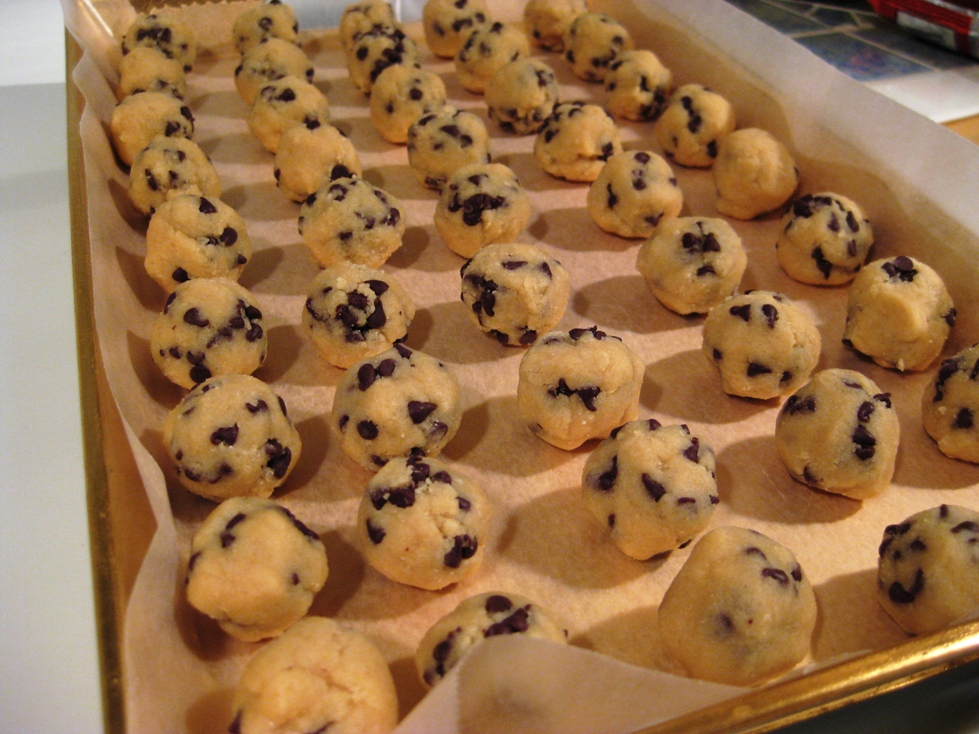
7.  Now stick those suckers in the freezer for 30 minutes and take some time to contemplate the crazy world we live in where I’m doling out useful recipe advice.  Hah!  Insanity, right??

8.  Also during this downtime, gets to melting your Dark Chocolate Candy Coating according to the instructions on the package.  I used Log House Chocolate CandiQuick Coating, which just so happened to come in its own microwaveable tray.  Um, fewer dishes to wash?  Holla’!

9.  Once the chocolate is nice and gooey and thoroughly melted, resist the urge to plow face-first into it, pull your balls out (huh huh) of the freezer and get to dipping!  I used a toothpick because, well, I’m just fancy like that.  But you can use a fondue stick, fork or whatever sharp, stabby utensil works best for you.

**A Word of Caution:  If you’re anything like me, this part will get extremely messy so I recommend treating your kitchen like a murder scene.  Put a heavy-duty tarp down on the floor, cover everything on your counter in saran wrap and put on a shower cap.  Go naked if you must.  (Just don’t tell anyone you did until after they’ve already tried them.)**

10.  Dip each cookie dough ball  individually, tap the excess chocolate off, and return it to the lined baking sheet.

My balls started getting soft (huh huh) and unmanageable halfway through, so I just popped them back into the freezer for another 15 minutes and reheated the chocolate a bit.

11. Once they’re all done, put the tray in the fridge and chill them until the chocolate coating’s nice and firm.  Transfer them to an airtight container and store them in the fridge for up to one week.

And I shall call you “Breakfast”.

Voila!

Now go forth and make as many ball-dipping jokes as you can.

* By the way, I had a way nastier title for this post but it made even me blush so I decided to keep it to a clean Old Skool rap reference.

To all the impressionable children reading this blog:  You’re welcome.

And: Where the heck are your parents?

Are YOU a Chili Racist?

I’m not gonna lie – Erin’s Halloween post from yesterday cracked me up.  I must say her Halloween looked far more entertaining than my night, during which I proceeded to drink an entire bottle of shiraz and pass out candy at my neighbor’s house because they actually decorated for the holiday and I felt it was far easier to mooch off of their hard work and holiday spirit than actually do any work of my own.  Don’t worry – I hid my wine glass behind the porch railing every time the impressionable little kiddies approached, but I may have laughed a little too loudly when my neighbor’s husband told a costumeless teenage boy he looked like Justin Bieber.

Yes, I was that girl.  I’m not proud.

Anyway, I think my lack of enthusiasm for yesterday’s holiday might stem from what it subconsciously implies – the cold is right around the corner.  When I came home from Costa Rica, I noticed the leaves had started turning colors.  I tried my best to ignore it.  When I had to pull the heavy quilt over myself in the middle of the night, I tried to ignore that too.  But the other night, when I felt compelled to make chili for dinner – chili, for godssake – I could ignore it no longer.  The Cold is here.

And since I don’t want to be alone in my misery, I’m going to share my white chili recipe with you – my AWARD-WINNING chili.

That’s right – this recipe won the coveted Golden Ladle at my office chili contest in 2009.  It even won a few votes in 2010, even though I wasn’t allowed to enter the contest as the reigning chili champ.  Now those of you who can’t get enough of traditional, spicy red chili might initially repel the idea of a relatively un-spicy white chili.

But I will tell you what I told the skeptics during my Golden Ladle acceptance speech:  Don’t be a chili racist – give white chili a chance!

I think I originally got this recipe from a grocery store, believe it or not.  I don’t tweak this much, so here’s what you’ll need:

White Chili Ingredients
  • 1 lb. sausage (I use Jimmy Dean’s hot sausage)
  • 1 lb. (give or take) ground turkey (the more you use, the thicker your chili will be.  You can use as little as 1/2 lb. and go as high as you want – I think I used just over a pound this time because I like my chili nice and thick)
  • 1 green bell pepper
  • 1 onion
  • 4-5 small stalks of celery
  • 1 Tbsp. roasted garlic (it’s actually really easy to roast garlic yourself, but I already had the jar of store-bought stuff and for the purposes of this chili, it works just as well)
  • 1 package of taco seasoning
  • 2 (15.8 oz) cans of great northern beans
  • 1 (14 oz) can of chicken broth
  • 1 (4.5 oz) can diced green chiles (the store was out of these, so I picked up 4 fresh green chiles and diced them myself – a little more work, but still tasty)
  • 1 (16 oz) can of refried beans with diced green chiles (This is the SECRET INGREDIENT, friends.  That’s right – it’s the thing that people love when they taste it but can’t quite figure out what it is.  Whatever you do, don’t skip this ingredient – it’s okay if you can’t find the kind with chiles – and DON’T tell them what it is!)

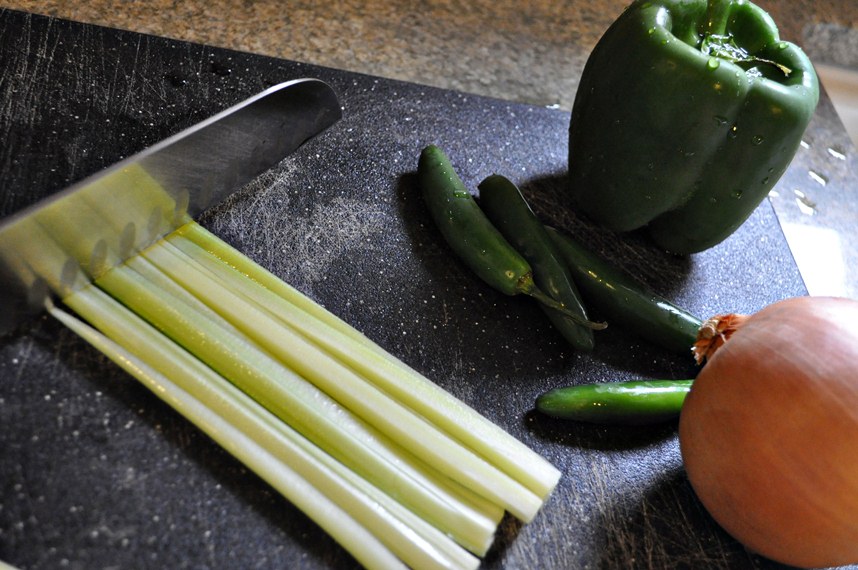
1.  Turn on your favorite satellite music station and dice up your celery, onion and bell pepper.  You should definitely sing while you’re doing this, but be careful about dancing – you are wielding a knife.

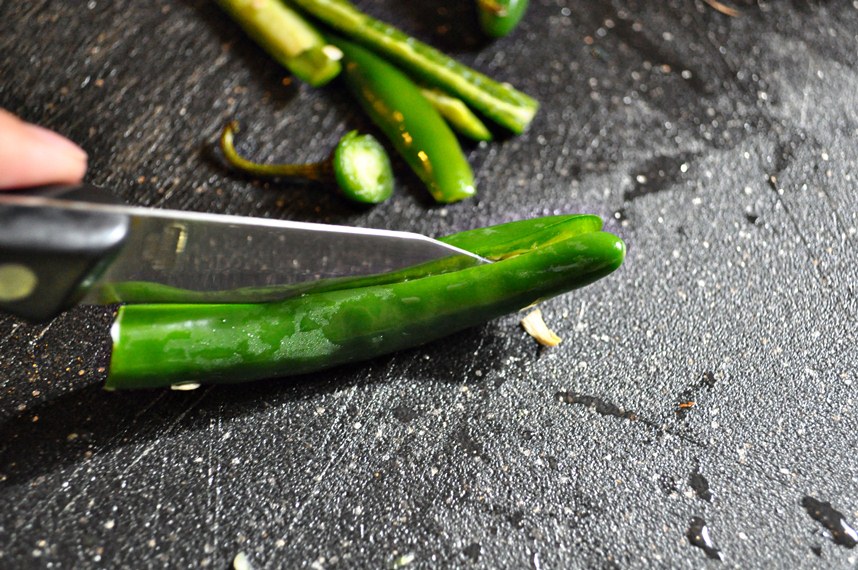
2.  If you bought fresh chiles, go ahead and dice those up as well.  Wear gloves if you’re smart, but if you’re me, forget the gloves and slice them into quarters lengthwise, slice off the seedy membrane part, and then chop up the rest.  That stinging sensation on your fingers will go away.  Eventually.

Everything’s ready!

3.  Warm up a pot over medium-high heat.  Add the sausage, turkey, onions, celery and green bell peppers.  If you’re using fresh chiles, add those too at this time.  Sauté everything for 10-12 minutes until the meat is fully cooked and the veggies are soft.

4.  Drain the excess grease, then stir in the taco seasoning.  Cover and let cook for about a minute, just to let all the tasty seasoning goodness soak into the meat.

5.  Remove cover and stir in the remaining ingredients (roasted garlic, northern beans (including liquid), refried beans, chicken broth, and the can of chiles if you didn’t use fresh).

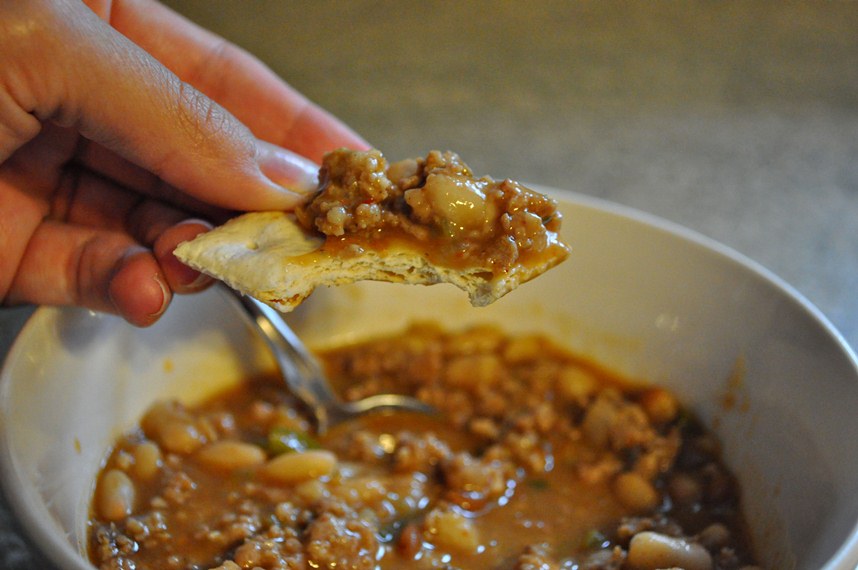
6.  Let sit on the stove, stirring occasionally, until everything is nice and warmed through.  Serve with your favorite hot sauce on the side and enjoy!

California, Here We Come

Before you get too excited, no, we are not going to California.

We are in Costa Rica right now, people.  Why would we go to California??

The title of this post will make more sense later.  Moving on.

Recently I’ve realized that aside from this:

And these:

Running Dogs

One of the things I’ve absolutely missed the most while living in Costa Rica is cooking.  And I’m not even that good at it.  It was just fun to do.  Therapeutic, even.  Man, I feel sorry for anyone who has to live with me when I don’t have my cooking outlet *cough*Erin*cough*.

Even though Judy has graciously offered us the use of her gorgeous kitchen (which I hope to show you at some point), the budget constraints that Erin and I have placed on ourselves have limited our main course dinners to primarily beans, rice, potatoes, or some combination thereof.*  We’re not missing out on our starches here, folks.

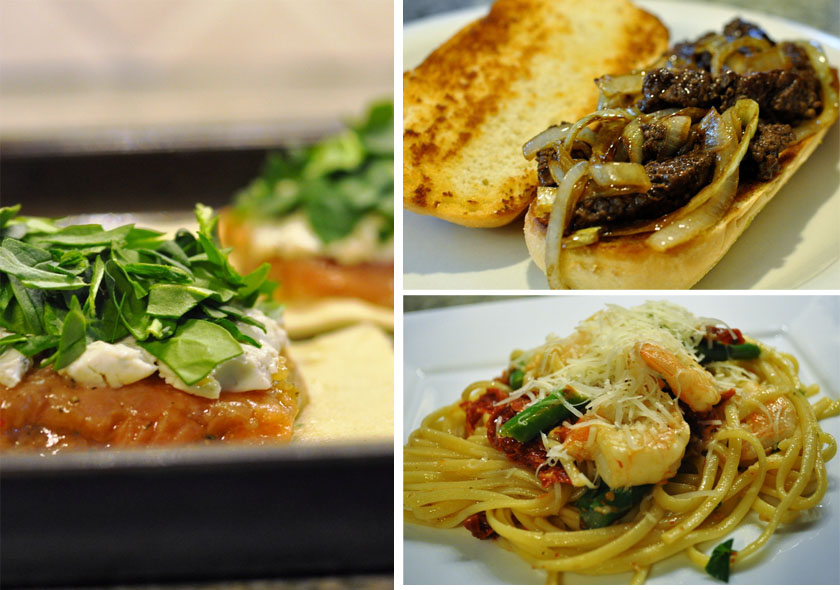
So in my nostalgia, I’ve found myself perusing recipes online and making lists of things I want to try concocting when I get home.  I’ve also been looking through the recipes I’ve already posted on this site.  I constantly crave things like that Shrimp, Asparagus and Sundried Tomato Pasta I showed you once, or those Spinach Salmon Bundle things that kicked off the whole food portion of this site in the first place.  Oh, and this Steak Sandwich.  I could definitely use a steak sandwich right about now.

Spinach Salmon Bundles, Cube Steak Sandwich, Shrimp Asparagus & Sundried Tomato Pasta

Crap I just drooled down my shirt.

Anyway.  I was going through my hard drive and found some photos of recipes I haven’t yet posted. Whoah.  I had forgotten all about them.  And they instilled feelings in me – feelings I haven’t felt in a long, long time.

So I’m going to share one with you today.  This is one of my all-time favorite summer/fall recipes.  And even though it’s meatless, it’s completely appropriate for company.  Even big, burly man-type company has always devoured this dish.  I don’t know why, and I don’t question it.  It’s simple and delicious.

The original recipe makes actual sandwiches, but I prefer to serve these open-faced.  You can find the original here.

California Grilled Veggie Sandwich

To make these (the way I make ’em), you will need:

  • Olive oil or balsamic vinegar (If I grill the veggies, I use olive oil.  If I sauté ’em, I use balsamic vinegar.)
  • 1 medium zucchini, sliced
  • 1-2 small yellow squash, sliced
  • 1/2 small red onion, sliced
  • 1 red bell pepper, sliced (sometimes I leave this off – it looks pretty, but there are already more than enough veggie toppings without them)
  • 1/4 cup mayo
  • 3-4 cloves of garlic, minced
  • 1 Tbsp. lemon juice
  • 1/2 cup crumbled feta cheese
  • Thickly sliced sourdough bread
Zucchini, Squash and Red Onion

Once you have your ingredients together, it’s time to get messy:

1.  Slice up all your veggies.

Sliced Veggies

2.  I often use an indoor grill to cook my veggies.  I grease the grates with olive oil and preheat it around medium-high.  For a less-tedious method, I sometimes saute the veggies with a little bit of balsamic vinegar.  Really, you can cook them any old way you want.  Just get them cooking!

Oil Grill Grates
Grill Veggies

3.  While the veggies are cooking, mix together your mayo, garlic and lemon juice and spread evenly onto 2 large pieces of the sourdough bread.  Then sprinkle on some feta cheese.

Sourdough Slices

4.  If you’re grilling your vegetables, check to see if the first side is done.  If it is, flip ’em on over.

Flip veggies
Grilled Veggies

4.  You can wait until your veggies are done cooking and re-use the indoor grill, or if you’re impatient like me, go ahead and get your grill pan oiled heating on the stove over medium heat.  Place your slices of sourdough bread on the grill pan, then cover it with some type of lid.  The goal is to get the feta cheese nice and melty.  (It’s not going to actually melt into a goo – but it should get nice and soft.)  This will also toast the bread.

Toast bread and melt cheese

5.  If your veggies get done cooking a little early, just set them aside in a bowl and cover to keep warm.

Bowl of veggies

6.  Once the bread is toasty and the cheese is melty, top the slices with your grilled veggies and enjoy!

California Grilled Veggie Sandwich

I know they don’t look like much, but there’s something about this mixture of toppings that makes these taste phenomenal.  Even Erin, who purportedly “hates” mayo, will gobble up these sandwiches.  If you try them, let me know what you think!

*Correction:  We usually do eat some combination of beans and/or rice for dinner.  However, sometimes our completely awesome boss makes a kickass meal and generously shares it with us.  He is a fantastic cook and we are ALWAYS grateful when he shares his masterpieces with us.

I Want It That Way. With Mushrooms.

I’ve mentioned before that when I first got into this blogging business I had zero intention of posting recipes.  Ever.  I originally thought that would be like Elmer Fudd writing articles on behalf of PETA, or the Backstreet Boys trying to teach us the artistry of compelling lyrics.

It just didn’t make sense.

But then this happened.  It was back when I had a full-time job and was trying to write a new post every single day.  Back before I had an awesome writing partner to relieve the pressure.

I’d wanted to reveal our finished kitchen, but the problem was, it wasn’t finished.  So in a desperate attempt to fill some space, I showed you the (burned) spinach salmon bundles I’d made for dinner that night.  They were burned, people!  I’m so not good at this.  But for some reason, some of you told me you liked the post.  And some of you even tried the recipe.  Which is pretty damn cool.

So I started showing you more of my recipe endeavors.  Not because I’m a great cook – I’m not even a very good cook.  But like I said in that first recipe post:

I’m not really a “pinch-of-this, dash-of-that” type of person, but more of a “put-the-measuring-cup-on-the-counter-and-bend-down-to-eye-level-to-make-sure-I’m-getting-just-the-right-amount” type person.

Cooking doesn’t come naturally to me.  But I can follow instructions – if I haven’t had too much wine.  (At least Erin doesn’t have to worry about that nasty business anymore, eh?)  And I guess I’ve been justifying the continuation of the recipe posts by thinking there are more of you out there, like me, who’ve been afraid of cooking well into “adulthood” and just need a little encouragement in the way of pictures and “been-there-done-that” mess-up stories.

Because I’ve finally learned that IT’S OKAY TO MESS UP IN THE KITCHEN.

At least I hope it is, because I do it all the time.  So, I’ve come to you today with another recipe.  But if these are starting to bore you and you really couldn’t give two hoots about what I’ve stuffed into my expanding waistline last night, do let me know.  It won’t hurt my feelings – they aren’t even my own recipes!

But I do feel especially compelled to share what I made last night.  It was so… different.  So out of my usual comfort zone, and it turned out delicious, so yes.  I have to share.

Aside from acquiring some of the ingredients, it was deceptively simple to make.  It contained some of my usual friendly ingredients like pasta and butter.  But it also contained a couple I’d normally shy away from, like Japanese mayonnaise and chili garlic sauce.  I stopped at a local Asian market to pick up those things, and let me just tell you – I will be back.  The food they had there was incredible!  And scary.  But mostly incredible!  Oh, the sushi I could (attempt to) make…

So the original recipe that caught my eye yesterday can be found here.  The only thing I changed was cooking up a bed of pasta for the main dish.  You know, ’cause I like to keep it light.

Portobello Shroomies with Creamy Scallop Topping

Do NOT be scared of this concept.  Beef-less as it is, this was fit for company.

To make them, you will need:

  • 3 Tbsp. butter, divided
  • 4 large Portobello mushroom caps (My little po-dunk grocery store lets me buy these pre-packaged or in bulk, so you shouldn’t have a problem finding them.)
  • Garlic Powder
  • 1 Tbsp. butter
  • 2 lbs. scallops (I bought the super cheap 4 oz. bags of “mini” scallops.  They were 2 bags for $3, so I bought 4 bags.  Even though that’s only 1 pound, the amount turned out to be perfect to cover the mushroom caps.)
  • 1 cup Japanese mayonnaise (I bought the recommended Kewpie brand.  It has a freaky little cartoon baby on the front.  I hope this mayo isn’t made out of babies.)
  • 1/2 teaspoon chili-garlic sauce (They actually had this at the commissary on post, but I bought the jar at the Asian market.  I’m a wuss when it comes to spicy food, but I actually wish I’d added a bit more of this.  The flavor was great, and I found the mayonnaise a little overpowering.)
  • 2 Tbsp. green onions, chopped
  • 8 oz. linguine (optional)
  • Drizzle of olive oil (optional)
Portabello Mushroom Cap Dinner

*Missing from team photo:  Garlic powder and pasta.  I think they were spotted fooling around under the bleachers.

Directions:

1.  Defrost your scallops (assuming you’re not lucky enough to live somewhere you can get fresh seafood and had to buy frozen) according to the package directions.  And if you decided to make a lovely bed of pasta for your shroomies, go ahead and get your water boiling.

pot of water

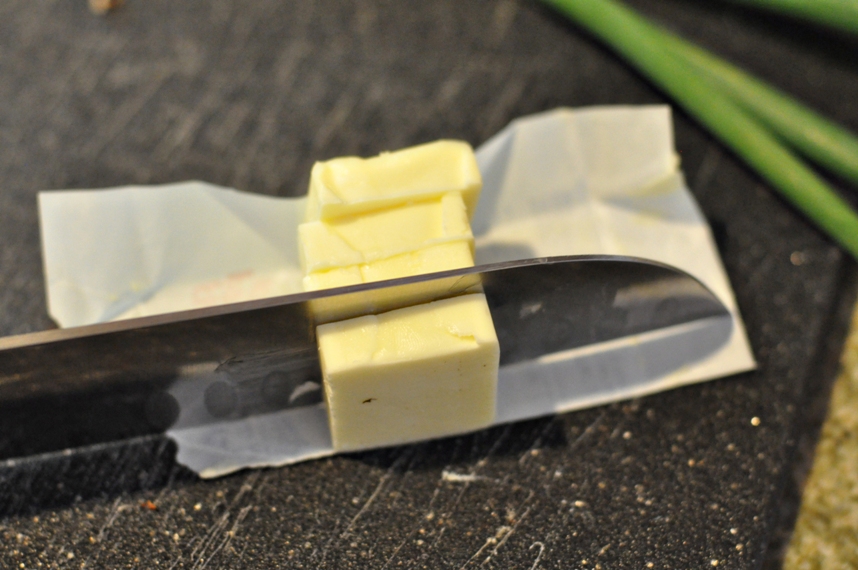
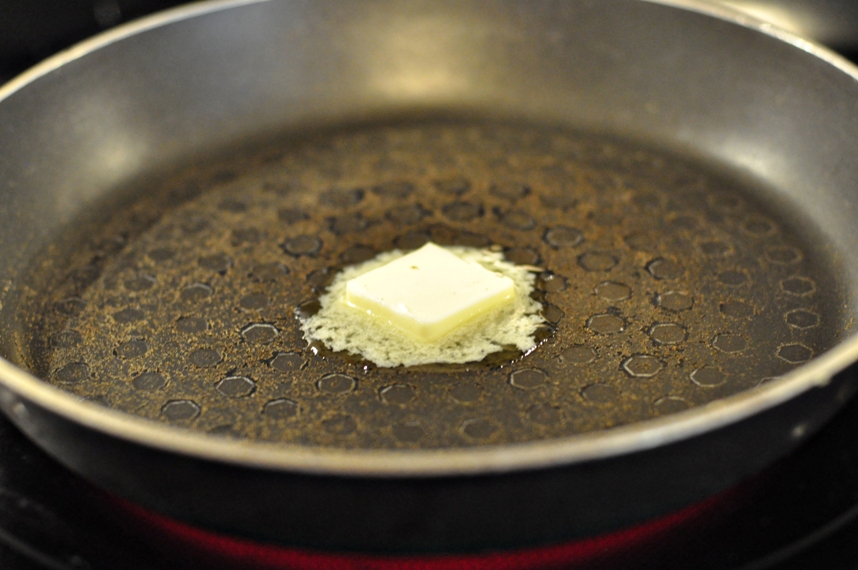
2.  Thoroughly rinse your Portobello mushrooms.  Don’t be scared of the gills – they actually feel kinda good to the touch.  (Is that weird??)  Divide the 3 Tbsp. of butter into 4 equal pieces.  Melt a piece in a sauté pan over medium-high heat, then add a mushroom cap and cook until soft in the center.  (This took approx. 2-3 minutes per side for me.)  Repeat with the remaining mushroom caps and butter.

Divide Butter
melt butter in pan
cook portabello caps

*I found this to be a bit meticulous.  If I make this again, I’ll probably use my large grill pan and cook all 4 caps at once.  Cooking them one at a time forced me to rinse the pan between mushrooms because the butter would begin to burn.

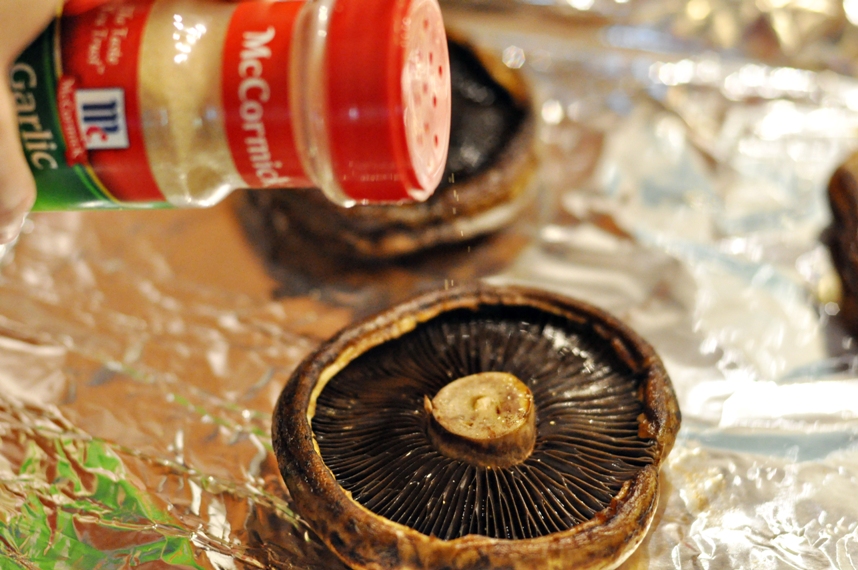
3.  Line a baking sheet with aluminum foil.  As the mushrooms cook, place them on the sheet gill side up, so they make little “bowls.”  Mmmmm… fungus bowls.  Generously sprinkle them with garlic powder.

line pan with foil
garlic powder

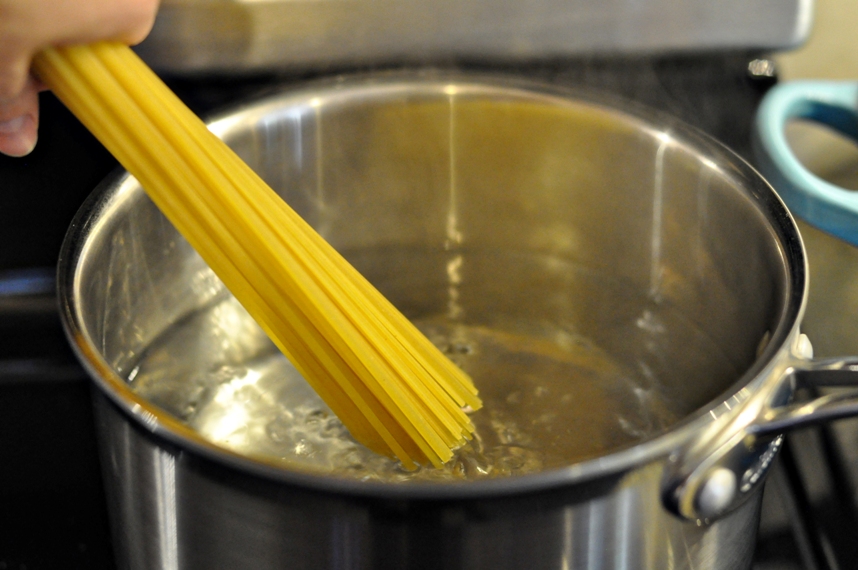
Oh, and your pasta water should be boiling by now, so salt it and add the linguine.

cook linguine

4.  Preheat your broiler and set the oven rack about 6″ away from it.  Do you use your broiler?  I do all the time.  It’s FANTASTIC.  Just remember to leave your oven door cracked open a couple inches while your food cooks.  That’s all there is to it!

5.  Melt the last tablespoon of butter in a skillet over medium-high heat and sauté your scallops until they’re lightly browned.  If you’re using larger scallops, they’d probably be great seared.  But mine ended up kind of boiling in the pan because they were cheap and frozen and filled with water.  No worries, though – they still turned out great.

cook scallops

Fill each mushroom cap with the scallops.

6.  In a small bowl, mix together the cup of Japanese mayonnaise and 1/2 (or more) teaspoon of garlic chili sauce.

mayo sauce

*Be careful not to let go of the foil top of the chili sauce while you’re opening it, lest you splatter red sauce all over your counter and walls.  I’ve been putting my backsplash to good use.  But that’s probably just me.

chili sauce splatter

This Kewpie brand Japanese mayo looked strange. It came in a very flimsy plastic bottle inside a loosely wrapped plastic pouch.  But the mayo itself was very similar in consistency to the mayo we’re used to – just a bit of a different flavor and probably worth purchasing if you’re going to try this recipe.

Japanese mayonnaise

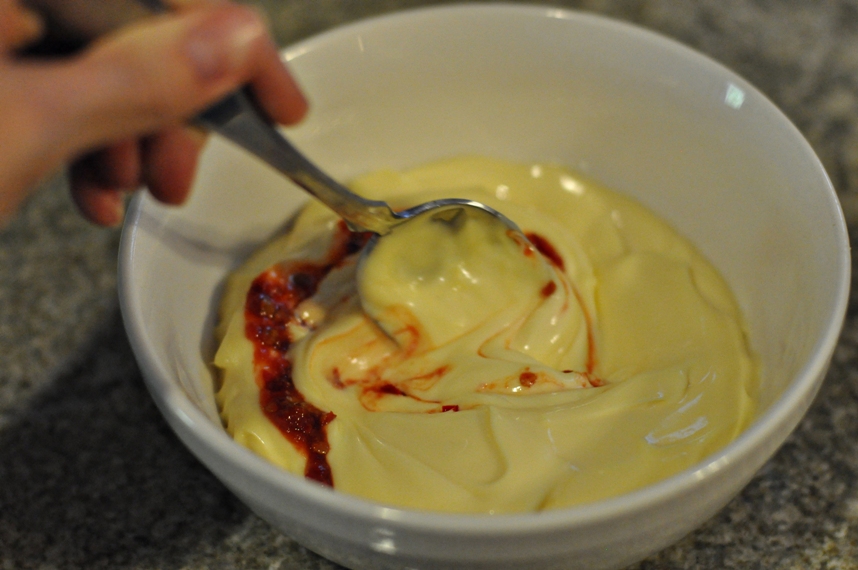
Anyway, mix the mayo and chili sauce together and spoon that mixture over your scallop-filled mushrooms.

mix mayo sauce
spoon sauce over scallops

7.  Stick the pan under the broiler until the topping turns bubbly and slightly brown (about 3-5 minutes).  WATCH CAREFULLY.  The broiler can do wonderful things, but it can also burn food in an instant.

broil portabello mushrooms

8.  When your pasta is done, drain it and add a drizzle of olive oil to keep it from getting dry and sticky.  I also added a bit of the mayo/chili sauce topping, which worked really well.

cooked pasta

9.  When your mushroom topping is nice and bubbly and starting to brown, take them out of the oven.  Chop up a green onion (or two) and sprinkle on top of the mushrooms.  I ended up only using the green part of the onion.

bubbly broiled mushrooms
portabello mushroom with scallop cream sauce

10.  Assemble!  Dish some pasta onto a plate, then use a STRONG spatula to maneuver a mushroom cap onto it.  I say this because I used a WEAK spatula for the first one, and it splattered upside-down (of course) back onto the baking sheet.

Yes, these things happen to me.

All.  the.  time.

Sorry, no picture to commemorate my humiliation.

But I do have these:

This should have some plain roasted asparagus sitting next to it.  Yum.

So think you might try it?  Or is this just a little too freaky for you?

I’m In Love, I’m In Love, And I Don’t Care Who Knows It!

Two things:

1.  Chocolate.

2.  Peanut Butter.

I love chocolate and peanut butter so much.  How do I describe my passion?  Let’s see… If I could have a 3-way with chocolate and peanut butter right now, I would.  I might even let them videotape it.

Ahem.

Chocolate Peanut Butter Cream Pie

As it stands, my enjoyment of this delicious peanut butter cream pie (recipe found here) has remained relatively private – shared with only a few select neighbors in the protective confines of their living room.

See, I was assigned the dessert responsibility for their “Dutch BBQ” the other night.  For some reason this pie, which I hadn’t made in several years, popped into my head.  I couldn’t get it out.  Luscious creamy peanut butter base with a fluffy chocolate topping.  Have I mentioned how much I like chocolate and peanut butter?  (See “Who the Heck is Katie?” at the right.)

Here’s What You Need:

  • 1/2 (8 oz.) package cream cheese, softened
  • 1 Tbsp. white sugar
  • 1 Tbsp. cold milk
  • 1 C. peanut butter
  • 1 (8 oz.) container frozen whipped topping, thawed
  • 1 (9″) prepared graham cracker crust
  • 2 (3.9 oz.) packages instant chocolate pudding mix
  • 2 C. cold milk
  • 4 peanut butter cups, cut into 1/2 inch pieces (Optional – I know it takes away from the presentation, but I often forgo these little adornments on desserts.  I feel like it adds stress when cutting the slices because everyone wants a piece of the peanut butter cup and there might not be enough.  It also dictates the size of the pieces.  And that’s just not right.)

Here’s What You Do:

1.  Put your half brick of softened cream cheese in a bowl.

Softened cream cheese

2.  Add 1 Tbsp. of sugar, 1 Tbsp. of cold milk, and 1 C. peanut butter.  Stir until creamy.

Add 1 Tbsp. Sugar
Add 1 Tbsp. Milk
Add 1 C. Peanut Butter
Stir until creamy

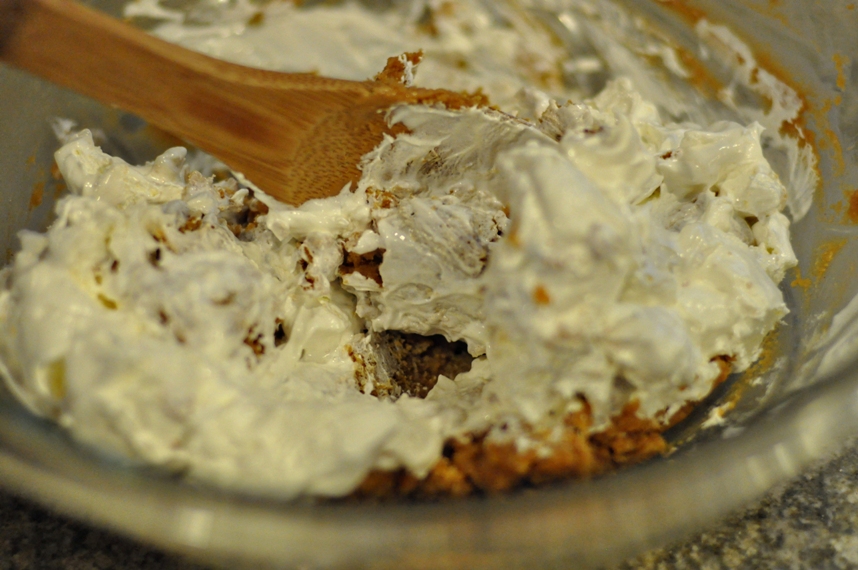
3.  Fold 1 1/2 C. of the cool whip to the peanut butter mixture.

Cool Whip

If a little bit of it falls on your finger, just go ahead and lick it off.  You shouldn’t fight impulses like this.  Fighting them makes you grow up.  And no one wants to do that.

Taste the Cool Whip

Fold in the Cool Whip.

Fold in Cool Whip

The Cool Whip will make it nice and fluffy.

Fold in Cool Whip

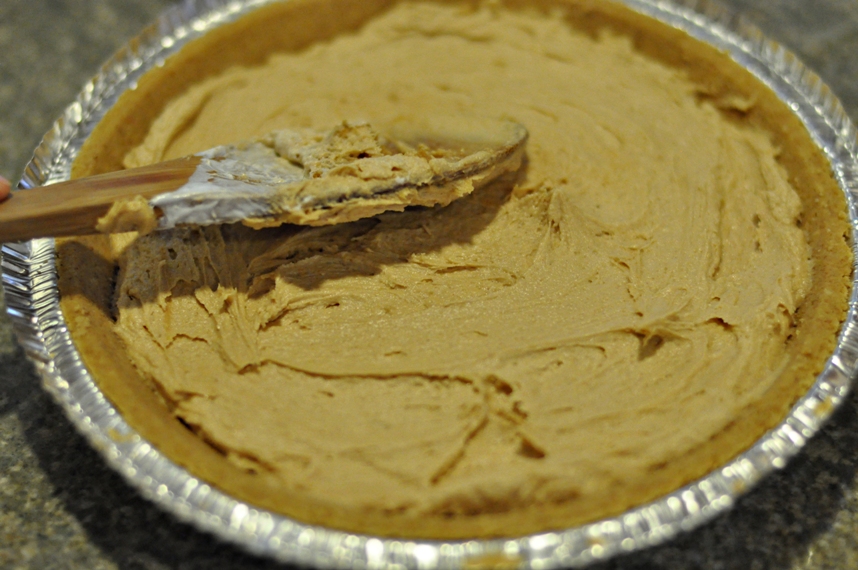
4.  Spread the peanut butter mixture into the bottom of the pie crust.

Spread mixture into pie crust

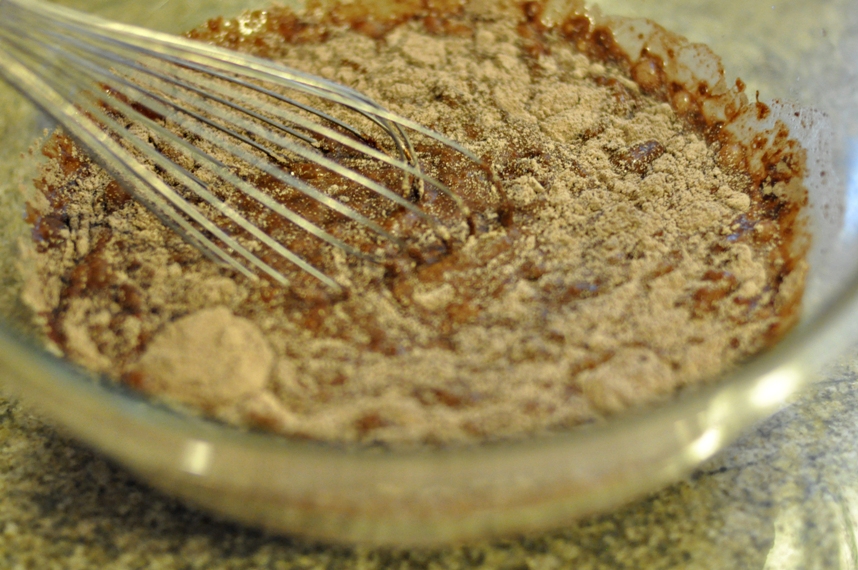
5.  Whisk the pudding mix and 2 C. cold milk together in a large bowl until relatively smooth.

Chocolate Pudding Mix
Add milk to the pudding mix
Whisk milk and pudding mix

6.  Add the remaining Cool Whip and stir to combine.

Add remaining cool whip

7.  Spread the chocolate mixture on top of the peanut butter layer.

Spread chocolate mixture over peanut butter layer
Double Layer Chocolate Peanut Butter Pie

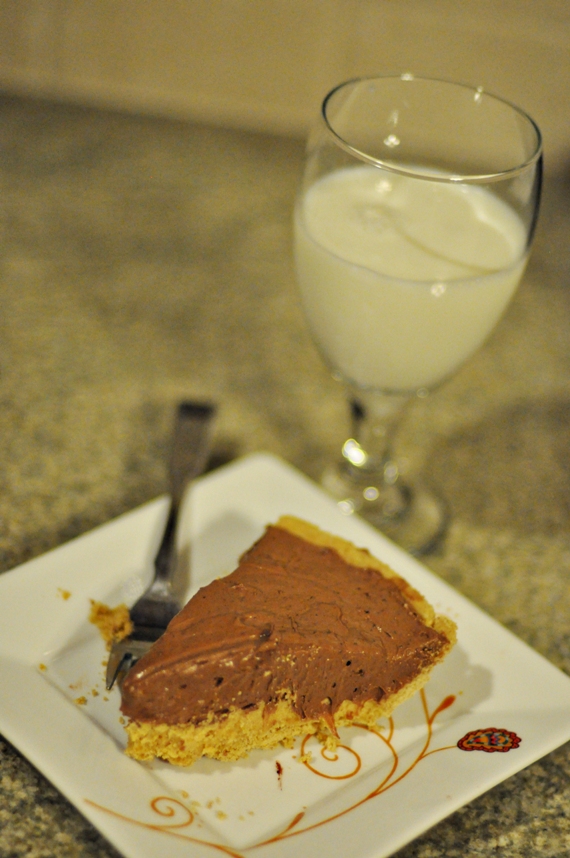
Okay.  So it’s not the most attractively presentable dessert to take to a gathering.  But I promise you, when people get a taste of that creamy, chocolaty, peanut buttery goodness, they won’t care.

Chocolate Peanut Butter Pie

Especially when served with a tall glass of milk.

Chocolate Peanut Butter Pie with Milk

Seriously.  If you ever want anything from me – almost anything at all – shove a piece of this under my nose and I won’t be able to resist.

Chocolate Peanut Butter Whipped Pie

Is anyone more crazy about chocolate and peanut butter than me?!

Sacrebleu Cheese Summer Salad

It has been freakin’ hot here.

Like, 100-degrees+ day after day after day for the past couple of months.  We maybe get a breather in the 90’s every now and then, but those days seem few and far between.

It’s a muggy, sweat-inducing wall of solar energy out there, and I’m loving it.  I’ll take these sweltering, b.o.-urging summer soggers over bulky sweaters and frost any day.  I can take the heat, as long as you can take the smell.

But if there’s one thing to complain about during these crazy hot days, it’s the fact that it’s damn-near impossible to turn on the oven without raising the temperature of my entire house by at least 20-degrees.

Sweat?  I don’t mind it.  Excruciatingly high a/c bill?  I mind it.

So when I get home from work, I’ve had to force my vino or cold beer-influenced mind (do I sound like an alcoholic?) to get a little creative.

Lucky for anyone who depends on my cooking for survival, my sister sent me a recipe a few weeks ago that she’s been insisting – incessantly – that I try.  She calls it, “The Best Salad Ever,” though I still think I dig this one just a tad more.  But, considering hers takes a bit less work (store-bought dressing and no slicing of mangos, which is a huge pain-in-the-ass by the way), I will highly recommend it after finally caving and making it last night.

Say hi, Kelly.

It didn’t take too much convincing for me to try it since it requires very little work (score!) and the use of avocados (double-score!).

Here’s what you need:

  • Chicken (You could use breasts or whatever you have – I used tenderloins since they cook very quickly and are great for salads)
  • Seasonings for the chicken (I’m deliberately vague here because you really can use whatever your little heart desires.  Upon Kel’s recommendation, I used dried basil and garlic powder)
  • Romaine Lettuce
  • Golden Raisins (Whatever you do, do not leave these out!  I don’t even like raisins as a general rule – they’re all wrinkly and have a weird texture, but these completely complimented this salad so deliciously, it just would not have been as special without them.)
  • Avocado (yum, yummy, yum yum yum)
  • Bleu Cheese Crumbles
  • Red Onion
  • Bleu Cheese Vinaigrette  (Don’t pass on this, either.  I’d never had it, but it’s wonderful.  Not as heavy as that cream-laden stuff.  I found this next to the bagged lettuce at the grocery store.)
  • Mandarin Oranges (I didn’t use these because again, they’re weird and wrinkly, but like the golden raisins, I bet they’d be really good in this)
  • Croûtons (Didn’t use because I forgot.  And you know what?  I didn’t miss them.)
Bleu cheese chicken salad

Here’s How to Put it Together:

1.  Heat up some olive oil in a sauté or grill pan over medium-high heat.

2.  Season your chicken with your choice of seasonings (I used dried basil and garlic powder – plenty of it).

3.  Cook your chicken until it’s no longer pink and the juices run clear.  I look for the purty grill marks and then slice open a piece to make sure the pink is gone.

4.  While the chicken is cooking, dice up some read onion – or leave it in rings if you prefer – and dice up your avocado.  I only used half the onion, by the way, and still had plenty leftover.  Red onion can be pretty potent.  If you’re going to let your diced avocado sit out for awhile, sprinkle some lemon juice on top to keep it from turning brown.

5.  Just like the Honey Lime Grilled Chicken Salad, I like to serve this up assembly-style.  Throw all of the ingredients into a bowl per your preferred ratio.  Everybody’s happy!

Look at that – romaine, avocado, finely diced red onion. bleu cheese, magnificent golden raisins, and grilled chicken – all partyin’ together under a kinky drizzle of bleu cheese vinaigrette.  Mmmmmm.

Stay cool out there.

Mini Hammy Sammies

Okay, folks.  This is the easiest recipe I’ve shown you thus far.  And some of the (very few) ingredients might seem a little strange to you, especially when mixed together and spread onto a bun of deliciousness.

But you want to make these.  Trust me.

These mini hammy sammies are perfect for dinner in front of a movie with a cold beer.  Or munchin’ on while watching a favorite sporting event with a cold beer.  Or enjoying out on the deck on a balmy night with a cold beer.

Catch my drift?

They’re pretty casual, very quick, and, since they’re easy to make in bulk, would work really great for a party appetizer.

The original Mini Ham and Cheese Roll recipe is found here.  I hardly change a thing.  (Except, you’ll see in this one particular instance, I thought I had poppy seeds when I did not, in fact, have poppy seeds.  Please excuse this horrible lapse in judgement and don’t make the same mistake.)

*You definitely want to halve this recipe if you’re just making it for a couple people.  The full recipe below makes 24 mini sammies.

WHAT YOU NEED:

  • 2 Tbsp. dried minced onion
  • 1 Tbsp. prepared mustard
  • 2 Tbsp. poppy seeds (Don’t forget these – they’re great.)
  • 1/2 cup butter, melted
  • 24 dinner rolls
  • 1/2 pound chopped ham (I just use sliced deli ham)
  • 1/2 pound thinly sliced Swiss cheese
Mini Ham and Cheese Rolls

Missing from the family photo:  Butter (he was getting nuked) and Poppy Seeds (they’re probably off at a bar somewhere tossing shots and hitting on wildly inappropriate women – it’s like pulling teeth to get them to come to these reunions).

DIRECTIONS:

1.  Preheat oven to 325-degrees F (more like 315 in our case – our oven cooks hot).

2.  Melt the butter in a bowl.  Just a lil’ tip:  If you use a microwave, it’s easier to cut the butter up and cover it with a paper towel so it doesn’t splatter.

Melt Butter

3.  Add your minced onion, mustard, and poppy seeds (IF they’d bothered to show up) to the melted butter and give it a good stir.

4.  Line a baking sheet with foil, then split the dinner rolls.  It’s easier if you leave them attached to each other in groups of 2, 4, or even all 8.  That way you can spread everything on ’em and it doesn’t drip through while they’re baking.  Just cut them apart when you’re done.

5.  Here’s where we deviate from the original directions a bit.  The original directions say to spread our butter mixture over the top of the buns, but we like to be sneaky and put some inside the buns as well.  Let’s be honest – these aren’t exactly healthy.  So why not just go all-out?

6.  Assemble the sandwiches by adding the ham and cheese.  (I’m sure you could’ve figured out where this is going by now, but I like to spell things out.  You know, just in case…)

7.  Close ’em up and spread or drizzle more of the butter mixture on top.  This is necessary so your buns don’t dry out in the oven.  Nobody likes dry buns!

Pretend there are lovely little black poppy seeds adorning the tops as well.  It just feels like something is missing without them.

8.  Bake them for about 20 minutes until the cheese is ooey, gooey, melty and delicious.

9.  Pop ’em on a plate and enjoy!  And don’t forget the beer.

Meaty Make-Up

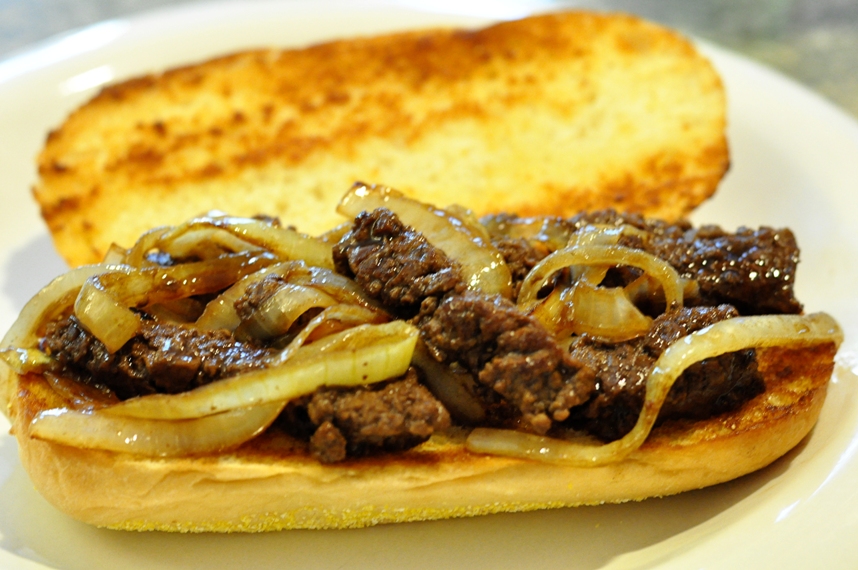
Here’s a juicy, meaty picture of the sandwiches I made tonight…

…to make up for yesterday’s debacle.

You want to make these sandwiches.  Trust me.

I call them “Katie’s Favorite Sandwich” – otherwise known as “Marlboro Man’s Favorite Sandwich” courtesy of The Pioneer Woman.  She’s a genius.

If you want to impress your meat-loving significant other, test these puppies out.  And don’t you dare leave out the Tabasco – only use a couple splashes if you’re afraid of the heat.

Doesn’t get much easier or tastier than this.  The end.

Cheesy Mozzarella Ranch Burgers

*Warning:  Do NOT read this post if the sight of raw meat makes you queasy.  Unless you like feeling queasy.  If that’s the case, read on.

I realize it’s kinda ballsy to post a recipe for burgers on a blog that a) isn’t entirely about food, b) isn’t written by a food connoisseur, or c) claims that poo-pourri is one of the best. gifts. ever.

Many people tend to take hamburgers very, very seriously.  Such people insist that burgers should be prepared as simply as possible, using very little ingredients.

But c’mon – it’s a burger, people – ground chuck stuck between two buns (and I’m not talking about Erin’s husband when he finally gets home).  (Sorry Erin’s mother-in-law!)  I mean, it’s ground beef – not veal.

All I’m sayin’ is that it’s a meat that’s made to be played with – and play with it, I do.

So here’s what you need for the burgers I made for the 4th of July celebration (a recipe inspired in-part by Erin’s good friend Kevin and other recipes found online at various times):

  • 4-ish lbs. ground beef (I normally like to get the good stuff, but since I was being cheap after much purchasing of alcohol, I got a pre-packaged brand of regular ground)
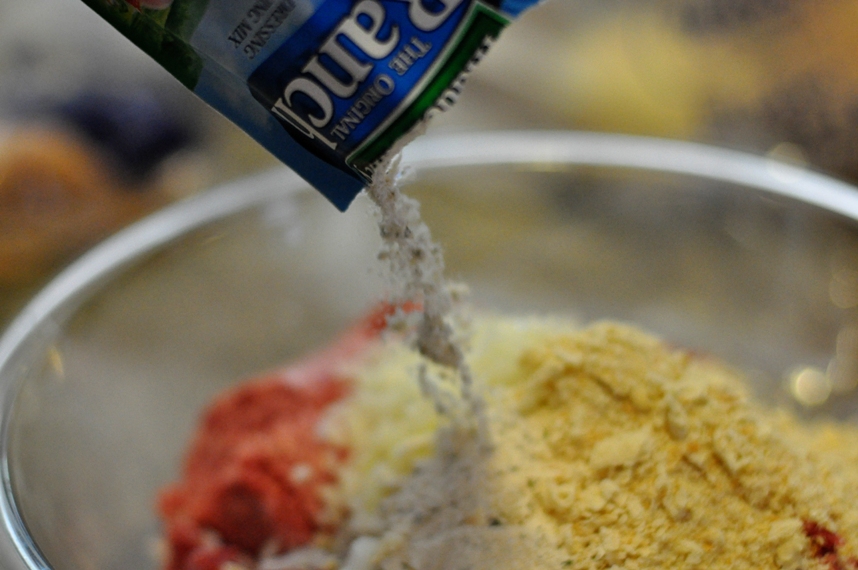
  • 2 (1 oz.) packages of ranch dressing mix (I would’ve actually used 3, but I only had 2.  Crap.)
  • 2 eggs, lightly beaten
  • 1 to 1 1/2 cups crushed saltine crackers or bread crumbs (amount depends on the consistency of your meat)
  • 1 large onion, chopped
  • Worcestershire (if meat is dry)
  • 8 oz. mozzarella cheese
Burger ingredients

1)  Dice up your onion, nice and fine.

Diced onion

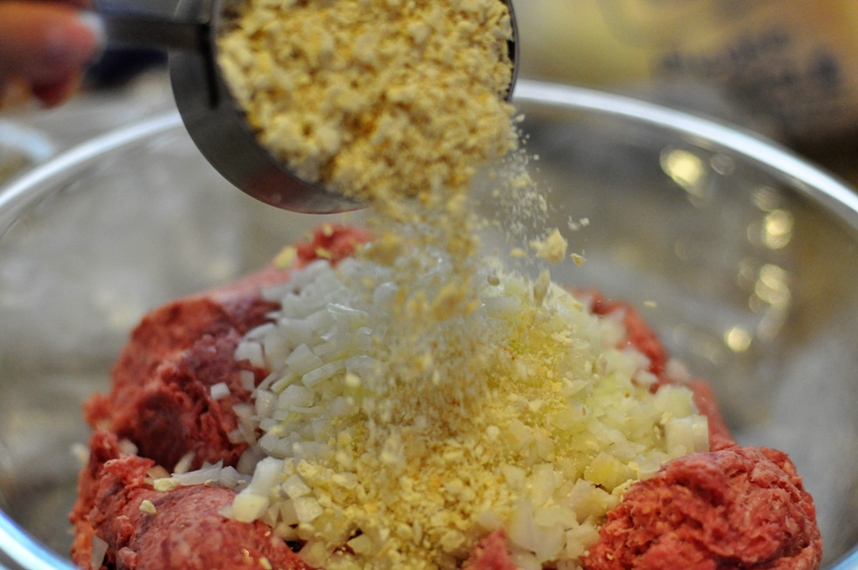
2)  Stick all your ingredients in a giant bowl.

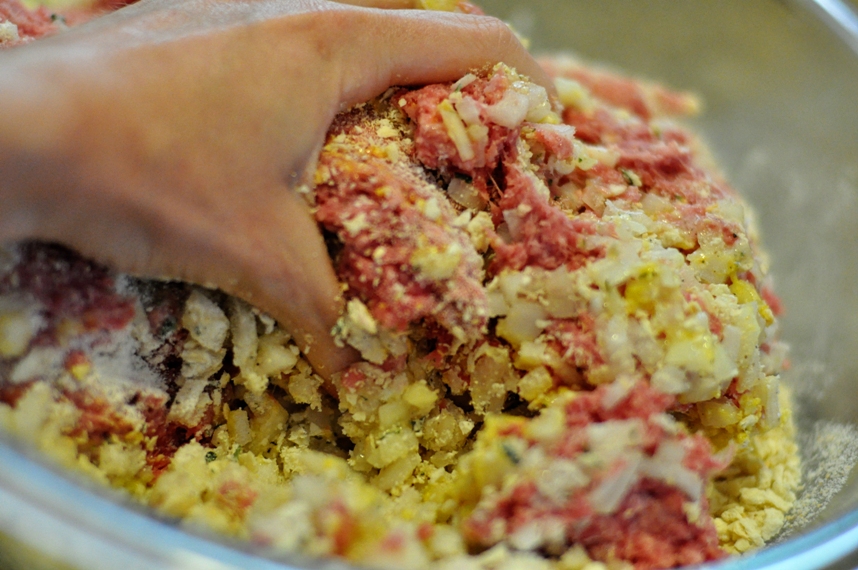
3)  Now’s the fun part.  Make sure your hands are clean and dig on in!  Trust me, you can try to do this with a spoon if you want.  You can try.  But your burgers will likely end up very unevenly mixed.  Plus, you won’t have the fun of digging ground beef out from under your fingernails later.

Ooohh feels so good.

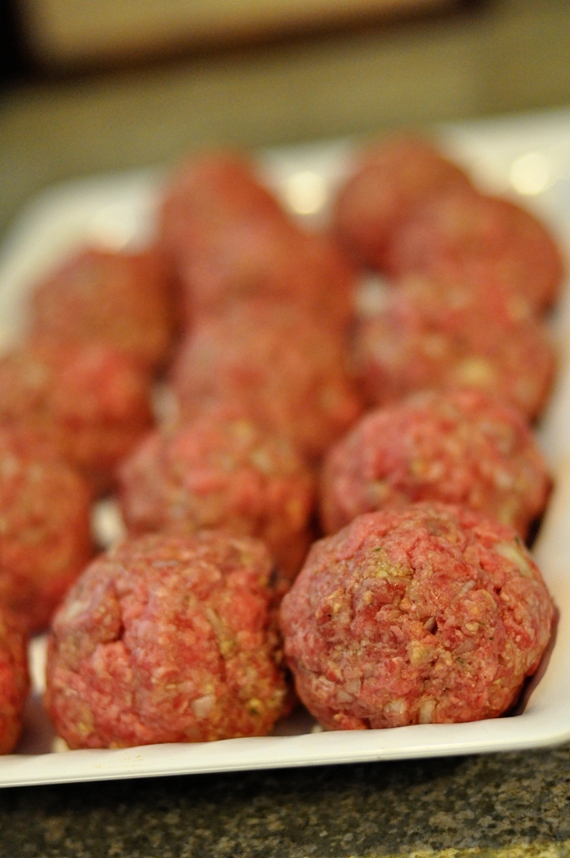
4)  You want them to be sticky, but not too sticky.  (Yeah, that helps, right?)  Then form them into balls.  I think I got about 14 balls out of my 4 or 4 1/2 lbs. of meat.  You can really make them as big as you’d like.

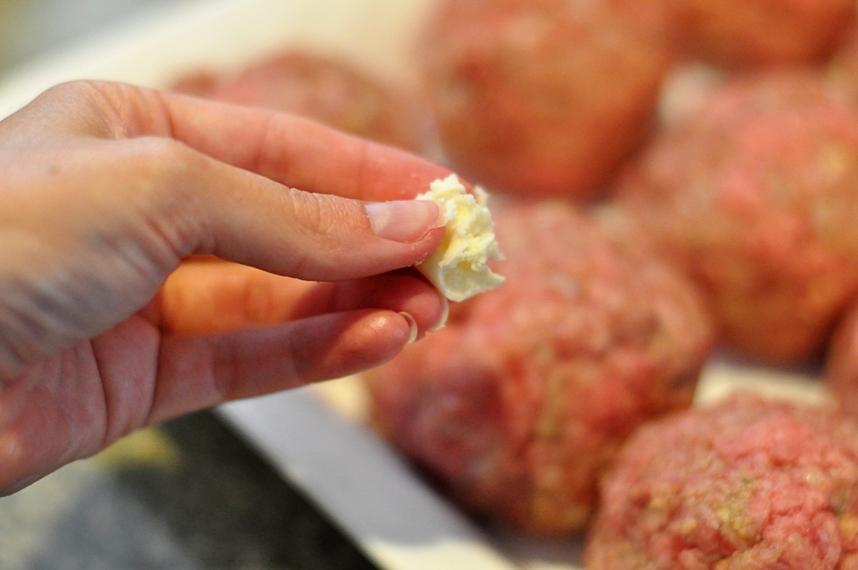
5)  Break off chunks of your mozzarella cheese (wash your hands first), and then press them inside the meat, making sure to cover the cheese completely with meaty goodness.

I only used half of this block of mozzarella:

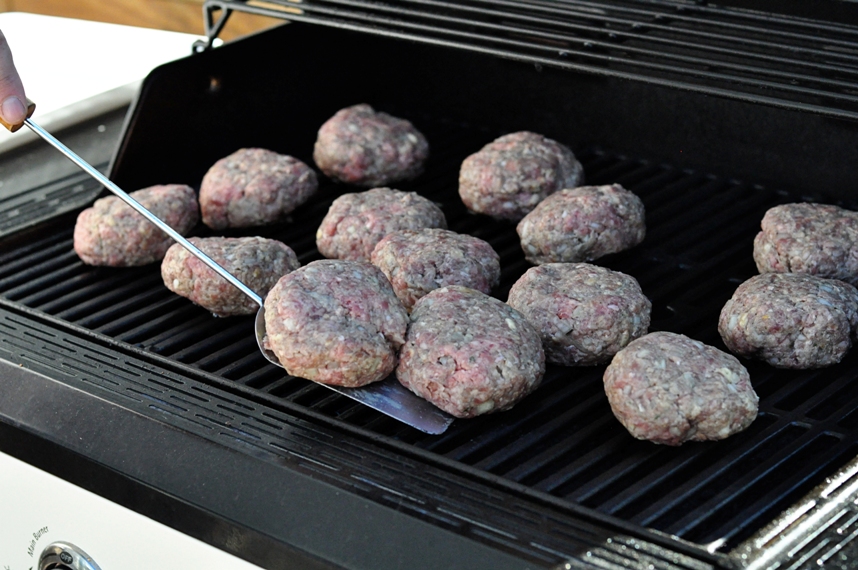
6)  Once each burger ball is stuffed with 2-3 pieces of the cheese, it’s time to slap ’em on the grill.  Now I’m not about to tell anyone how to cook your meat, but FOR THE LOVE OF ALL THAT IS HOLY, PLEASE don’t make them well-done.  I know it’s not veal, but it’s not tire rubber, either.  You want to taste the meat, don’t you?  (Unless you’re a vegetarian, in which case I’m not sure why you’re even still reading this post.)

ranch burgers

Now is when I have to admit I’ve failed you.  I’ve failed you as a blogger and as a human being.  Every person who blogs about food knows you’re supposed to have a photo of the finished product.  They know this.

But here’s what went down:

We took some really good buns and slathered butter on the insides and stuck them on the top rack of the grill so they could get nice and toasty (you could also do this on an indoor griddle).  Then we added condiments of our choosing and finally bit into the ranchy, cheesy goodness that is these burgers.  It was the cheese, friends.  (Okay, it might have partially been the beer), but it was mostly the cheese that made me forget about picking my camera back up and snapping a photo of the finished product.

I promise you I will probably forget to take the final picture on more than one occasion.  That’s just me.  But it’s like the Gin Blossoms said, “Don’t expect too much from me, and you might not be let down.”

Make these (or some variation there-of) this summer.  You won’t be disappointed.  Unless you screw ’em up.

What’s your favorite kind of burger?

Rice and Veggies and Sausage and Such

The new site is still a work-in-progress.  But it’s coming, I promise.

But in the meantime, you know what’s fun?  Besides walking 100 yds. out onto a bridge just to get a crappy photo?

Taking some food that might – in its purest form – have some type of health value, and then adding enough other crap to basically negate that as much as possible.

Rice and veggies, meet oil and sausage.  And a bit of mayo.  But it’s SO worth it.  Trust me – you’ll see.

This is kind of my “fall-back” dinner – the thing I make when I have no idea what else to make.  So we basically have it like once every other week.  I enjoy cooking, but I’m not exactly creative.  The ingredients are easy, the process is easy (plenty of chopping, which I find therapeutic – is that weird?), and this makes enough to keep us rich in work lunches for at least 4 days.

And because it’s loaded with vegetables and grains, I can do my girl-thing and justify my wittle brain into thinking it’s healthy.  And then I add mayo.

So here is where I found the original recipe.  I didn’t change anything this time, but you could get creative – add teriyaki if you don’t like soy sauce, change up the veggies, etc.

Here’s what you’ll need:

  • 1 pound ground sausage (I use Jimmy Dean’s Hot sausage.  He’s yummy.)
  • 5 eggs, beaten (Get the free range “happy chicken eggs”.  That’s what I call ’em.  You’ll feel better about yourself as a person.)
  • 3 tablespoons vegetable oil  (I suppose you could sub a “healthier” oil.  But I’ve always made it with the veggie oil, and I’m afraid to change because I know I like it this way.  Plus, it’s VEGGIE oil – can’t be that bad, right?  RIGHT?!)
  • 1/2 head cabbage, cored and shredded  (Screw the shredding – I just chop it up with a big fat knife)
  • 3 carrots, chopped
  • 6 cups cooked white rice, cold*
  • 1/4 cup soy sauce, or to taste
  • 1 (14.5 ounce) can bean sprouts, drained (I actually use fresh sprouts – about half the weight in ounces does the trick)
  • 1 (6 ounce) package frozen green peas, thawed (These really don’t even need to be thawed)
  • ground black pepper to taste
  • 3 green onions, chopped

*The reason the recipe says the rice should be cold is because day-old rice tends to be less sticky than freshly-cooked rice.  The problem?  I NEVER think that far ahead.  I don’t know I’m making this until I’m making it.  The solution?  Stick your cooked rice in the freezer for about an hour or so (while you prep your other ingredients, run to the store for the ingredients you forgot, paint your toenails, etc.) and I don’t usually have a problem.  You  might want to stir halfway through to make sure it doesn’t freeze together in clumps.

1.  Cook your rice according to the package directions.  I use a rice cooker to justify its existence.  I simply add 2 cups of uncooked rice, 4 cups of water, hit the “cook” switch, and end up with 6 whopping cups of cooked rice.  This is a LOT of rice, friends.  Consider yourselves warned.

2.  Get your sausage cooking over medium-high heat.  You don’t need any oil yet – this is greasy enough.

3.  While your sausage is cooking, chop up your carrots, cabbage and green onions.

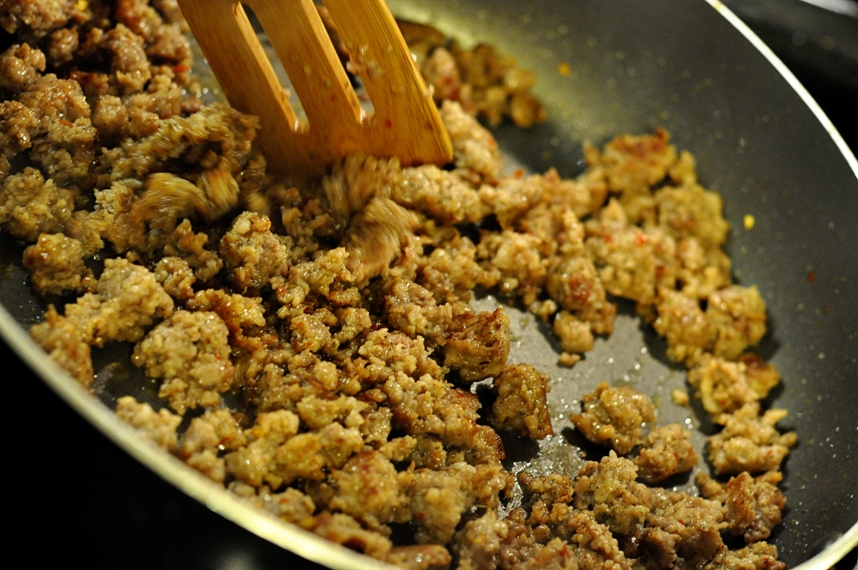
4.  Meanwhile, your sausage should start to look like this:

Once it’s cooked, set it aside on a plate covered with a paper towel to soak up some of the grease.  Don’t forget to feed a couple pieces to your pups.  They deserve it.

AND FOR THE LOVE OF ALL THAT IS HOLY, DO NOT drain the grease from the pan!!!

5.  Yep, that’s right.  You’re using that grease.  Crack open 5 eggs into a bowl and beat the heck out of  ’em with a fork.

Am I the only one impressed with myself for taking a photo while cracking an egg?  Okay, so the timing could’ve been slightly better, but I assure you that this is egg-cracking action here – I’m not just holding it next to the bowl.

Then scramble them up (over low heat) in that sausage grease-laden pan.  YUM.

Take the cooked eggs out of the pan and set them aside as well.

6.  Here’s where things really get moving.  Heat 3 Tbsp. vegetable oil in a VERY LARGE pan (if you’re making the full recipe) over HIGH heat.  When you stir fry, it’s all about the heat, baby.  This should go QUICK.  Add your carrots and cabbage, and cook until the cabbage is wilted.  This should only take a couple of minutes…

7.  Add the cold rice and stir it up until the clumps are gone.  Can’t get rid of the clumps?  No worries.  I think it tastes better that way.

8.  Add the cooked sausage and 1/4 c. soy sauce.

9.  Then stir in your bean sprouts, peas and eggs.

10.  Add a bunch of ground pepper and your chopped green onions just before you remove it from the heat.

*I couldn’t actually grind the pepper and take a photo at the same time, so pretend there’s something happening here.

11.  Sit back and admire your handiwork.

And, if you’re feeling extra frisky, you can add some Japanese white sauce (also known as duck sauce, seafood sauce, etc.) to your bowl.  We tend to use a combination of this recipe and this recipe.  Pick your poison.  Oh, and this is where the mayo comes in – so you see, it’s completely optional.

It’s probably not for everyone, and doesn’t exactly look gourmet, but I love this.  Nay, crave this.  Yes, I said nay.  And I might say “good morrow” later this evening.  It’s a Renaissance kind of day.