
Kitchen Progress: Hidden Hood and Beadboard Band-Aids.
I’m not going to sugar coat it. We’ve kind of been trying to do this whole would-be weekend warrior thing with finishing up the kitchen and building that dry bar and painting our bathroom and kind-of-sort-of thinking about brightening up the laundry room, but then it’s like we blink, and we discover a BBC drama called Happy Valley on Netflix, at which point the procrastination sets in and a couch surfing marathon ensues, and suddenly the weekend is over and I have barely anything to show for it except a wound-up ball of run-on sentences tumbling through my brain and onto my blog — all in a British accent, of course.
These things don’t make me feel good about myself.
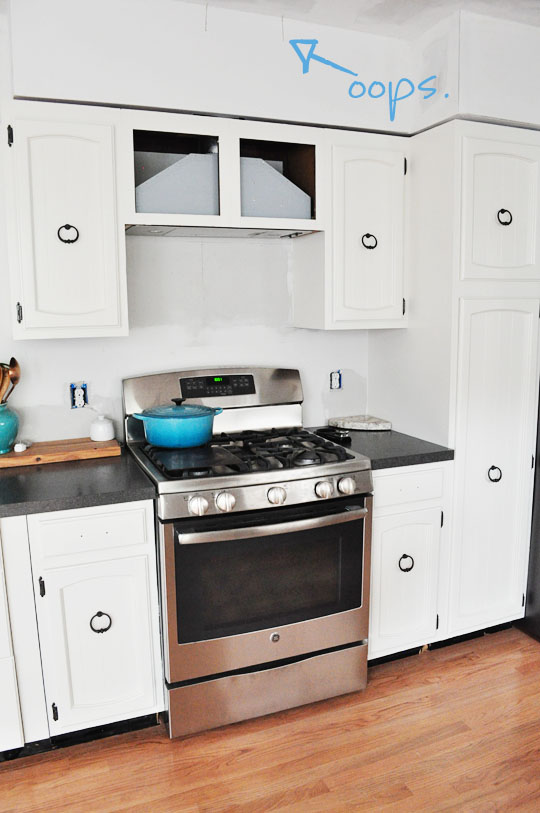
What does make me feel good, however, is any kind of slight progress on the kitchen. I was hoping to show you completed soffits today, but you’ll have to settle for some jury-rigged beadboard and a brief explanation of how we installed our hood.
Because television, guys. It’s toxic to home renovations.
The range hood has actually been installed for several months. You might’ve noticed it when I’ve showed kitchen pictures before and thought, big deal. Range hood. I see those every day. But I’m here to set the record straight. This hood was a BIG DEAL. In fact, it was the pivotal point around which major kitchen layout decisions were made, because moving the range (and therefore the hood) from the peninsula to the wall involved extending the hardwood floors and moving the ventilation and otherwise messing with things I didn’t feel like we’d have the energy to mess with.
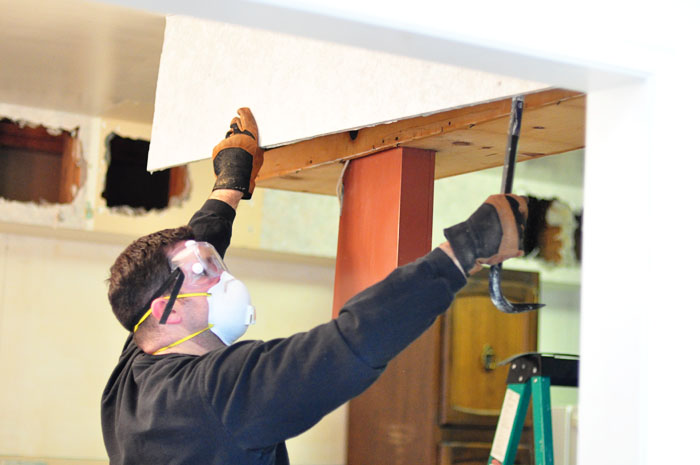
But Justin wanted that peninsula gone from his life. And since he’s the one who makes the cheesecakes, I eventually conceded, poured myself a cocktail, and sat back to watch him tear out a soffit that was apparently installed by highly skilled NASA engineers.
And that’s how it looked for approximately 867 billion years, until we had drywall installed, painted the cabinets, finally installed the appliances that had been sitting in our sunroom for months and months. Then I managed to guilt Justin into finishing what he’d started.
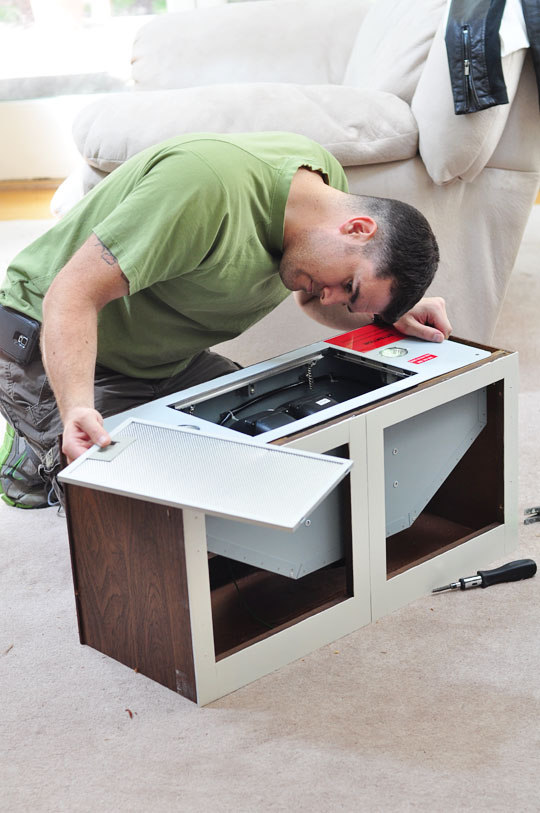
Since we’d hidden our microwave inside a cabinet, we decided to do the same with the hood. I’d almost ordered this affordable hood insert, but ended up ordering this Zephyr insert which, at the time, was $100 more and actually isn’t as powerful. Why? Because it fit our existing cabinet almost perfectly, and with a kitchen that gets almost no natural light, I wanted those bright halogen lights.
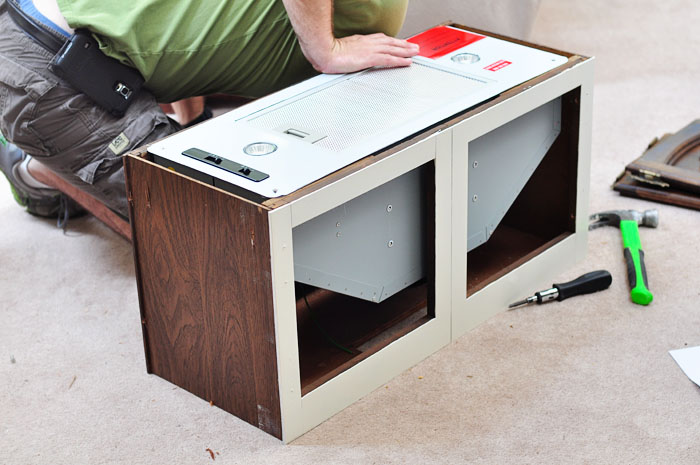
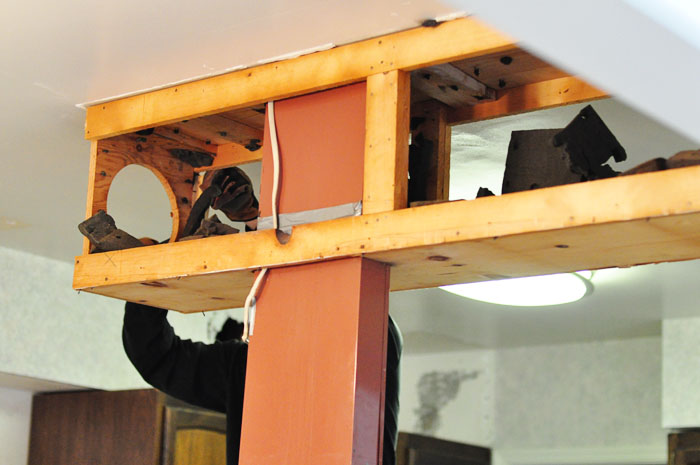
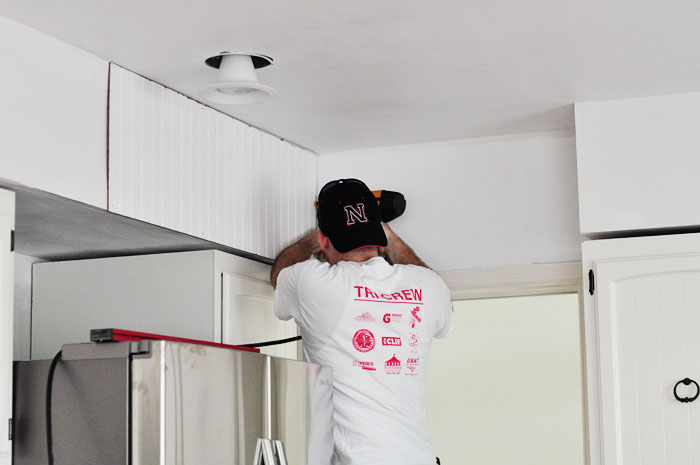
Installing the hood into the cabinet was fairly straightforward. Justin turned everything upside-down to see if it all fit, and then installed a small piece of wood on the short ends of the underside of the cabinet to screw the hood into. Then he took it out and installed the empty cabinet above the range.
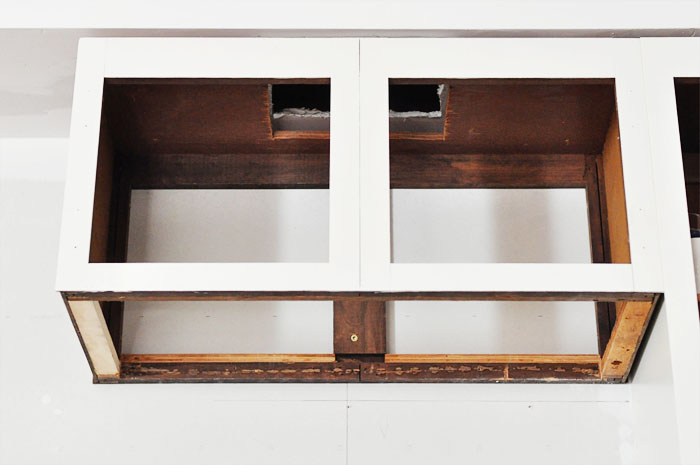
Next, he had to go into the attic and cut a hole down through the ceiling, the soffit, and the top of the cabinet for the new vent. Since the old vent was rectangular, he had to buy a converter piece to attach in the attic, and then enough circular tubing to reach the 5-6 feet where we wanted it moved.
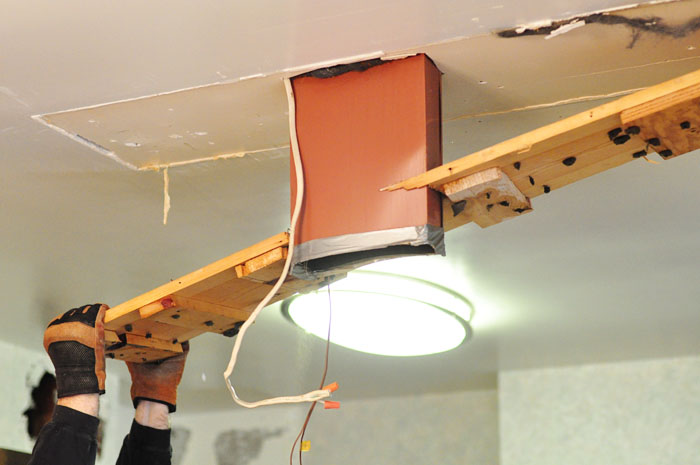
Then it was just a matter of popping the hood back in and screwing everything tight.
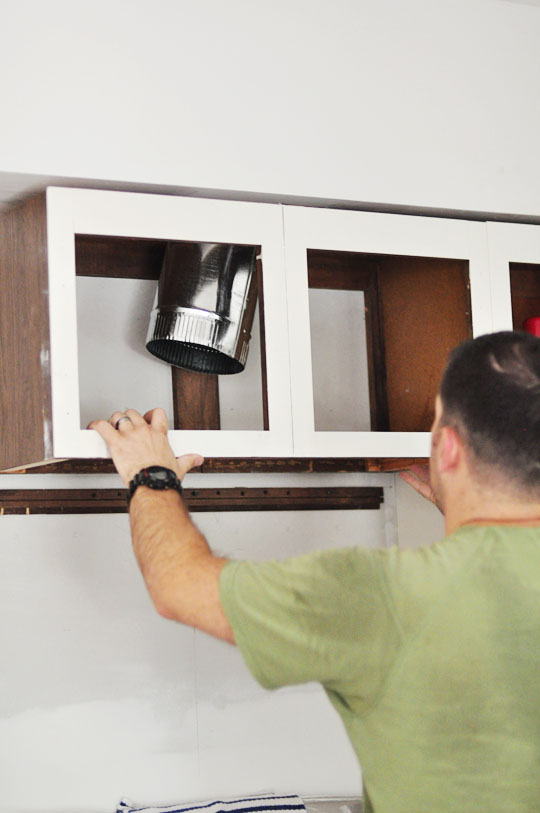
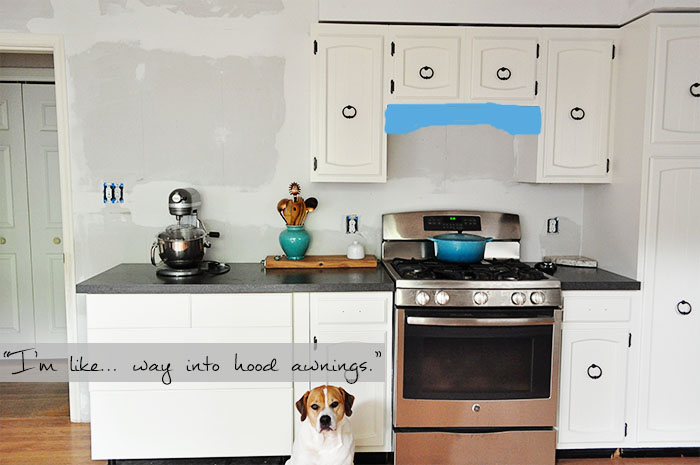
Eventually, the plan is to install some kind of cover or “hood awning,” if-you-will, to hide it completely.
But until that day, it’s perfectly functional as-is. The Zephyr is super quiet but does a nice job of drawing smoke and smells out of the kitchen.
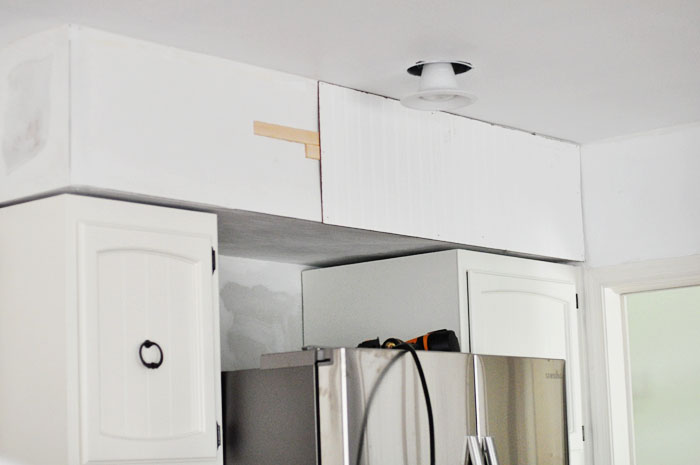
Up in the attic, Justin had gotten a little overzealous with the sawzaw and accidentally cut through the front of our soffit.
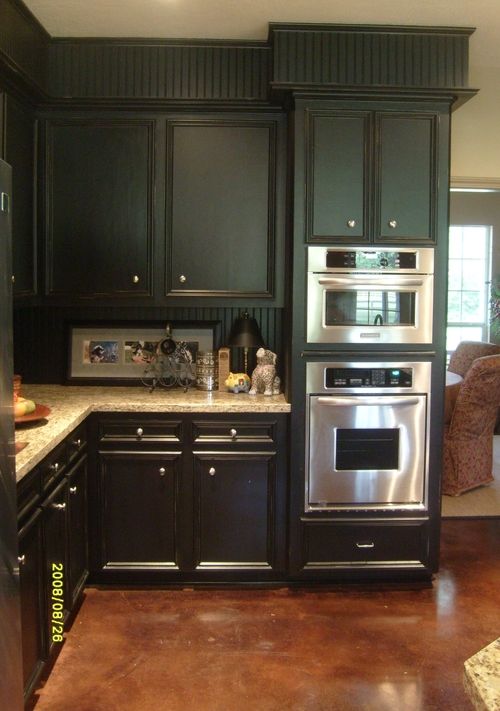
This was nothing to worry about though, because from the very beginning, I’ve had a plan. In my mind, I’ve been picturing a little something like this to extend the look of the cabinets all the way to the ceiling:
The beadboard, of course, would also cover up those accidental sawzaw holes.
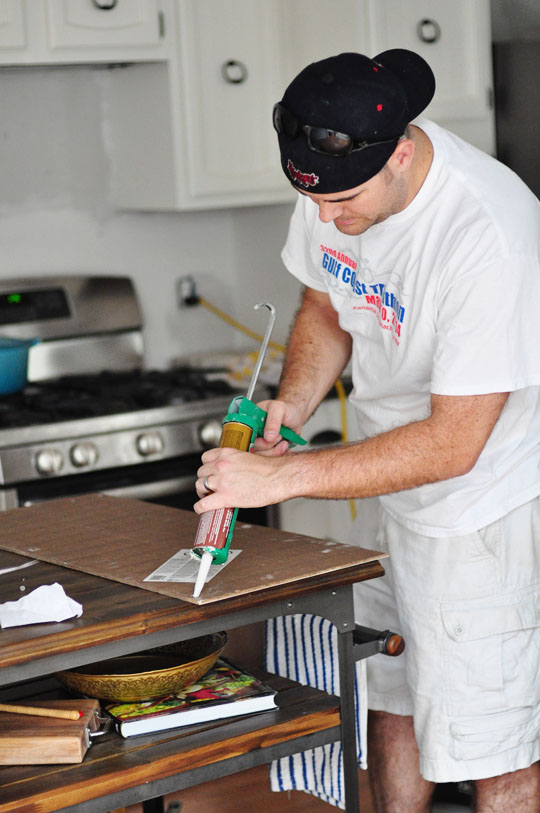
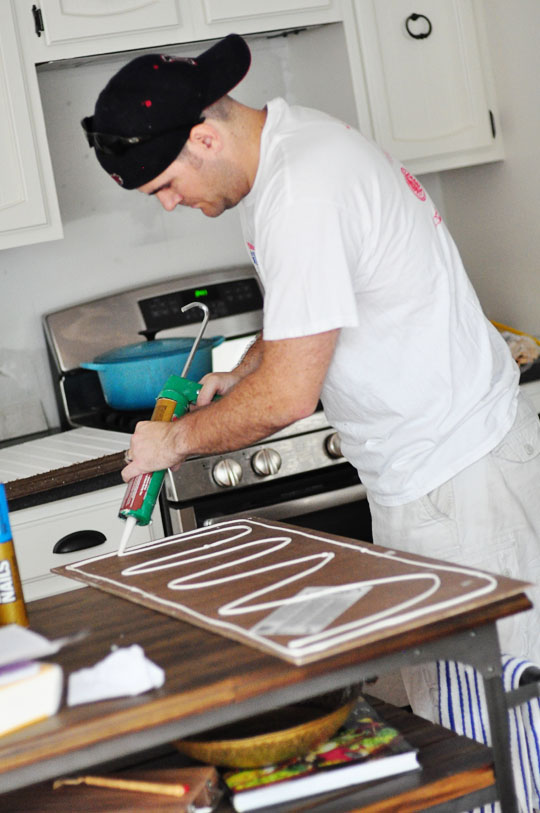
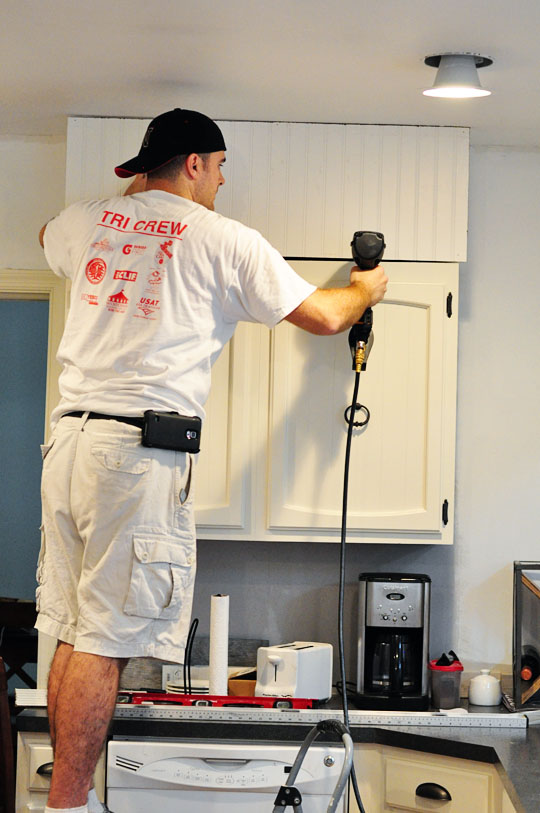
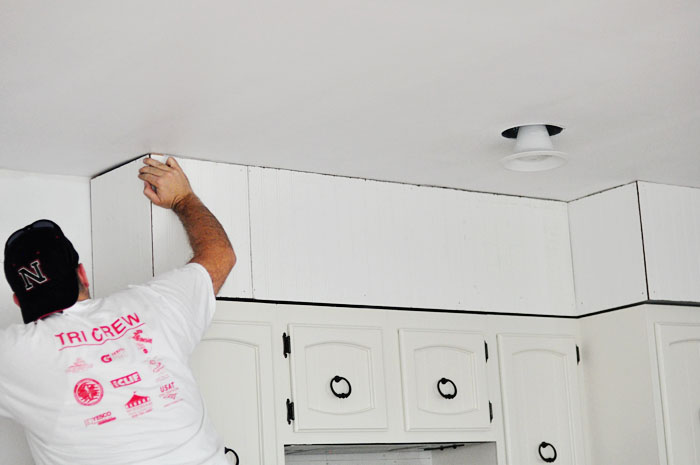
The reality, however, is proving to be a little bit trickier. This weekend Justin bought large sheets of beadboard and ripped them to the height of the soffits. Then he applied liquid nails to the backs:
And started nailing them to the soffit faces:
Since we’d made the mistake of hiring an un-vetted handyman/drywaller, the soffits aren’t exactly precise.
In fact, they’re awful.
They required a couple of shims here…
And a couple of wood scraps there…
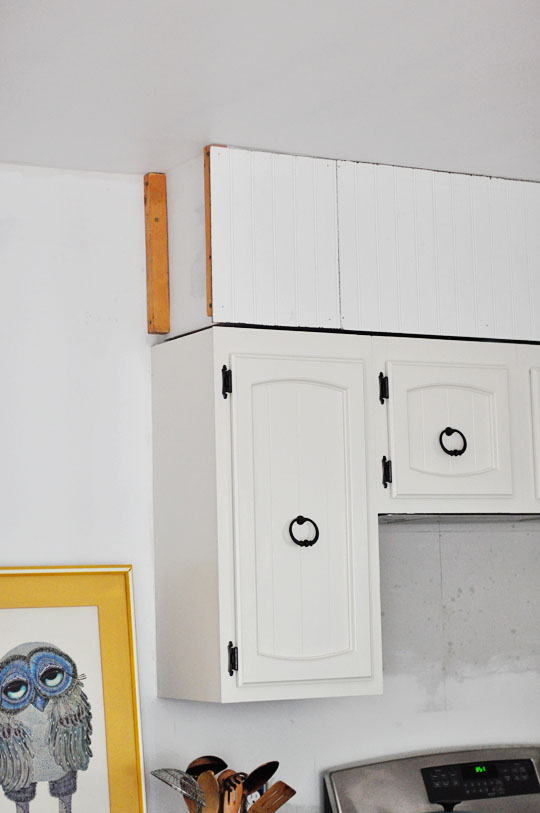
…to make everything line up. In some cases, unfortunately, our drywaller extended the soffits beyond the edge of the cabinets, which is just something my inner perfectionist is going to have to live with.
*eye twitch*
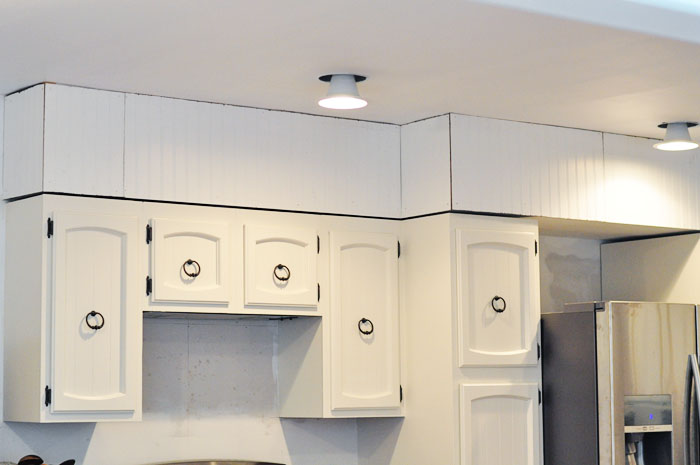
Eventually he got everything covered, but the seams and gaps admittedly look less than stellar.
I’m hoping this is something that about a gallon of caulk and some paint can take care of, along with the rest of the trim once we get that installed in the next decade or so.
Our mutts, who’ve commandeered this chair and refused to move for the duration of the beadboard fiasco, are ready for this kitchen to be done.


And frankly, so are we. Next up? Trim and paint.
What’s the longest DIY project you’ve ever taken on? And, more important, how have you overcome the toxic drug that is Netflix so you can actually finish said project?
Really.
I need to know.
Comments
I swear, almost every time I read your blog lately I feel like I should look up the word soffit, but then I don’t because I suck. Meanwhile, I absolutely did not know that that attractive stripey wall stuff was called beadboard and that it could be glued to a wall. So I totally learned something today. (Although what I learned was still not what a soffit was, because I have a feeling I’m not going to look that up again.) Beadboard though – good stuff. I’m currently scanning my apartment for surfaces I can glue it to. I don’t think I have any that are appropriate. :(
Ha! Yeah, soffits are a big point of contention in my life these days. They’re typically that “built out” space found above cabinets in older homes and often were/are used to hide electrical wiring and heat/air ducts. Fortunately, ours didn’t have anything in them (except one random wire that cut through on its way across the ceiling and down to the wall), so we were able to rip the old ones out. The only reason we had new ones built was because I didn’t think my style of cabinets would look good without them (and plus there’d be one random duct running up the wall from the hood). P.S. Here’s a good example of a beadboard application in our last house that we applied in the last house: http://www.domestiphobia.net/category/dwell/our-house/guest-bathroom/ I’m wondering if you might be able to do something like that in yours?
Does Justin secret hope for Monday mornings in your house ;-) Never done a DIY project, but I know they are in my future! You are totally and completely inspiring and everything turns out awesome, despite what you say behind the scenes! Yes we get into Netflix and Apple streaming often..very often!
You know what? I think he probably does. ;)