Navigate / search

Mi Taco Es Su Taco

*Please forgive the unforgivably dark/blurry photos in this post and any of my posts hereafter.  By this point in the trip I had busted my favorite low-light camera lens (something I’m not yet ready to talk about) and I was making do with what I had.

On one of our last days in Costa Rica, our friend Becs showed us one hell of a time.  There was a crazy monkey chase (more to come, I promise), pool-crashing at the beach (more to come, I promise), and the most wonderfully orgasmic tacos I’ve ever had the pleasure of devouring.

That’s what I’m going to tell you about now (in case the title of this post led you to think otherwise – again, get your minds out of the gutter).

I can tell you from experience that after a long morning of horsing around with monkeys and a long afternoon of frolicking in both the Pacific ocean and a guest-only hotel pool (a hotel of which we were definitely not guests), there is nothing – I repeat nothing – more satisfying than a tall glass of Costa Rican beer and the best tacos I’ve ever had in my life.

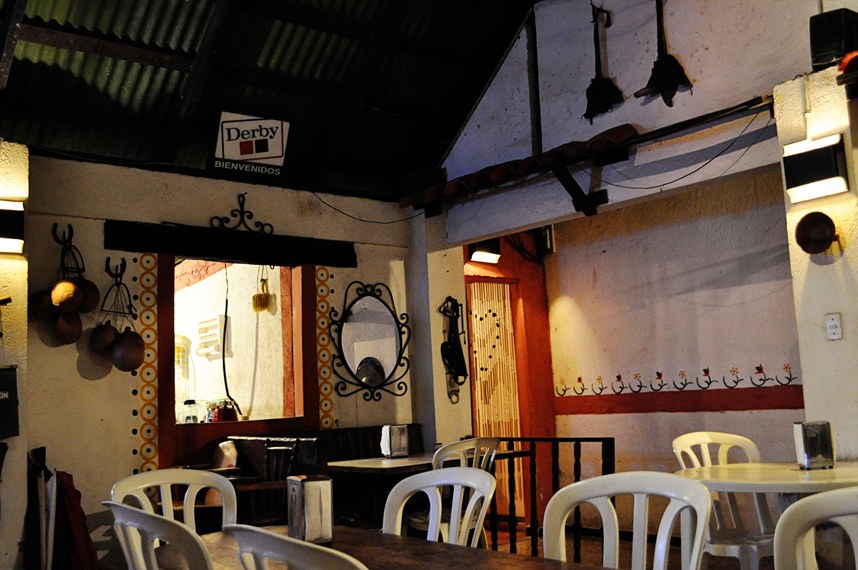
At first I thought Becs was mistaken when she pulled off the main road onto a rocky dirt driveway overgrown with weeds and shrubbery.  Surely the nondescript, unlit home in front of us was not a restaurant.  Was it?

But as we approached, I saw the understated sign next to the front door:

Tacos.

‘Nuff said, apparently.

Tacos in Liberia, Guanacaste, Costa Rica

I’d be lying if the place didn’t make me conjure up thoughts of some crazy old guy in the back butchering up human flesh to serve with tortillas and Lizano al a Sweeny Todd.  (My first “real” date took me to see that play, by the way.  Remind me to tell you about that gem some other time.)

Hey, I have an active imagination.

But the inside was cozy, and I settled down when the owner brought me my cerveza and I saw that at least, if he was going to butcher us and serve us to the other customers (of which there were exactly none), he was at least willing to let us have a drink first.
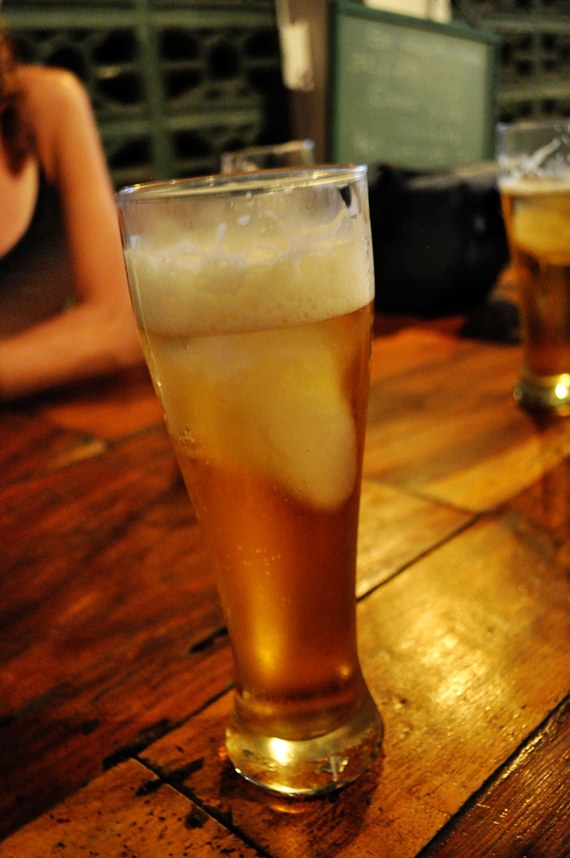
Imperial with Ice

Yes, that’s a chunk of ice in the glass.  It took us 2 months to get used to it, but non-touristy bars/restaurants in Costa Rica serve their beers with a glass of ice.  It’s actually pretty nice when it’s hot and humid out and the beer bottle isn’t exactly cold.

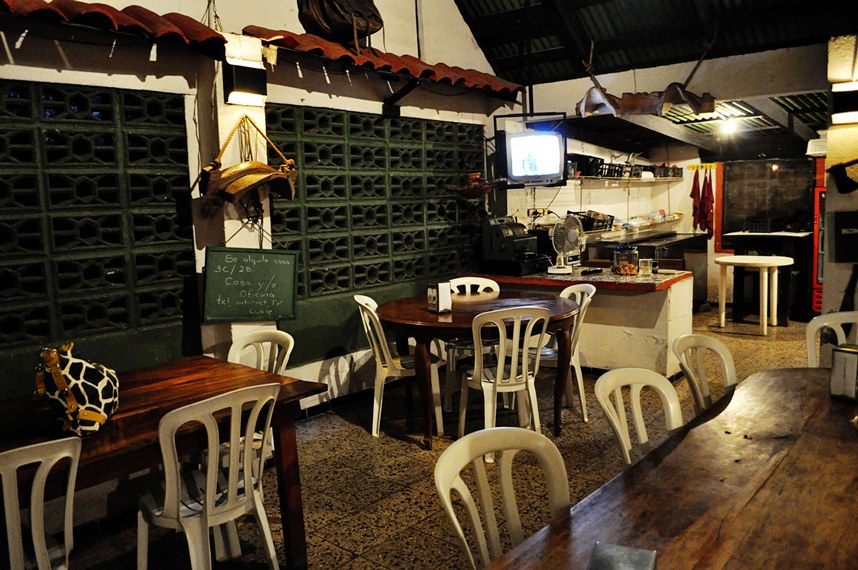
In a corner of the room there was a large chalk board with the menu (and surprisingly steep prices), along with a gas, flat-topped griddle and a wire shelf hanging from the ceiling.

The first thing we ordered was queso con chorizo, which is exactly what it sounds like – a bowl of delicious melted cheese with bits of chopped up chorizo.  The restaurant’s owner (sorry, forgot his name!), who is originally from Mexico, took several chunks of wonderful white cheese and melted it in an iron bowl over a charcoal grill.
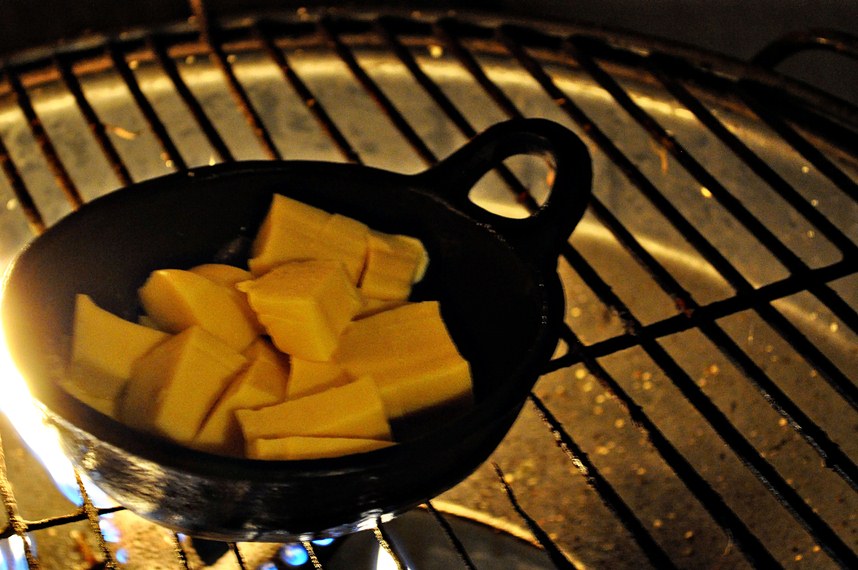
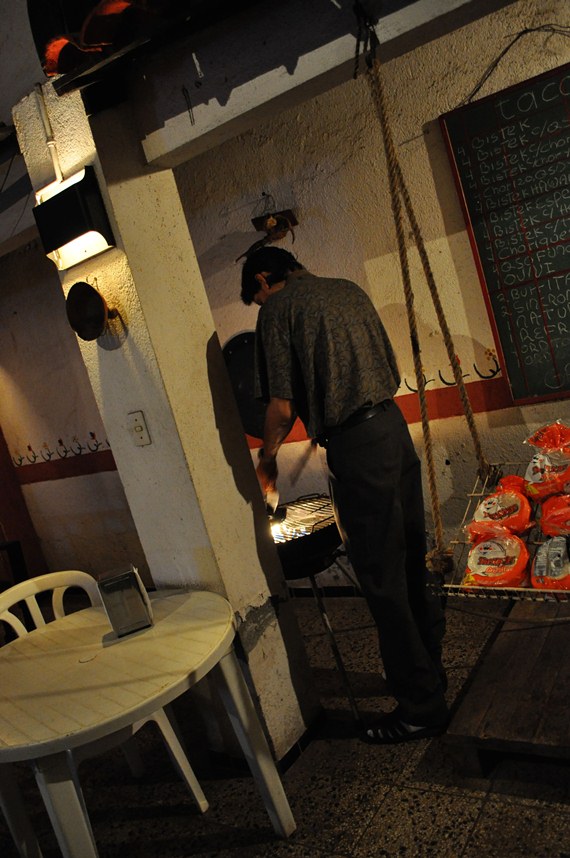
Melting queso on a charcoal grill

We waited as patiently as 3 hungry women who’d been at the beach all afternoon could possibly wait.

Then he threw in the chorizo that he’d cooked on the flat-top, and the result was a greasy, gooey, stringy bowl of deliciousness that really can’t be properly described with words.  We spooned it over grill-warmed tortillas and then we died.
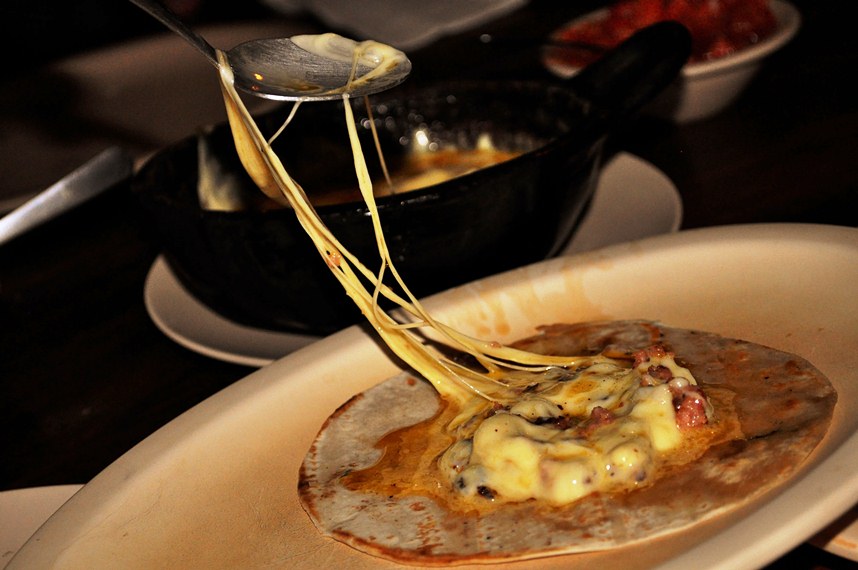
Queso con chorizo

Ask me if I care that this likely turned my arteries into sluggish, gummed-up muck.  ‘Cause I don’t.

Meanwhile, the Taco Guru was working his magic back on the flat-top.  While he’d been making our queso appetizer, he’d put all of the ingredients for our tacos on the hanging wire shelf.  We’d ordered one plate with beef, onions and cheese, and another plate with chorizo, cheese and grilled pineapple.  (Turns out we really didn’t need 2 plates – each plate comes a huge stack of tortillas, and one plate would’ve been more than enough for the 3 of us.)
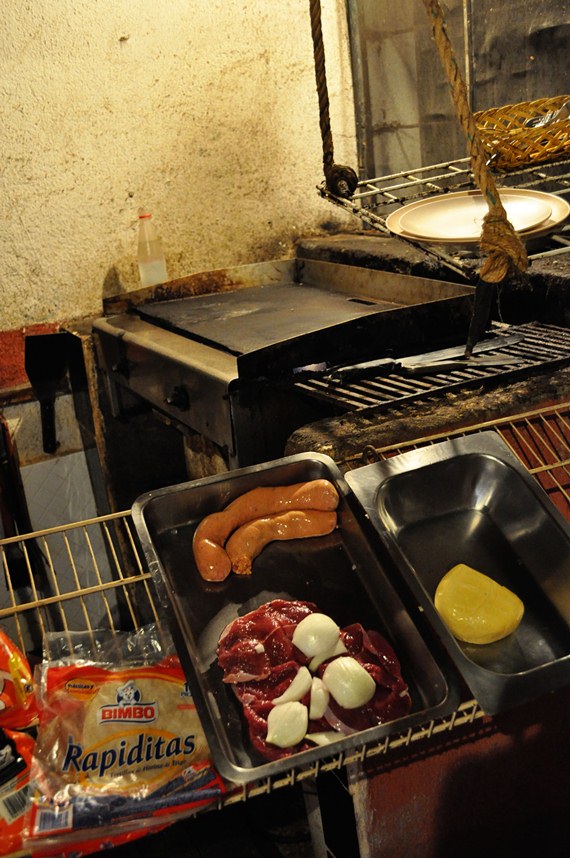
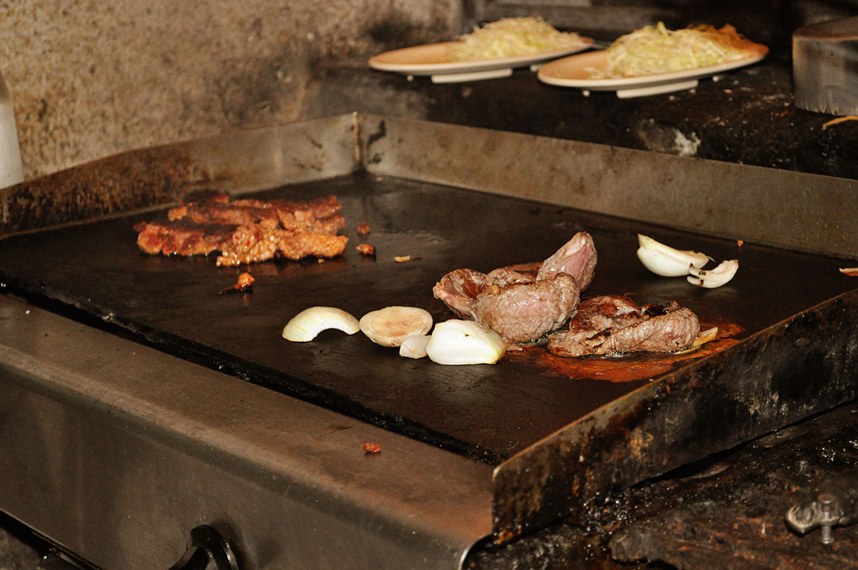
After the meat was cooked, he piled everything on the plates and brought them to the table.
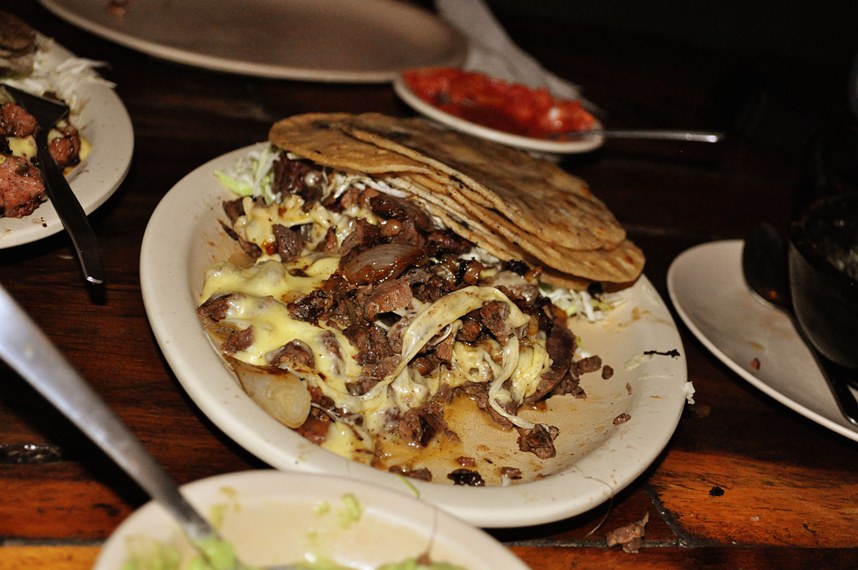
Beef, onion and cheese tacos

Beef, onions and cheese.

Chorizo, cheese and pineapple tacos

Chorizo, cheese and pineapple.

All I can say is these tacos were ah-maz-ing.
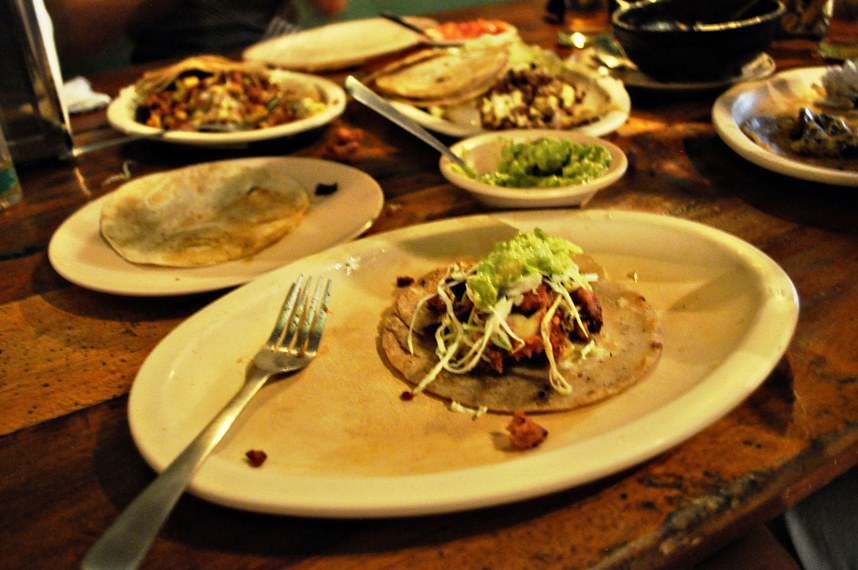
Best Tacos Ever

He served them with shredded cabbage, homemade guacamole and a spicy salsa.
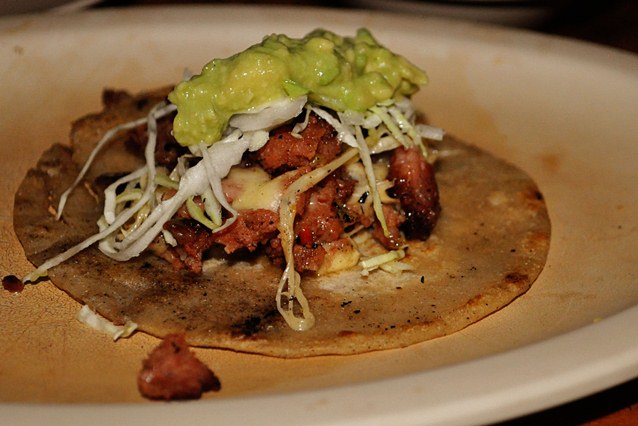
We ate them and died again.

The end.

Erin, Taco Guy, and Katie

Thanks for the laughs, the cries and the jiggly thighs, Taco Guy.  We’ll remember you fondly.

Tasting the Local Flavor

I’ve told you before about how I’ve been craving certain foods from back home, right?

Well it seems I have a problem.

I realized today that when I go home, it’s almost certain that I’m going to crave certain foods from Costa Rica.

You see, every now-and-then Erin and I splurge on a meal at a restaurant.  And after watching some bull riding yesterday (more on that to come), we craved nothing more than a couple of beers and some patacones at one of our favorite restaurants in Bagaces.

Pata-what-es??

Patacones.  (Pat-a-cone-ays.)

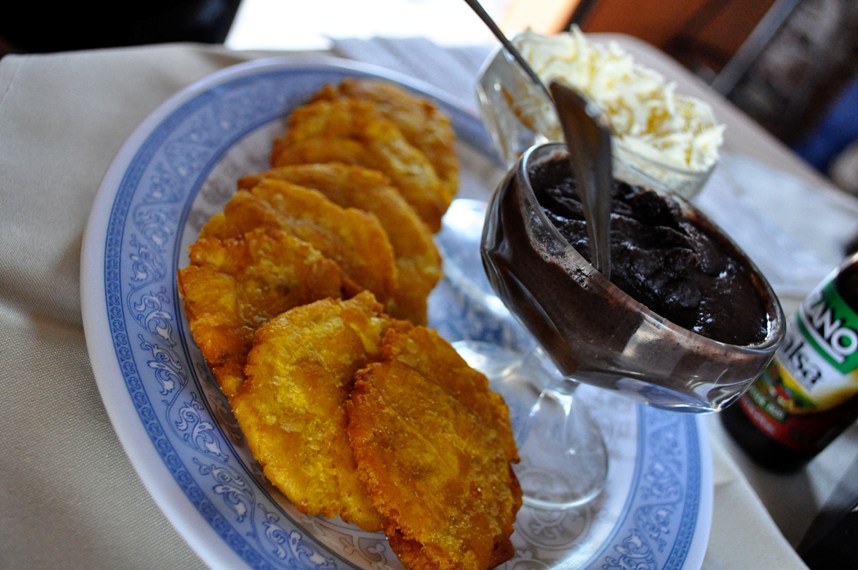
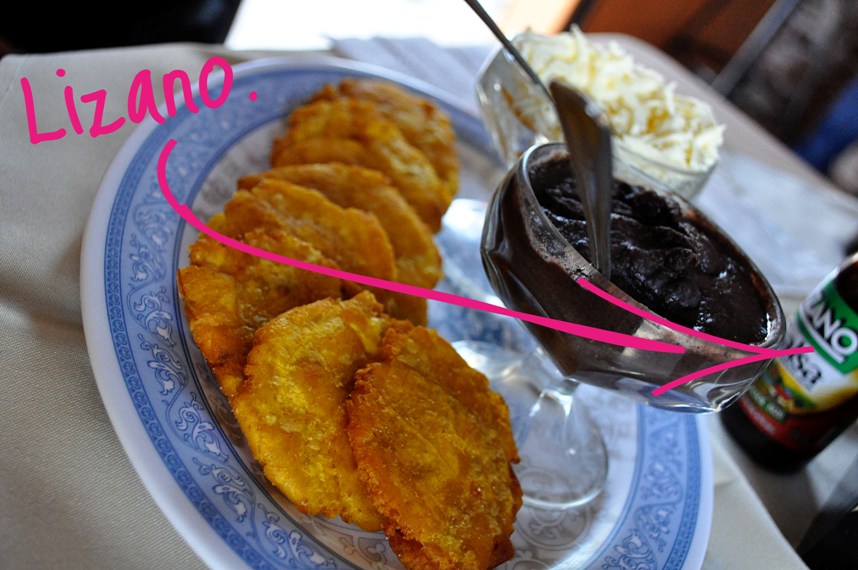
Basically, they’re fried plantains.  Plantains are very similar to bananas.

Costa Rica Patacones

No, they’re not served with chocolate.  That black stuff you see is actually frijoles molidos – a type of refried black bean.

Hey – don’t knock ’em ’till you try ’em.

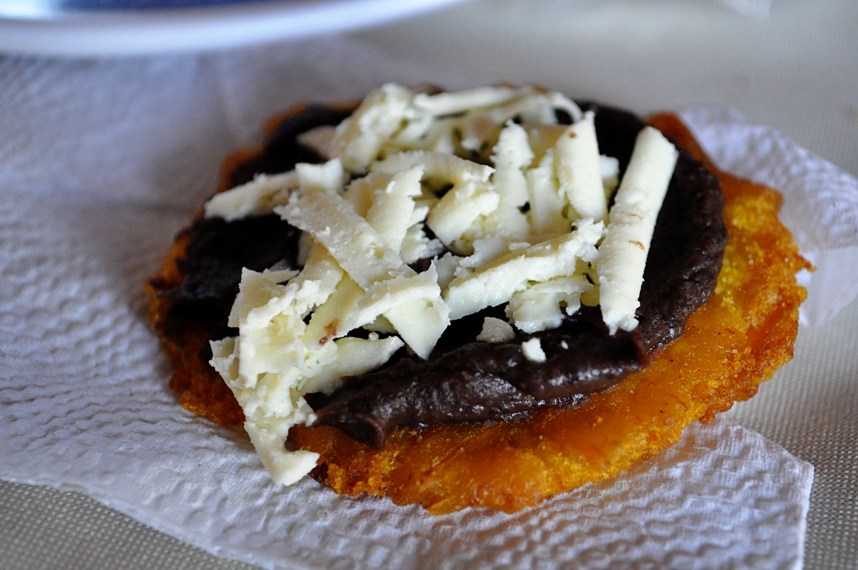
You spread the frijoles molidos over the patacones, and then you top it all with this slightly salty white shredded cheese.

Patacones con frijoles molidos y queso

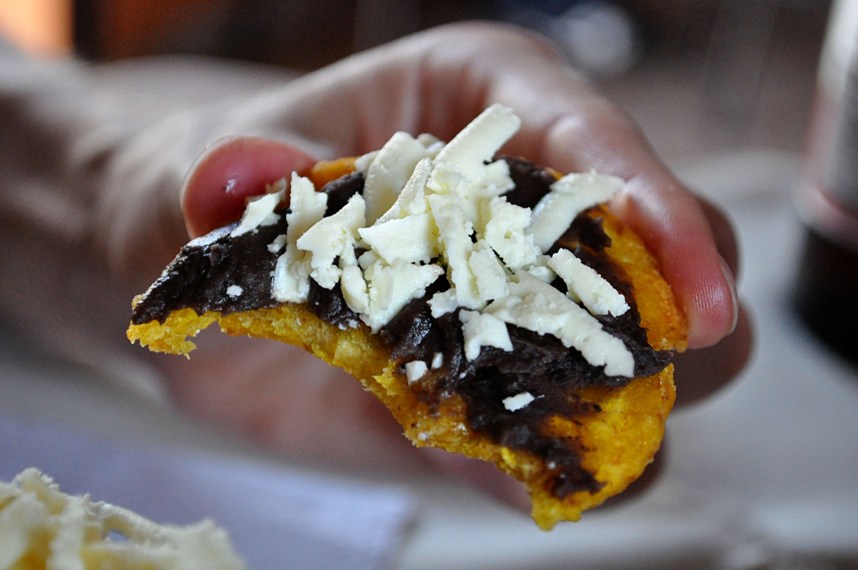
Mmmmmmmm.

CHOMP.

Oh, and let me take a moment to point this out:

Salsa Lizano is a Costa Rican condiment that is commonly found on restaurant tables and in refrigerators all over the country.  We have a bottle (or two) in ours, and we will likely have several bottles in our backpacks upon our departure.

Anyone know the export rules for Lizano?  Anyone?

And speaking of mmmmm….

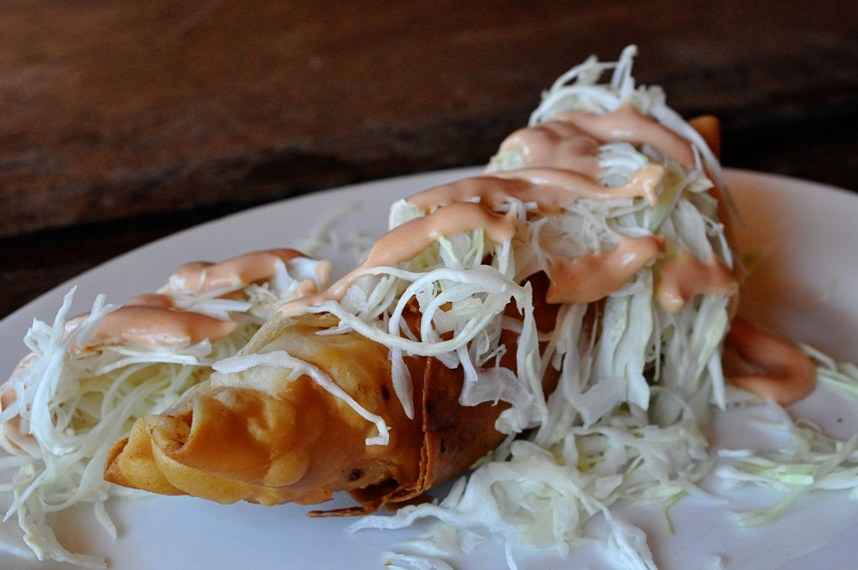
Erin and I each ordered fish tacos at the beach on Saturday.

Much to our surprise, they were fried!

Fried Fish Taco

I can’t say this surprise was unpleasant.  Although my arteries would probably disagree.  Especially because they drizzled Costa Rica’s infamous mixture of mayo and ketchup all over the top.  And of course, you can’t forget the cabbage.

YUM.

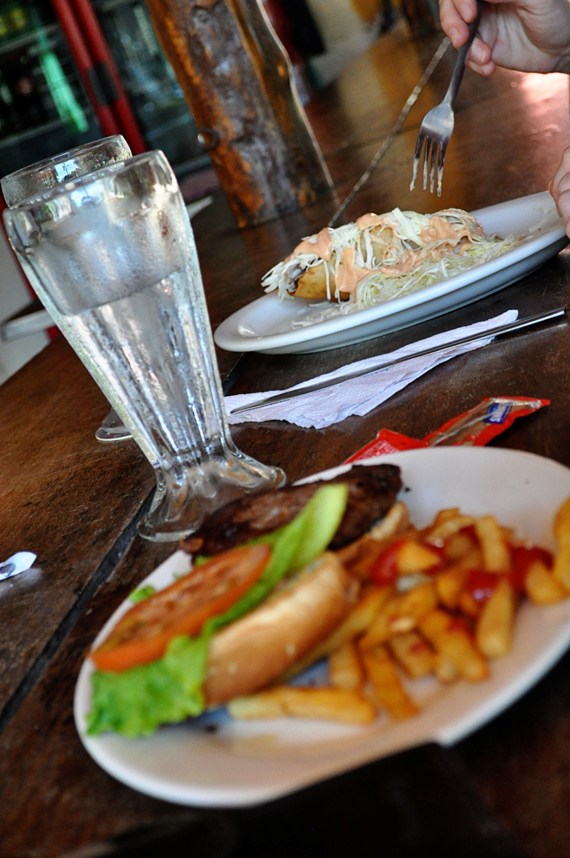
Karla just ordered a boring old burger.

Costa Rica Beach Lunch

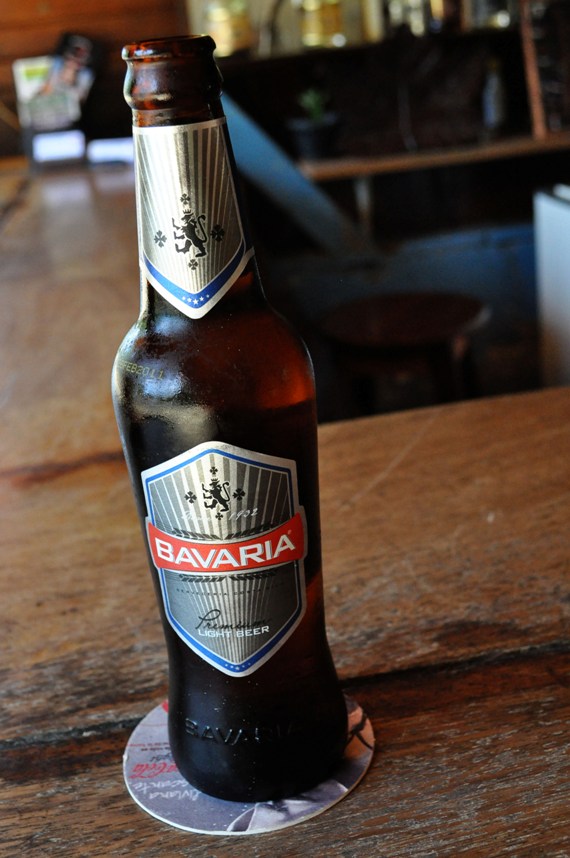
But even that, paired with an ice-cold local brew, can’t be beat on a hot day at the beach.

Costa Rica Bavaria Dark

Ironically, the one type of food I will probably miss the most is not even technically from Costa Rica.  It’s the ingenious invention of Aaron and Becs, and let me just say…. holy craptastic, batman!

They call them torti burguesas, which basically translates to grilled burgers wrapped in tortillas.

Oh, but that’s not all.

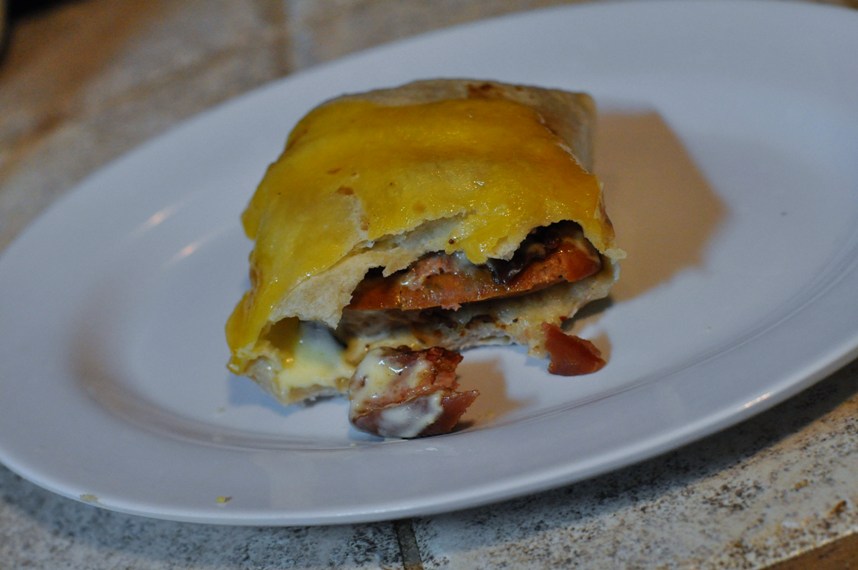
Add to them some cream cheese, crispy bacon, caramelized onions and a slice of cheddar on top, then bake them in the oven, and you have a tailgater’s wet dream.

I really, really wish I had a finished picture of these.  I do.  But I only thought to bring my camera on the day we made torti salchichas, one of my all-time favorite foods (hot dogs) done up torti burguesa-style.

*Warning:  If you’re not a big fan of meat – especially of the hot dog variety – you may want to skip the next couple of photos.

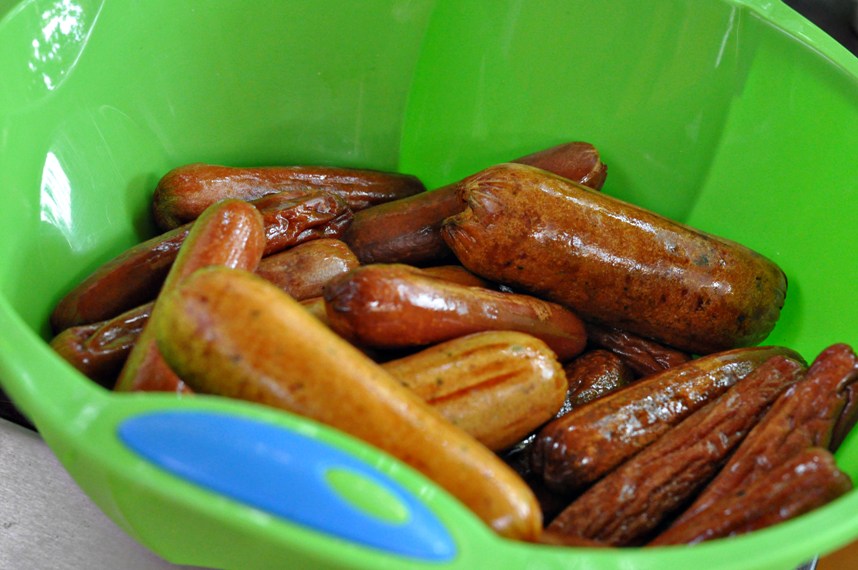
First the boys grilled up a bunch of hot dogs.

Bowl of hot dogs

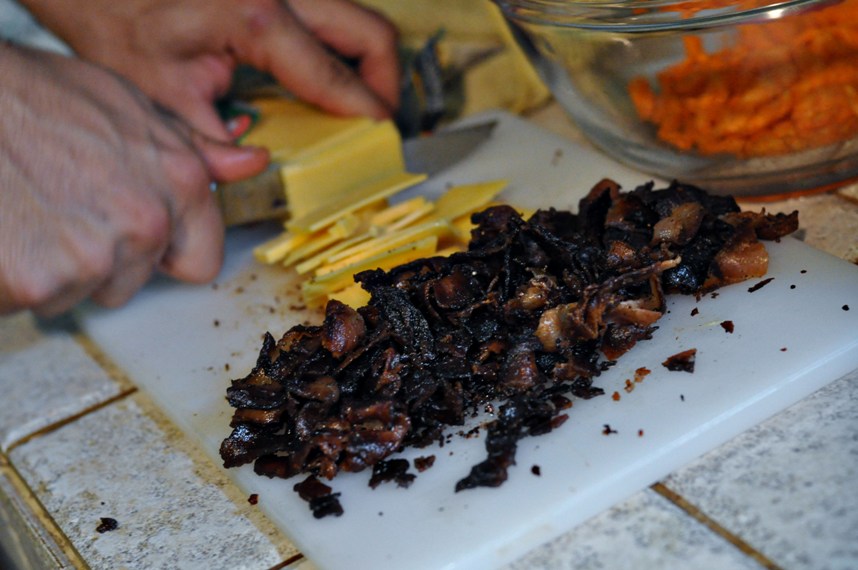
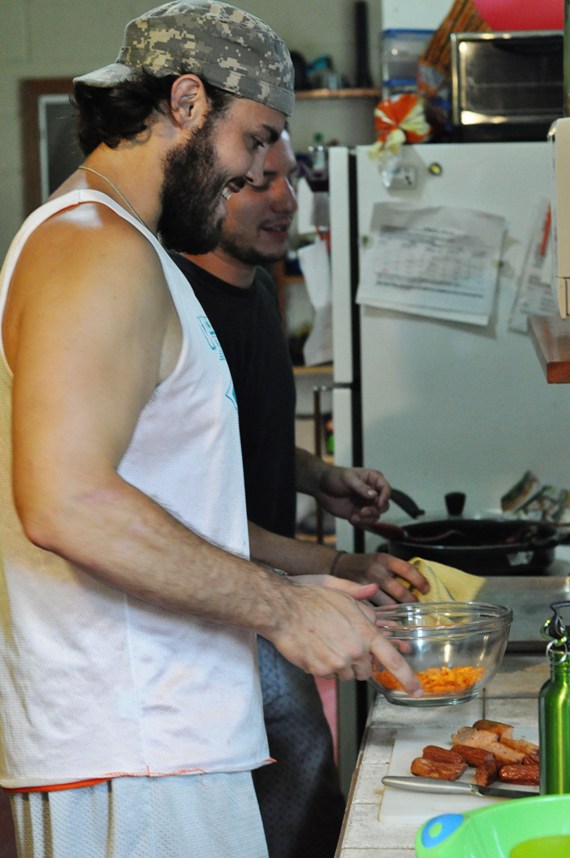
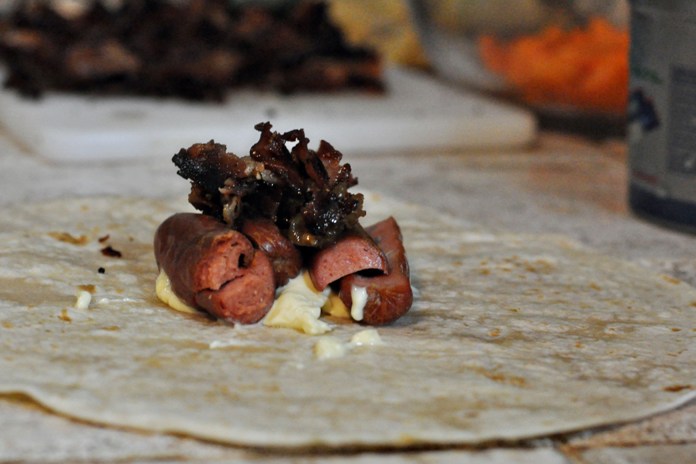
Then they put the tortis together assembly-line style.  A dab of cream cheese, hot dog pieces, caramelized onion, and a bit of crumbled bacon.  They may have sprinkled a few crunchy Cheetos in there for fun, but we can’t be sure.

crumbled bacon, cheddar cheese, cheetos

Finally, they wrapped ’em up and stuck ’em on a baking sheet with a slice of cheddar cheese on top and popped them in the oven.

And when they came out… wow.

Worth every single one of the 52,876 calories.

Okay, okay – 52,877 calories when dipped in Aaron’s homemade ranch.

But who’s counting?

Cheeseburger in Paradise

After over a week and a half of nonstop Noah’s Ark-style rain, the sun finally came out to play over the weekend, and Katie and I were hellbent on soaking up every single second of it.

Our original gameplan was to take off to the beach since we hadn’t yet been despite the fact that we’ve lived here for over a month.  (And, yes, we’re well aware of how pathetic that is.  Thank you.)  However, our ride fell through at the last minute leaving us high and dry without anything to do on a beautiful Saturday, so, naturally, we decided to horn in on the guys’ plans.

Remember these knuckleheads?

Homesick for some authentic American grub, Aaron, JJ and Matt had done some internet sleuthing and found a Tex-Mex restaurant located a few towns over.  Their plan was to spend the afternoon there watching college football, talking smack, giving each other noogies and whatever else guys do when chicks aren’t around.

Fortunately, they let us tag along and after an easy 45-minute drive through scenic countryside to the town of Tilaran, we found ourselves at 5 Corners Grill, a beachy little gem of a restaurant situated on a hill overlooking sprawling Lake Arenal.  Once there, we proceeded to spend the next six hours gorging ourselves on burgers and beer and hanging out with Jason and Cindy, the amazingly cool Austin, TX, couple who owns the joint.

A candid shot of Jason.  Cindy was wily enough to dodge me.

Despite having been open for less than a year, 5 Corners has a comfortable, well-established quality and loyal following of friendly regulars, many of whom are ex-pats themselves.  From the open-air patio bar with live trees growing right through the floor…

…to the Chicken Shit Bingo (which is exactly what you’re imagining it is) board and live scorpion on display in the breezeway…

I assume they put this down your pants and make you dance around for 10 minutes if you try to leave without paying.

…to the small garden and chicken coop located out back and assortment of squirmy, wiggly, disgustingly cute puppies of varying sizes and shapes milling about the premises, there is no shortage of interests to hold your attention.

Don’t get us wrong–Katie and I have been thoroughly enjoying the Costa Rican experience, but we had to admit that the smattering of Longhorns and Dallas Cowboys paraphernalia decorating the windows and good ol’ fashioned burger and fries were a pleasantly familiar taste of home sweet home.

This burger made my toes curl.  Don’t even ask what the bananas foster for dessert did to me.

By the end of the day, we were a few colones lighter, a few pounds heavier, and a few anecdotes richer (stay tuned, more on that tomorrow).

For anyone who happens to be passing through Tilaran or visiting the Lake Arenal area, I highly–highly–recommend this place.  No need to even thank me.

Just ship me a burger.

California, Here We Come

Before you get too excited, no, we are not going to California.

We are in Costa Rica right now, people.  Why would we go to California??

The title of this post will make more sense later.  Moving on.

Recently I’ve realized that aside from this:

And these:

Running Dogs

One of the things I’ve absolutely missed the most while living in Costa Rica is cooking.  And I’m not even that good at it.  It was just fun to do.  Therapeutic, even.  Man, I feel sorry for anyone who has to live with me when I don’t have my cooking outlet *cough*Erin*cough*.

Even though Judy has graciously offered us the use of her gorgeous kitchen (which I hope to show you at some point), the budget constraints that Erin and I have placed on ourselves have limited our main course dinners to primarily beans, rice, potatoes, or some combination thereof.*  We’re not missing out on our starches here, folks.

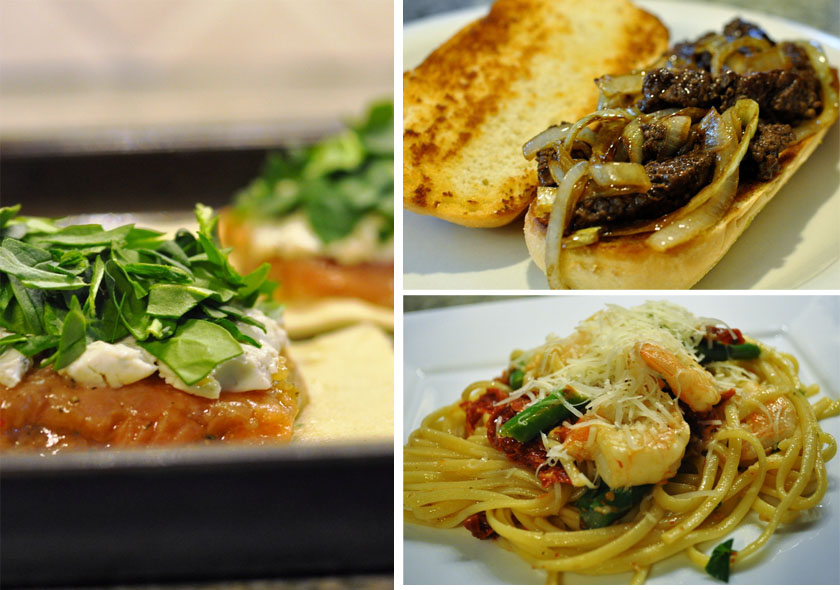
So in my nostalgia, I’ve found myself perusing recipes online and making lists of things I want to try concocting when I get home.  I’ve also been looking through the recipes I’ve already posted on this site.  I constantly crave things like that Shrimp, Asparagus and Sundried Tomato Pasta I showed you once, or those Spinach Salmon Bundle things that kicked off the whole food portion of this site in the first place.  Oh, and this Steak Sandwich.  I could definitely use a steak sandwich right about now.

Spinach Salmon Bundles, Cube Steak Sandwich, Shrimp Asparagus & Sundried Tomato Pasta

Crap I just drooled down my shirt.

Anyway.  I was going through my hard drive and found some photos of recipes I haven’t yet posted. Whoah.  I had forgotten all about them.  And they instilled feelings in me – feelings I haven’t felt in a long, long time.

So I’m going to share one with you today.  This is one of my all-time favorite summer/fall recipes.  And even though it’s meatless, it’s completely appropriate for company.  Even big, burly man-type company has always devoured this dish.  I don’t know why, and I don’t question it.  It’s simple and delicious.

The original recipe makes actual sandwiches, but I prefer to serve these open-faced.  You can find the original here.

California Grilled Veggie Sandwich

To make these (the way I make ’em), you will need:

  • Olive oil or balsamic vinegar (If I grill the veggies, I use olive oil.  If I sauté ’em, I use balsamic vinegar.)
  • 1 medium zucchini, sliced
  • 1-2 small yellow squash, sliced
  • 1/2 small red onion, sliced
  • 1 red bell pepper, sliced (sometimes I leave this off – it looks pretty, but there are already more than enough veggie toppings without them)
  • 1/4 cup mayo
  • 3-4 cloves of garlic, minced
  • 1 Tbsp. lemon juice
  • 1/2 cup crumbled feta cheese
  • Thickly sliced sourdough bread
Zucchini, Squash and Red Onion

Once you have your ingredients together, it’s time to get messy:

1.  Slice up all your veggies.

Sliced Veggies

2.  I often use an indoor grill to cook my veggies.  I grease the grates with olive oil and preheat it around medium-high.  For a less-tedious method, I sometimes saute the veggies with a little bit of balsamic vinegar.  Really, you can cook them any old way you want.  Just get them cooking!

Oil Grill Grates
Grill Veggies

3.  While the veggies are cooking, mix together your mayo, garlic and lemon juice and spread evenly onto 2 large pieces of the sourdough bread.  Then sprinkle on some feta cheese.

Sourdough Slices

4.  If you’re grilling your vegetables, check to see if the first side is done.  If it is, flip ’em on over.

Flip veggies
Grilled Veggies

4.  You can wait until your veggies are done cooking and re-use the indoor grill, or if you’re impatient like me, go ahead and get your grill pan oiled heating on the stove over medium heat.  Place your slices of sourdough bread on the grill pan, then cover it with some type of lid.  The goal is to get the feta cheese nice and melty.  (It’s not going to actually melt into a goo – but it should get nice and soft.)  This will also toast the bread.

Toast bread and melt cheese

5.  If your veggies get done cooking a little early, just set them aside in a bowl and cover to keep warm.

Bowl of veggies

6.  Once the bread is toasty and the cheese is melty, top the slices with your grilled veggies and enjoy!

California Grilled Veggie Sandwich

I know they don’t look like much, but there’s something about this mixture of toppings that makes these taste phenomenal.  Even Erin, who purportedly “hates” mayo, will gobble up these sandwiches.  If you try them, let me know what you think!

*Correction:  We usually do eat some combination of beans and/or rice for dinner.  However, sometimes our completely awesome boss makes a kickass meal and generously shares it with us.  He is a fantastic cook and we are ALWAYS grateful when he shares his masterpieces with us.

Ninety-Nine Bottles of Sauce in a Box

Ninety-nine bottles of sauce… Take one out, pass it about…

Wait! We just put those in there.

Okay.  Many of you have probably been wondering just what the heck we’ve been doing with our time during the day here in Costa Rica.  How do we earn our keep in this beautiful place?

Well, I’ve mentioned before that we came here primarily to work for an up-and-coming, family-owned hot sauce company called Chile Town.  We knew before we arrived that there would be some office work involved, including writing press releases and blog posts for the company website.  We also knew that we would potentially be making some of the sauce itself.

What we didn’t know is what, exactly, making hot sauce entailed.

It starts with the chile peppers, most of which are grown and hand-picked right here on the property.

Without giving away too many trade secrets before the sauce gets released to the U.S., I will say that some of the hottest peppers in the world are grown and used right here.  For that reason, caution must be used even during the picking-process.  Notice the gloves.  You don’t dare touch your eyes or exposed skin after handling hot peppers.

Chile Peppers

At this point some type of magic happens and the peppers are somehow washed, seeded, and mashed up into what we call… well mash.  By the way, at Chile Town each individual hot sauce uses an individual type of chile pepper – unlike many other hot sauces, which just use an extract to bring the heat, the sauces we’re helping to make here actually use the heat and flavor that come directly from the chile variety itself.  So a mild(er) sauce like the one called La Muñeca (“The Doll”) uses a less-spicy variety of pepper (yellow scotch bonnet) than the sauce called Bandito (“The Bandit”), which uses orange habaneros.

It’s all very scientific.

And if you think habaneros are spicy, some of the Chile Town sauces get even hotter than that!

*By the way, thanks to Becs for taking most of the following photos.  My gloved and mash-covered fingers were not about to get anywhere near my beloved camera.  Or my hair, apparently, which is a mess.  Apologies.

So what we end up with is this mash.

chile pepper mash

Appetizing, no?

Of course, the color/consistency vary depending on the type of pepper we’re using.  These are smoked jalapeños for the smoky Don Fuego (“Fire Boss”) sauce.

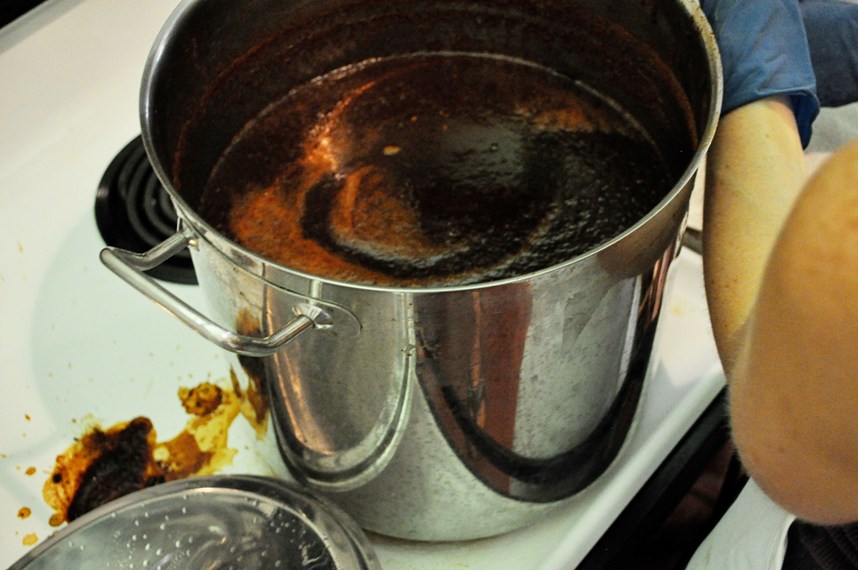
The first part of this entire process is really just basic cooking – we mix all the ingredients according to Aaron’s (aka “The Mayor’s”) top secret recipes and stick ’em on the stove to simmer.

Simmering Chile Town Hot Sauce

Here’s where it gets tricky.  Once all the ingredients are partying together in the pot and the sauce starts to thicken up, it’s time to blend.  This ensures a smoother, even consistency and that all of the flavors are truly melded to perfection.

The problem?  An industrial-sized blender, Aaron owns not.

So we use the small one.  Again, and again.  And again.

Blending Chile Town Hot Sauce

I’ll admit that this is probably the scariest part of the process for me.  I mean – you have this substance that is 2 kinds of hot – temperature and spicy – so if the blender decides to say… I don’t know… blow up in your face, you’re seriously burned.  Heat burned and heat burned.  Not pretty.  I’ve caught a splatter or two to know.

So we try to use the utmost precaution, especially during this phase of sauce production.

Blending Chile Town Hot Sauce

Once everything is blended, it goes back in the pot and back on the heat.  This time it needs to get to a certain (extremely hot) temperature before it can be bottled.  The goal is to have everything nice and evenly cooked to the desired level of thickness.

Don Fuego Chile Town Hot Sauce

Aaron’s stove takes a beating.

While the sauce is cooking, we need to wash bottles.  Lots and lots of bottles.

Hot Sauce Bottles

And of course, since no one wants to buy empty hot sauce bottles, we need to fill ’em.

Bottling Chile Town Hot Sauce

This step is a tid bit precarious, but it’s nothing we can’t handle.

Boxing Hot Sauce

We are sauce-making machines.

No thanks to this punk, who didn’t even bother to watch.

Stella Dog

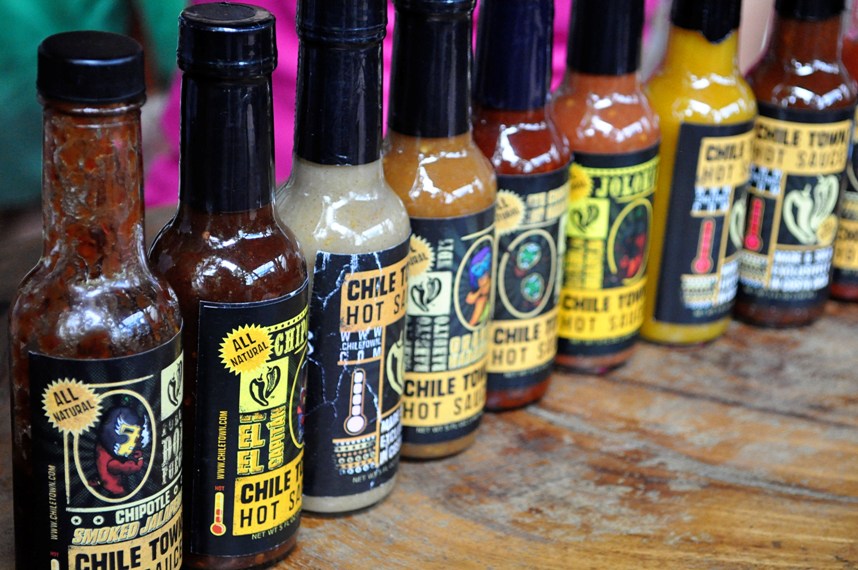
Once they cool a bit, we add the seals and labels.  Eventually, they look like this:

Chile Town Hot Sauce

Pretty groovy, huh?

Ironically, the most stressful part of the process is after all the sauce is made and we’re cleaning out the pots.  When the cold water hits the warm hot sauce remnants, the noxious chile fumes somehow get set off and I’m thrown into an ugly, hacking and sneezing fit.  It ain’t pretty.

And while Erin’s superior writing/editing skills have since earned her a place back in the air-conditioned office, I really don’t mind toiling over a steaming hot chile pepper concoction several days a week.  A true sense of accomplishment accompanies every seal of every lid; and while I dread the potential day when Aaron opens a bottle of sauce I made from one of his recipes and, God forbid, something just doesn’t taste quite right, I will at least savor the experience until that time.

Even though all of the bottles that eventually get sold in the U.S. will have been made to exact specifications in a factory by qualified professionals, I know I will smile every time I see one because I am now a first-hand witness to just some of the frustration, sweat, and determination that goes into creating a product.

A livelihood.

A passion.

And it’s pretty damn sweet.  And spicy.

The Fruits Of Our Labor

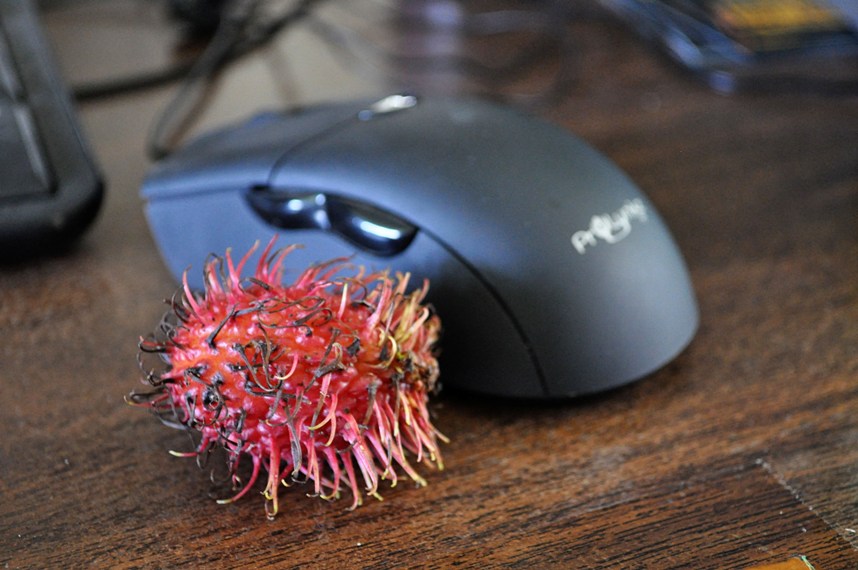
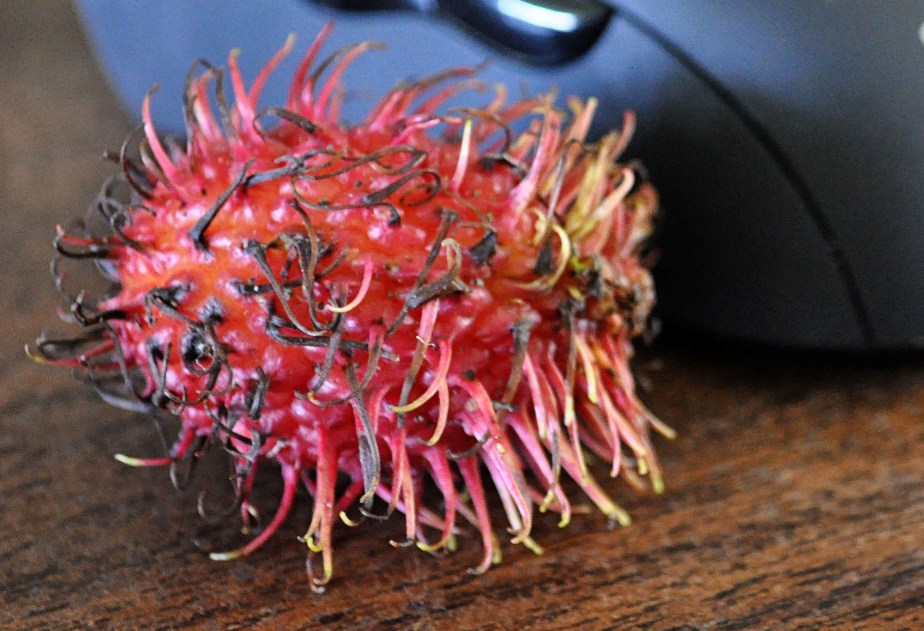
See this?

What is this?

Pinto, a world-travelling intern from Spain who’s been working here for approximately the past 5 years, always brings strange and wonderful fruits to work and offers to let us try them.

Meet Pinto.

Pinto is a wandering engineer who doesn’t believe in marriage and somehow always manages to get his food before anyone else when we go to our most frequented restaurant here in Bagaces.

And, like I said, Pinto is generous with fruit – fruit he buys from the local street vendors – fruit I’m always eager to try.

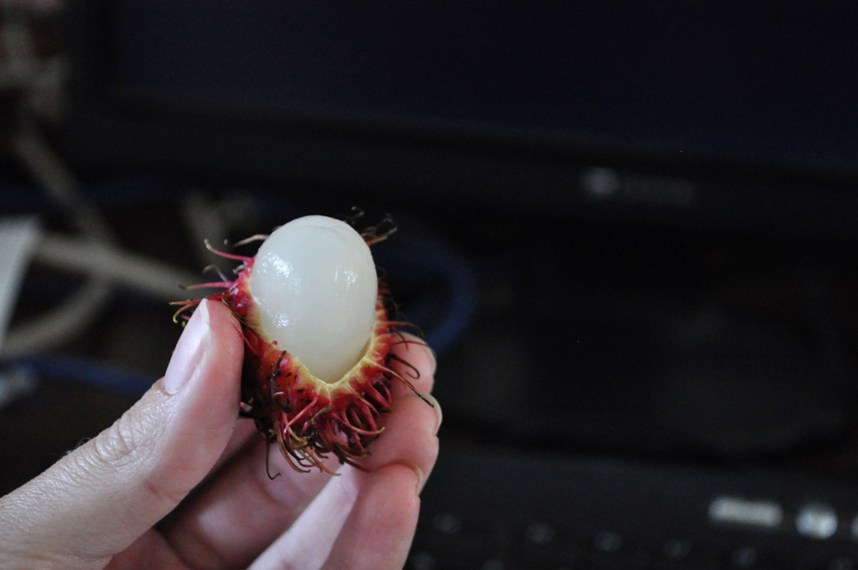
But I’ll admit – when I saw this sitting on my desk, I was a little skeptical.  I mean – it looks more like a toy I’d buy for my dogs than something edible.

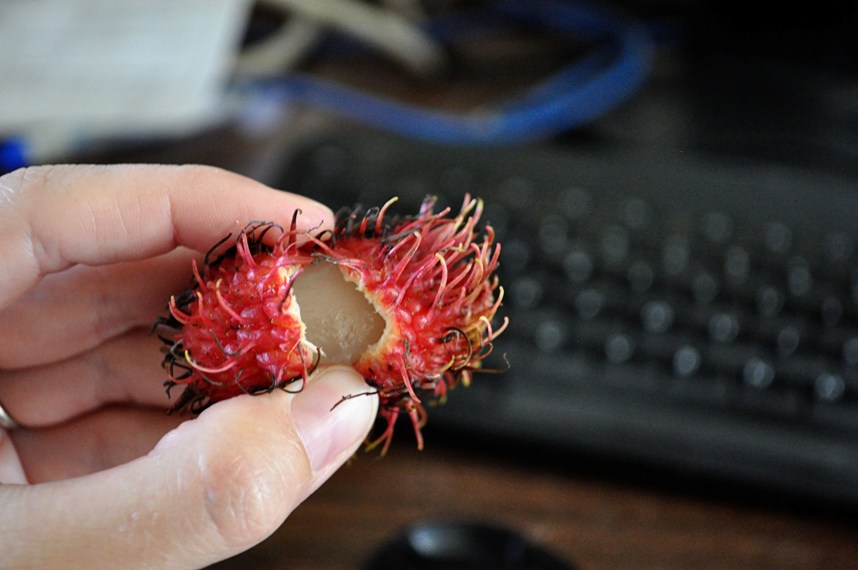
I had to look inside.

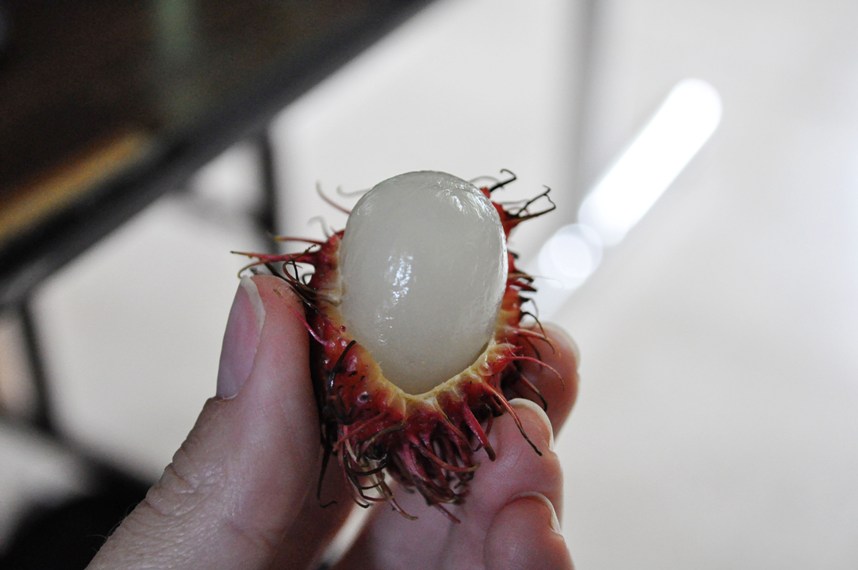
Oooh!  What’s that?  Some type of gummy, gooey, gelatinous substance.  Like something out of Alien

Costa Ricans call this a mamón chino, otherwise known as a rambutan (according to Wikipedia).  This is the edible “meat” inside.  Should I eat it?

Hells yeah I should.  It was good. Tangy, sweet, and a really cool texture.  The only thing I did not enjoy was the woody seed I managed to splinter in my mouth with my teeth – the seed I’m just now reading on Wikipedia is “mildly poisonous” when eaten raw.

Oops.

My mistake.  This time. But next time?  Next time I’ll be ready.

The Not-So-Musical Fruit

So we had an interesting dinner experience the other night.

In an effort to save a little moolah and live more like the locals, we attempted to make rice and beans.

Well.  I’m sure this is something that turns out absolutely delicious for those who eat it regularly and have actual… you know… seasonings in their kitchens.  But I’ll spoil the ending to this little story by telling you that ours ended up tasting a little more like… um… how should I put this?  Paper.

Our very first problem was that I felt it was imperative that I took a nap immediately when we got home.  The “nap” turned into 3 hours, and I woke up at 5:00.  So what?  Even if it takes a couple of hours to cook, no big deal, right?

Wrong.

I first consulted Judy, our gracious host and excellent cook about how we should get started.  She explained how she puts the whole onion inside the rice cooker (it actually roasts while the rice cooks so you can just squeeze the onion out of its outer layers of skin when it’s done), along with some diced pepper, garlic, and “other things” – other things we most certainly did not have.  She was generous enough to give us several cloves of garlic and some celery leaves to throw on in, and luckily we already had an onion and red pepper.

She showed me how to sort through the beans and pick out anything that had split or any pieces of rock or cement that might have found its way into the bag during processing.  (Which I’m told is pretty standard.  You know, like bugs in your pasta.  Oh we haven’t told you about that?  It’s dee-lish.)  Luckily, we had a pretty good bag.  She then explained that they needed to sit in a pot of water for 2-3 hours to soften up prior to cooking.

Wha?!

That’s right, she informed my dumbfounded expression.  2-3 hours should do the trick. Ok, so that’s still not terrible – then maybe 20 minutes to cook and we can eat around 8:30, right?

Wrong again.

When I googled “how to cook dry black beans,” I learned that not only do you need to soak them for 2-3 hours, but the best way to cook them is at a low simmer for another 2 hours!

WTF.  It’s beans.  And rice.  But apparently it takes longer than Coq au Vin to make without the delicious indulgence of all the fat and calories.

So I went back to Judy, tail between my legs.  Um… may I please borrow your pressure cooker?

Sigh.  She had to come back over and show us how to use it without burning our faces off, but this drastically reduced the cooking time and eliminated the need for soaking them.  Just throw all our stuff in the pot, and a little while later, poof! Beans are cooked.

Meanwhile, the rice concoction smelled delicious.

By this point we were starving, so we threw it all into a bowl and hoped for the best.

And it actually looked halfway decent…

Rice 'n Beans

But the taste… Oh, the taste.  How do I say this?

There wasn’t one.

In a true moment of ingenuity, Erin suggested we sprinkle it with our salty plantain chips, which proved to be a VAST improvement.

Platanos

Next time (har-har) we will be investing in some seasonings.  And I don’t think I ever want to try Judy’s rice and beans.  I would probably cry.

I spent the next morning walking around the yard reassessing this whole “budget” situation and trying to figure out whether we could afford to live off of boxes of macaroni and cheese for the next two months.

When I realized there’s no possible way, I felt frustrated for a second.

But only a second.

Because it’s really difficult to stay frustrated on a morning when – even with bland beans still percolating in my stomach – the world outside my bedroom looks like this:

Costa Rica Sunrise

And this.

Rice and beans?  What rice and beans?

I Want It That Way. With Mushrooms.

I’ve mentioned before that when I first got into this blogging business I had zero intention of posting recipes.  Ever.  I originally thought that would be like Elmer Fudd writing articles on behalf of PETA, or the Backstreet Boys trying to teach us the artistry of compelling lyrics.

It just didn’t make sense.

But then this happened.  It was back when I had a full-time job and was trying to write a new post every single day.  Back before I had an awesome writing partner to relieve the pressure.

I’d wanted to reveal our finished kitchen, but the problem was, it wasn’t finished.  So in a desperate attempt to fill some space, I showed you the (burned) spinach salmon bundles I’d made for dinner that night.  They were burned, people!  I’m so not good at this.  But for some reason, some of you told me you liked the post.  And some of you even tried the recipe.  Which is pretty damn cool.

So I started showing you more of my recipe endeavors.  Not because I’m a great cook – I’m not even a very good cook.  But like I said in that first recipe post:

I’m not really a “pinch-of-this, dash-of-that” type of person, but more of a “put-the-measuring-cup-on-the-counter-and-bend-down-to-eye-level-to-make-sure-I’m-getting-just-the-right-amount” type person.

Cooking doesn’t come naturally to me.  But I can follow instructions – if I haven’t had too much wine.  (At least Erin doesn’t have to worry about that nasty business anymore, eh?)  And I guess I’ve been justifying the continuation of the recipe posts by thinking there are more of you out there, like me, who’ve been afraid of cooking well into “adulthood” and just need a little encouragement in the way of pictures and “been-there-done-that” mess-up stories.

Because I’ve finally learned that IT’S OKAY TO MESS UP IN THE KITCHEN.

At least I hope it is, because I do it all the time.  So, I’ve come to you today with another recipe.  But if these are starting to bore you and you really couldn’t give two hoots about what I’ve stuffed into my expanding waistline last night, do let me know.  It won’t hurt my feelings – they aren’t even my own recipes!

But I do feel especially compelled to share what I made last night.  It was so… different.  So out of my usual comfort zone, and it turned out delicious, so yes.  I have to share.

Aside from acquiring some of the ingredients, it was deceptively simple to make.  It contained some of my usual friendly ingredients like pasta and butter.  But it also contained a couple I’d normally shy away from, like Japanese mayonnaise and chili garlic sauce.  I stopped at a local Asian market to pick up those things, and let me just tell you – I will be back.  The food they had there was incredible!  And scary.  But mostly incredible!  Oh, the sushi I could (attempt to) make…

So the original recipe that caught my eye yesterday can be found here.  The only thing I changed was cooking up a bed of pasta for the main dish.  You know, ’cause I like to keep it light.

Portobello Shroomies with Creamy Scallop Topping

Do NOT be scared of this concept.  Beef-less as it is, this was fit for company.

To make them, you will need:

  • 3 Tbsp. butter, divided
  • 4 large Portobello mushroom caps (My little po-dunk grocery store lets me buy these pre-packaged or in bulk, so you shouldn’t have a problem finding them.)
  • Garlic Powder
  • 1 Tbsp. butter
  • 2 lbs. scallops (I bought the super cheap 4 oz. bags of “mini” scallops.  They were 2 bags for $3, so I bought 4 bags.  Even though that’s only 1 pound, the amount turned out to be perfect to cover the mushroom caps.)
  • 1 cup Japanese mayonnaise (I bought the recommended Kewpie brand.  It has a freaky little cartoon baby on the front.  I hope this mayo isn’t made out of babies.)
  • 1/2 teaspoon chili-garlic sauce (They actually had this at the commissary on post, but I bought the jar at the Asian market.  I’m a wuss when it comes to spicy food, but I actually wish I’d added a bit more of this.  The flavor was great, and I found the mayonnaise a little overpowering.)
  • 2 Tbsp. green onions, chopped
  • 8 oz. linguine (optional)
  • Drizzle of olive oil (optional)
Portabello Mushroom Cap Dinner

*Missing from team photo:  Garlic powder and pasta.  I think they were spotted fooling around under the bleachers.

Directions:

1.  Defrost your scallops (assuming you’re not lucky enough to live somewhere you can get fresh seafood and had to buy frozen) according to the package directions.  And if you decided to make a lovely bed of pasta for your shroomies, go ahead and get your water boiling.

pot of water

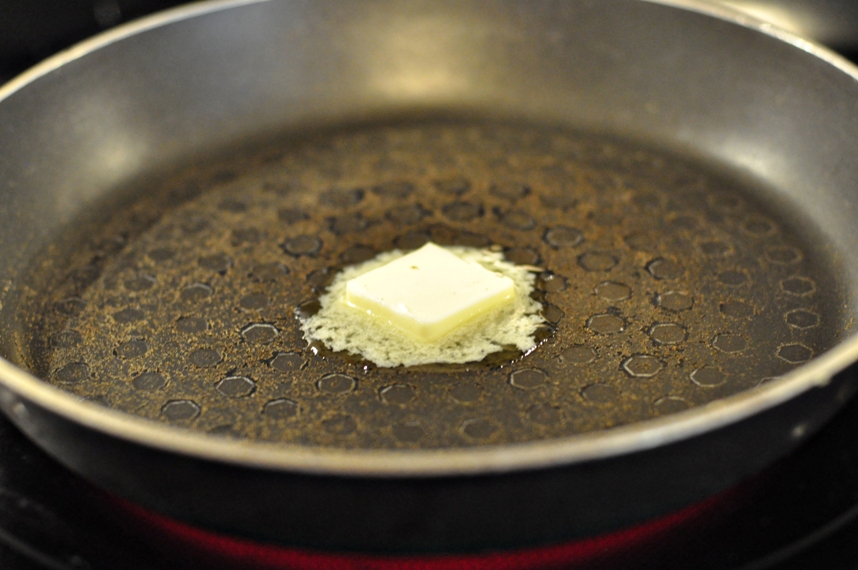
2.  Thoroughly rinse your Portobello mushrooms.  Don’t be scared of the gills – they actually feel kinda good to the touch.  (Is that weird??)  Divide the 3 Tbsp. of butter into 4 equal pieces.  Melt a piece in a sauté pan over medium-high heat, then add a mushroom cap and cook until soft in the center.  (This took approx. 2-3 minutes per side for me.)  Repeat with the remaining mushroom caps and butter.

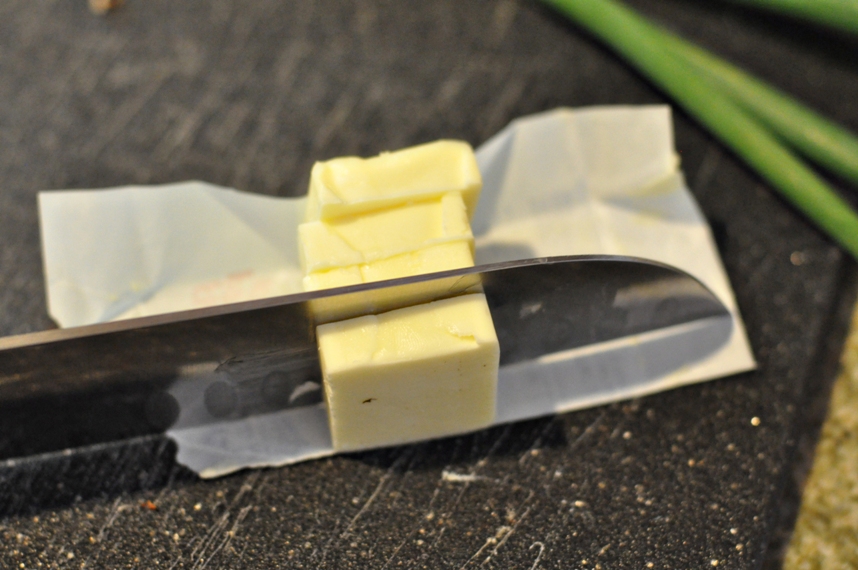
Divide Butter
melt butter in pan
cook portabello caps

*I found this to be a bit meticulous.  If I make this again, I’ll probably use my large grill pan and cook all 4 caps at once.  Cooking them one at a time forced me to rinse the pan between mushrooms because the butter would begin to burn.

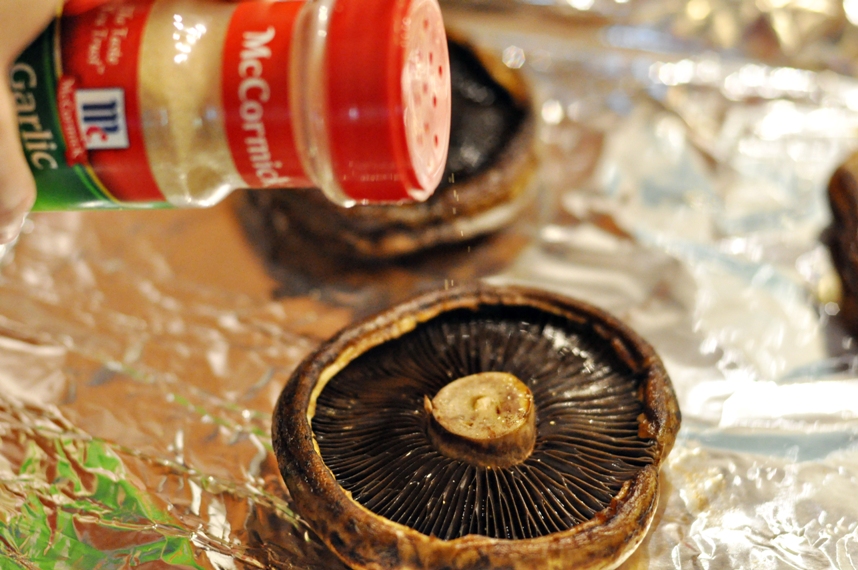
3.  Line a baking sheet with aluminum foil.  As the mushrooms cook, place them on the sheet gill side up, so they make little “bowls.”  Mmmmm… fungus bowls.  Generously sprinkle them with garlic powder.

line pan with foil
garlic powder

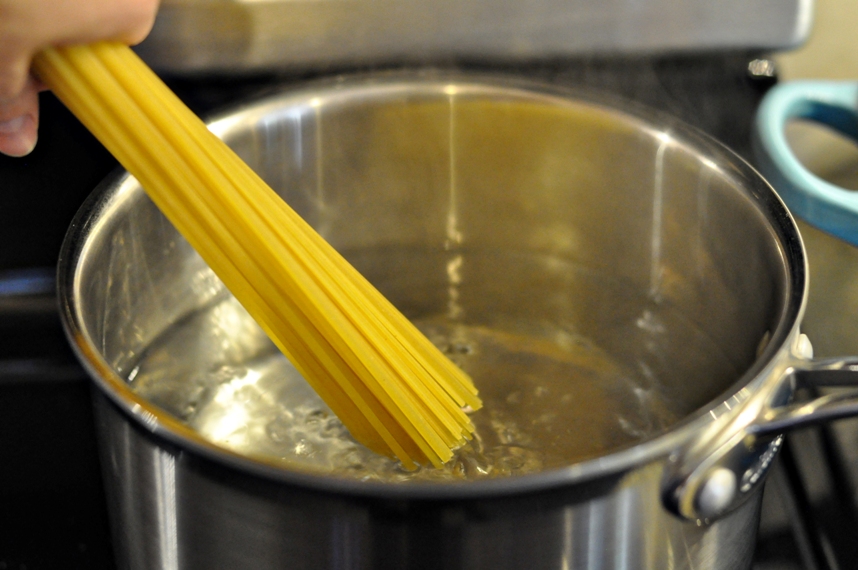
Oh, and your pasta water should be boiling by now, so salt it and add the linguine.

cook linguine

4.  Preheat your broiler and set the oven rack about 6″ away from it.  Do you use your broiler?  I do all the time.  It’s FANTASTIC.  Just remember to leave your oven door cracked open a couple inches while your food cooks.  That’s all there is to it!

5.  Melt the last tablespoon of butter in a skillet over medium-high heat and sauté your scallops until they’re lightly browned.  If you’re using larger scallops, they’d probably be great seared.  But mine ended up kind of boiling in the pan because they were cheap and frozen and filled with water.  No worries, though – they still turned out great.

cook scallops

Fill each mushroom cap with the scallops.

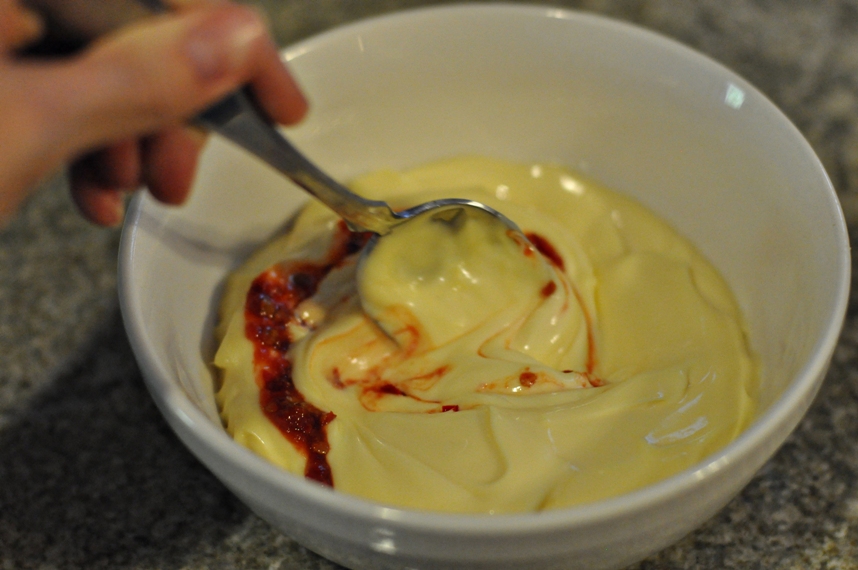
6.  In a small bowl, mix together the cup of Japanese mayonnaise and 1/2 (or more) teaspoon of garlic chili sauce.

mayo sauce

*Be careful not to let go of the foil top of the chili sauce while you’re opening it, lest you splatter red sauce all over your counter and walls.  I’ve been putting my backsplash to good use.  But that’s probably just me.

chili sauce splatter

This Kewpie brand Japanese mayo looked strange. It came in a very flimsy plastic bottle inside a loosely wrapped plastic pouch.  But the mayo itself was very similar in consistency to the mayo we’re used to – just a bit of a different flavor and probably worth purchasing if you’re going to try this recipe.

Japanese mayonnaise

Anyway, mix the mayo and chili sauce together and spoon that mixture over your scallop-filled mushrooms.

mix mayo sauce
spoon sauce over scallops

7.  Stick the pan under the broiler until the topping turns bubbly and slightly brown (about 3-5 minutes).  WATCH CAREFULLY.  The broiler can do wonderful things, but it can also burn food in an instant.

broil portabello mushrooms

8.  When your pasta is done, drain it and add a drizzle of olive oil to keep it from getting dry and sticky.  I also added a bit of the mayo/chili sauce topping, which worked really well.

cooked pasta

9.  When your mushroom topping is nice and bubbly and starting to brown, take them out of the oven.  Chop up a green onion (or two) and sprinkle on top of the mushrooms.  I ended up only using the green part of the onion.

bubbly broiled mushrooms
portabello mushroom with scallop cream sauce

10.  Assemble!  Dish some pasta onto a plate, then use a STRONG spatula to maneuver a mushroom cap onto it.  I say this because I used a WEAK spatula for the first one, and it splattered upside-down (of course) back onto the baking sheet.

Yes, these things happen to me.

All.  the.  time.

Sorry, no picture to commemorate my humiliation.

But I do have these:

This should have some plain roasted asparagus sitting next to it.  Yum.

So think you might try it?  Or is this just a little too freaky for you?

A Good Thing Gone Bad

In the midst of all the packing and airline melodrama Katie and I had going on last week, my body decided that it, too, would capitalize on this opportune time to start actin’ a fool.  And act a fool, it did.

I could easily ramble on for the next five paragraphs about the symptoms I had and what all led up to the final diagnosis — and I did in the first draft, before remembering that long-winded monologues detailing your every pathological idiosyncrasy generally make people want to chew their legs off or jump in front of moving vehicles to make it stop.

So, instead, let’s just say the good news is: I’m not dying.  Can I get a what-what?!

However, the bad news is… I can no longer drink wine.

Delicious, stress-reducing, body-tingling, confidence-boosting, life-affirming wine.

Why not just stop feeling while I’m at it?

While there’s no way to test for it — since, technically, it’s not even an actual allergy — recent events seem to indicate that I’ve developed an intolerance to the sulfites in wine.

For those of you who’ve had no reason to ever learn about sulfites — because, why would you? — they’re preservatives added to extend the shelf life of processed foods such as baked goods, soup mixes, pickled foods, dried fruit, potatoes and potato chips, trail mix, jams, maraschino cherries, condiments, juice, molasses, guacamole, etc.

Dang.  There goes my world-famous Molasses Pickled Prune Bread with Guacamole Marmalade recipe.  The PTA Council will just have to find another Refreshment Coordinator for the monthly meetings.

Even then, sulfites and I would be cool if that were all but, for whatever reason, they had to go and “naturally occur” in grapes.  And then wine had to go and “be made out of” grapes.  And then I had to go and “be sensitive” to grape sulfites.  Really, there’s a lot of blame to throw around here.

By the way, I couldn’t find any pictures, but here’s what I’m guessing a sulfite looks like:

Sulfites are characterized by douche-y smirks, Ray-Bans and circa-early ’90s soul patches.  Also, they’re known to lurk around local high school hang-outs, wear button-down flannel shirts with the sleeves ripped off, and drive beater Camaros they claim to be “restoring”.

It’s no wonder my body decided to wisen up and lay the smackdown on these suckers.

The cause for sulfite sensitivity is unknown, but apparently it’s pretty common for people to randomly develop it later in life, and the only “cure” is to avoid foods that trigger a reaction.  Which is a pretty lame cure if you ask me.

Never in a million years would I have suspected such an utter betrayal by my internal organs but, apparently, developing new allergies is one of the many sadistic tools your body has at its disposal to destroy your will to live as you get older, thus paving the way for your bitter-ass retirement years.

Fortunately, my sensitivity seems to pertain specifically to wine and certain juices (Orange, I’m looking at you), so I guess I should be thankful that my culinary habits don’t require a major overhaul.  Plus, some friends have put me onto certain low-sulfite wine brands to try and I can still drink beer like a champ (or at least as well as I was able to before, which was actually not at all like a champ).

Normally, this would be the part where I indulge in a little righteous self-pity but, during my exhaustive Google research over the past week, I’ve come across a number of blogs written by people with sensitivities to all sulfites, and it definitely puts things into perspective.  Considering they’re as much a staple of the American diet as flour and eggs, this means every grocery shopping trip, restaurant, social gathering, buffet, snack tray and baked good made by a well-meaning neighbor is a minefield of potential toxins for them.  And you don’t hear them whining.

One blog I especially loved was Wine NOT!, written by a spunky, hilarious lady who’s adapting hilariously to her new lifestyle.  Seriously, cannot emphasize the hilariousness enough.

Hilariosity?  Hilariality?  Hilaritude?

Whatever, just go read her blog.

(Ed. Note: Ok, I actually just clicked on her blog and today’s post is about scooping a growth out of her neck with a melon baller.  So if you’re not into that sort of thing, maybe wait until tomorrow to start reading.)

Anyhoo, what I’m trying to say is, in the Grand Scheme of Things, considering all the potentially horrible diagnoses I could’ve been handed, I got off easy like Lindsay Lohan on a drug charge.

I’ll drink to that!

I’m In Love, I’m In Love, And I Don’t Care Who Knows It!

Two things:

1.  Chocolate.

2.  Peanut Butter.

I love chocolate and peanut butter so much.  How do I describe my passion?  Let’s see… If I could have a 3-way with chocolate and peanut butter right now, I would.  I might even let them videotape it.

Ahem.

Chocolate Peanut Butter Cream Pie

As it stands, my enjoyment of this delicious peanut butter cream pie (recipe found here) has remained relatively private – shared with only a few select neighbors in the protective confines of their living room.

See, I was assigned the dessert responsibility for their “Dutch BBQ” the other night.  For some reason this pie, which I hadn’t made in several years, popped into my head.  I couldn’t get it out.  Luscious creamy peanut butter base with a fluffy chocolate topping.  Have I mentioned how much I like chocolate and peanut butter?  (See “Who the Heck is Katie?” at the right.)

Here’s What You Need:

  • 1/2 (8 oz.) package cream cheese, softened
  • 1 Tbsp. white sugar
  • 1 Tbsp. cold milk
  • 1 C. peanut butter
  • 1 (8 oz.) container frozen whipped topping, thawed
  • 1 (9″) prepared graham cracker crust
  • 2 (3.9 oz.) packages instant chocolate pudding mix
  • 2 C. cold milk
  • 4 peanut butter cups, cut into 1/2 inch pieces (Optional – I know it takes away from the presentation, but I often forgo these little adornments on desserts.  I feel like it adds stress when cutting the slices because everyone wants a piece of the peanut butter cup and there might not be enough.  It also dictates the size of the pieces.  And that’s just not right.)

Here’s What You Do:

1.  Put your half brick of softened cream cheese in a bowl.

Softened cream cheese

2.  Add 1 Tbsp. of sugar, 1 Tbsp. of cold milk, and 1 C. peanut butter.  Stir until creamy.

Add 1 Tbsp. Sugar
Add 1 Tbsp. Milk
Add 1 C. Peanut Butter
Stir until creamy

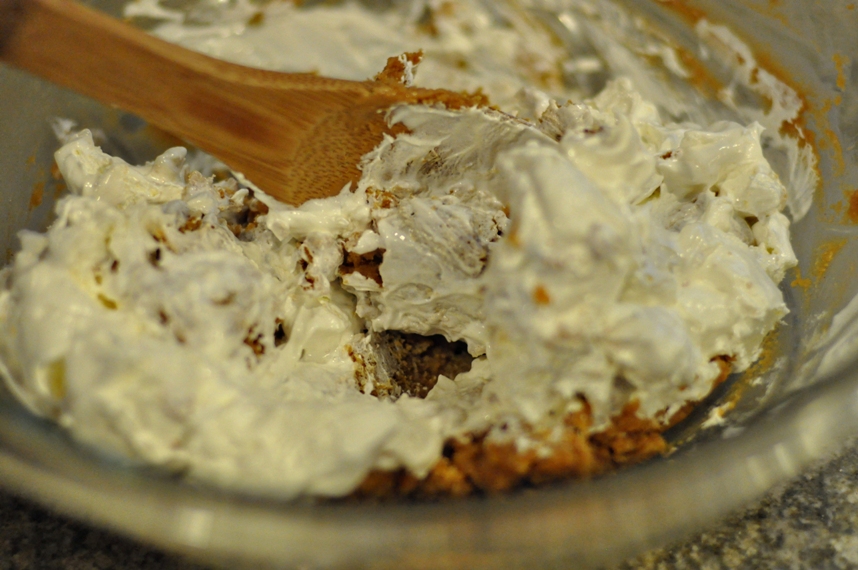
3.  Fold 1 1/2 C. of the cool whip to the peanut butter mixture.

Cool Whip

If a little bit of it falls on your finger, just go ahead and lick it off.  You shouldn’t fight impulses like this.  Fighting them makes you grow up.  And no one wants to do that.

Taste the Cool Whip

Fold in the Cool Whip.

Fold in Cool Whip

The Cool Whip will make it nice and fluffy.

Fold in Cool Whip

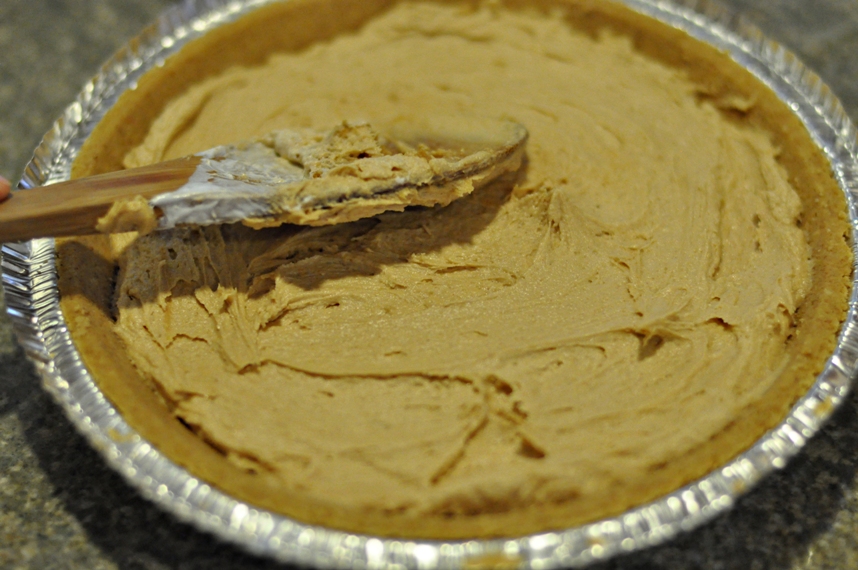
4.  Spread the peanut butter mixture into the bottom of the pie crust.

Spread mixture into pie crust

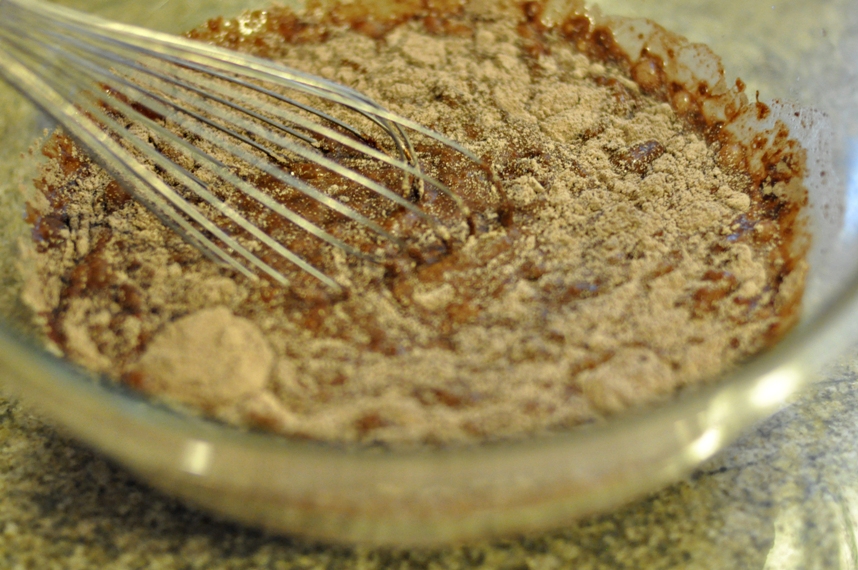
5.  Whisk the pudding mix and 2 C. cold milk together in a large bowl until relatively smooth.

Chocolate Pudding Mix
Add milk to the pudding mix
Whisk milk and pudding mix

6.  Add the remaining Cool Whip and stir to combine.

Add remaining cool whip

7.  Spread the chocolate mixture on top of the peanut butter layer.

Spread chocolate mixture over peanut butter layer
Double Layer Chocolate Peanut Butter Pie

Okay.  So it’s not the most attractively presentable dessert to take to a gathering.  But I promise you, when people get a taste of that creamy, chocolaty, peanut buttery goodness, they won’t care.

Chocolate Peanut Butter Pie

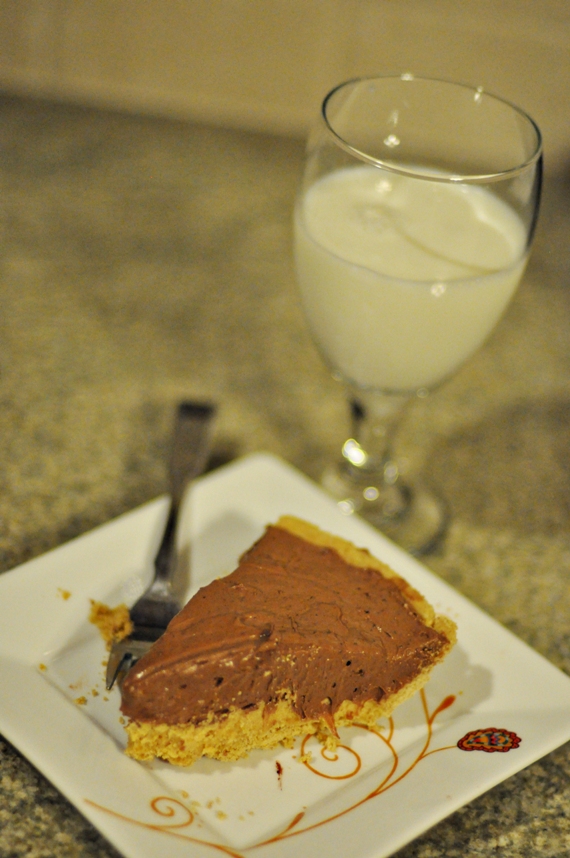
Especially when served with a tall glass of milk.

Chocolate Peanut Butter Pie with Milk

Seriously.  If you ever want anything from me – almost anything at all – shove a piece of this under my nose and I won’t be able to resist.

Chocolate Peanut Butter Whipped Pie

Is anyone more crazy about chocolate and peanut butter than me?!