Navigate / search

Sacrebleu Cheese Summer Salad

It has been freakin’ hot here.

Like, 100-degrees+ day after day after day for the past couple of months.  We maybe get a breather in the 90’s every now and then, but those days seem few and far between.

It’s a muggy, sweat-inducing wall of solar energy out there, and I’m loving it.  I’ll take these sweltering, b.o.-urging summer soggers over bulky sweaters and frost any day.  I can take the heat, as long as you can take the smell.

But if there’s one thing to complain about during these crazy hot days, it’s the fact that it’s damn-near impossible to turn on the oven without raising the temperature of my entire house by at least 20-degrees.

Sweat?  I don’t mind it.  Excruciatingly high a/c bill?  I mind it.

So when I get home from work, I’ve had to force my vino or cold beer-influenced mind (do I sound like an alcoholic?) to get a little creative.

Lucky for anyone who depends on my cooking for survival, my sister sent me a recipe a few weeks ago that she’s been insisting – incessantly – that I try.  She calls it, “The Best Salad Ever,” though I still think I dig this one just a tad more.  But, considering hers takes a bit less work (store-bought dressing and no slicing of mangos, which is a huge pain-in-the-ass by the way), I will highly recommend it after finally caving and making it last night.

Say hi, Kelly.

It didn’t take too much convincing for me to try it since it requires very little work (score!) and the use of avocados (double-score!).

Here’s what you need:

  • Chicken (You could use breasts or whatever you have – I used tenderloins since they cook very quickly and are great for salads)
  • Seasonings for the chicken (I’m deliberately vague here because you really can use whatever your little heart desires.  Upon Kel’s recommendation, I used dried basil and garlic powder)
  • Romaine Lettuce
  • Golden Raisins (Whatever you do, do not leave these out!  I don’t even like raisins as a general rule – they’re all wrinkly and have a weird texture, but these completely complimented this salad so deliciously, it just would not have been as special without them.)
  • Avocado (yum, yummy, yum yum yum)
  • Bleu Cheese Crumbles
  • Red Onion
  • Bleu Cheese Vinaigrette  (Don’t pass on this, either.  I’d never had it, but it’s wonderful.  Not as heavy as that cream-laden stuff.  I found this next to the bagged lettuce at the grocery store.)
  • Mandarin Oranges (I didn’t use these because again, they’re weird and wrinkly, but like the golden raisins, I bet they’d be really good in this)
  • Croûtons (Didn’t use because I forgot.  And you know what?  I didn’t miss them.)
Bleu cheese chicken salad

Here’s How to Put it Together:

1.  Heat up some olive oil in a sauté or grill pan over medium-high heat.

2.  Season your chicken with your choice of seasonings (I used dried basil and garlic powder – plenty of it).

3.  Cook your chicken until it’s no longer pink and the juices run clear.  I look for the purty grill marks and then slice open a piece to make sure the pink is gone.

4.  While the chicken is cooking, dice up some read onion – or leave it in rings if you prefer – and dice up your avocado.  I only used half the onion, by the way, and still had plenty leftover.  Red onion can be pretty potent.  If you’re going to let your diced avocado sit out for awhile, sprinkle some lemon juice on top to keep it from turning brown.

5.  Just like the Honey Lime Grilled Chicken Salad, I like to serve this up assembly-style.  Throw all of the ingredients into a bowl per your preferred ratio.  Everybody’s happy!

Look at that – romaine, avocado, finely diced red onion. bleu cheese, magnificent golden raisins, and grilled chicken – all partyin’ together under a kinky drizzle of bleu cheese vinaigrette.  Mmmmmm.

Stay cool out there.

Mini Hammy Sammies

Okay, folks.  This is the easiest recipe I’ve shown you thus far.  And some of the (very few) ingredients might seem a little strange to you, especially when mixed together and spread onto a bun of deliciousness.

But you want to make these.  Trust me.

These mini hammy sammies are perfect for dinner in front of a movie with a cold beer.  Or munchin’ on while watching a favorite sporting event with a cold beer.  Or enjoying out on the deck on a balmy night with a cold beer.

Catch my drift?

They’re pretty casual, very quick, and, since they’re easy to make in bulk, would work really great for a party appetizer.

The original Mini Ham and Cheese Roll recipe is found here.  I hardly change a thing.  (Except, you’ll see in this one particular instance, I thought I had poppy seeds when I did not, in fact, have poppy seeds.  Please excuse this horrible lapse in judgement and don’t make the same mistake.)

*You definitely want to halve this recipe if you’re just making it for a couple people.  The full recipe below makes 24 mini sammies.

WHAT YOU NEED:

  • 2 Tbsp. dried minced onion
  • 1 Tbsp. prepared mustard
  • 2 Tbsp. poppy seeds (Don’t forget these – they’re great.)
  • 1/2 cup butter, melted
  • 24 dinner rolls
  • 1/2 pound chopped ham (I just use sliced deli ham)
  • 1/2 pound thinly sliced Swiss cheese
Mini Ham and Cheese Rolls

Missing from the family photo:  Butter (he was getting nuked) and Poppy Seeds (they’re probably off at a bar somewhere tossing shots and hitting on wildly inappropriate women – it’s like pulling teeth to get them to come to these reunions).

DIRECTIONS:

1.  Preheat oven to 325-degrees F (more like 315 in our case – our oven cooks hot).

2.  Melt the butter in a bowl.  Just a lil’ tip:  If you use a microwave, it’s easier to cut the butter up and cover it with a paper towel so it doesn’t splatter.

Melt Butter

3.  Add your minced onion, mustard, and poppy seeds (IF they’d bothered to show up) to the melted butter and give it a good stir.

4.  Line a baking sheet with foil, then split the dinner rolls.  It’s easier if you leave them attached to each other in groups of 2, 4, or even all 8.  That way you can spread everything on ’em and it doesn’t drip through while they’re baking.  Just cut them apart when you’re done.

5.  Here’s where we deviate from the original directions a bit.  The original directions say to spread our butter mixture over the top of the buns, but we like to be sneaky and put some inside the buns as well.  Let’s be honest – these aren’t exactly healthy.  So why not just go all-out?

6.  Assemble the sandwiches by adding the ham and cheese.  (I’m sure you could’ve figured out where this is going by now, but I like to spell things out.  You know, just in case…)

7.  Close ’em up and spread or drizzle more of the butter mixture on top.  This is necessary so your buns don’t dry out in the oven.  Nobody likes dry buns!

Pretend there are lovely little black poppy seeds adorning the tops as well.  It just feels like something is missing without them.

8.  Bake them for about 20 minutes until the cheese is ooey, gooey, melty and delicious.

9.  Pop ’em on a plate and enjoy!  And don’t forget the beer.

Well, Hello There.

I couldn’t help but notice you from across the room.  Looking lonely.

Want a little company?  Don’t worry, I don’t bite.  Ha-ha.

Sooo, what brings a sweet little thing like you to a place like this? 

Really?  That’s fascinating

Tell me more…

I have to say, you’re amazing and I dig getting to know you and all…. 

But you look a little tense. 

Confined, even.

Maybe you should try to loosen up a bit…?

There.  Now doesn’t that feel better?
Yeah, that’s more like it…

Man, you’re really coming out of your shell, aren’t you?  Wild thing!

So, uh… yeah.  (cough)

Well, (checks watch) I guess I’d better get going. 

Got a busy day ahead of me.  And whatnot. 
You know how it is. 

Um, look, you’re sweet and all. 

I’m just not really looking for anything long-term right now.  You know?

Plus, you’re candy.  I’m a girl.  It’d never last between us.

But you’ll remain in my heart (and teeth) for a long time to come.

You stay classy, you hear?

Meaty Make-Up

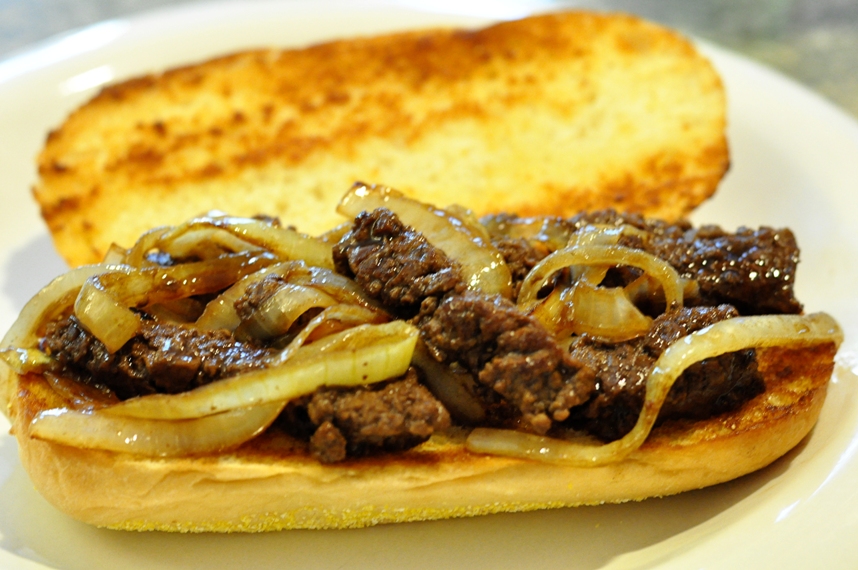
Here’s a juicy, meaty picture of the sandwiches I made tonight…

…to make up for yesterday’s debacle.

You want to make these sandwiches.  Trust me.

I call them “Katie’s Favorite Sandwich” – otherwise known as “Marlboro Man’s Favorite Sandwich” courtesy of The Pioneer Woman.  She’s a genius.

If you want to impress your meat-loving significant other, test these puppies out.  And don’t you dare leave out the Tabasco – only use a couple splashes if you’re afraid of the heat.

Doesn’t get much easier or tastier than this.  The end.

Cheesy Mozzarella Ranch Burgers

*Warning:  Do NOT read this post if the sight of raw meat makes you queasy.  Unless you like feeling queasy.  If that’s the case, read on.

I realize it’s kinda ballsy to post a recipe for burgers on a blog that a) isn’t entirely about food, b) isn’t written by a food connoisseur, or c) claims that poo-pourri is one of the best. gifts. ever.

Many people tend to take hamburgers very, very seriously.  Such people insist that burgers should be prepared as simply as possible, using very little ingredients.

But c’mon – it’s a burger, people – ground chuck stuck between two buns (and I’m not talking about Erin’s husband when he finally gets home).  (Sorry Erin’s mother-in-law!)  I mean, it’s ground beef – not veal.

All I’m sayin’ is that it’s a meat that’s made to be played with – and play with it, I do.

So here’s what you need for the burgers I made for the 4th of July celebration (a recipe inspired in-part by Erin’s good friend Kevin and other recipes found online at various times):

  • 4-ish lbs. ground beef (I normally like to get the good stuff, but since I was being cheap after much purchasing of alcohol, I got a pre-packaged brand of regular ground)
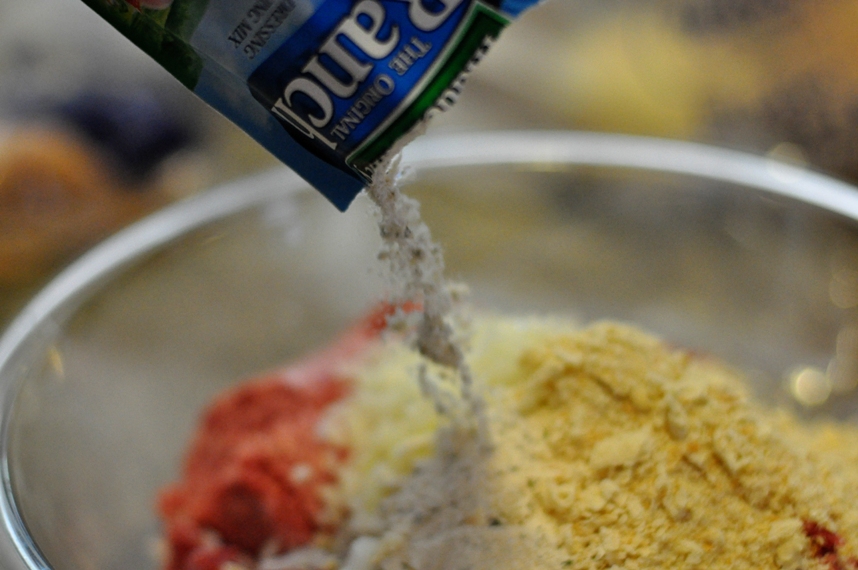
  • 2 (1 oz.) packages of ranch dressing mix (I would’ve actually used 3, but I only had 2.  Crap.)
  • 2 eggs, lightly beaten
  • 1 to 1 1/2 cups crushed saltine crackers or bread crumbs (amount depends on the consistency of your meat)
  • 1 large onion, chopped
  • Worcestershire (if meat is dry)
  • 8 oz. mozzarella cheese
Burger ingredients

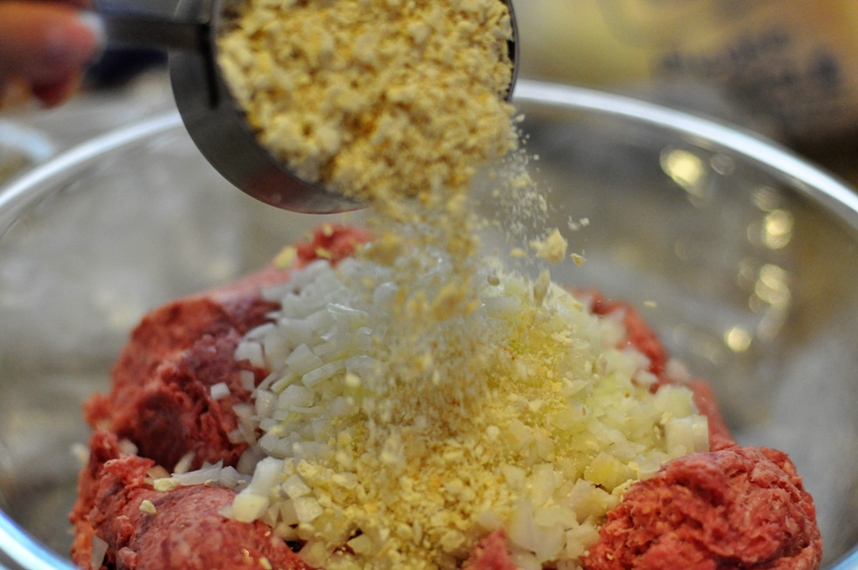
1)  Dice up your onion, nice and fine.

Diced onion

2)  Stick all your ingredients in a giant bowl.

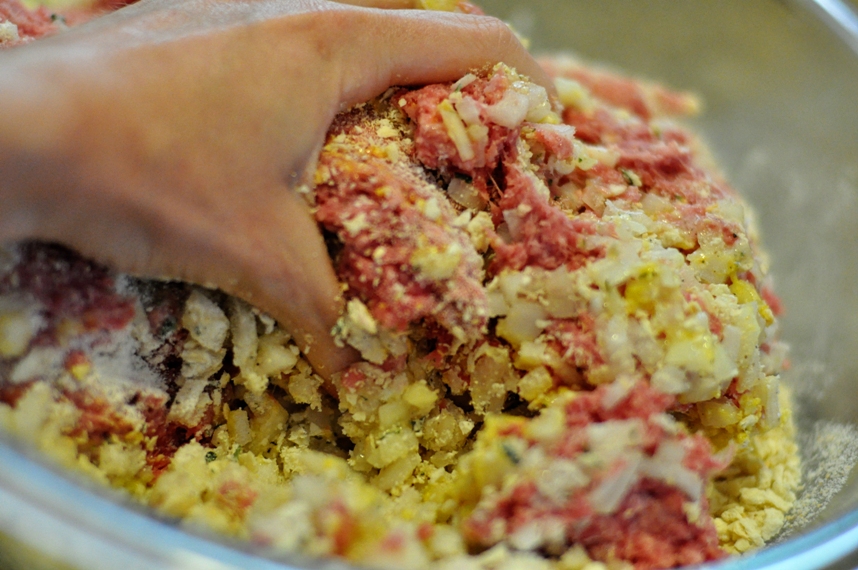
3)  Now’s the fun part.  Make sure your hands are clean and dig on in!  Trust me, you can try to do this with a spoon if you want.  You can try.  But your burgers will likely end up very unevenly mixed.  Plus, you won’t have the fun of digging ground beef out from under your fingernails later.

Ooohh feels so good.

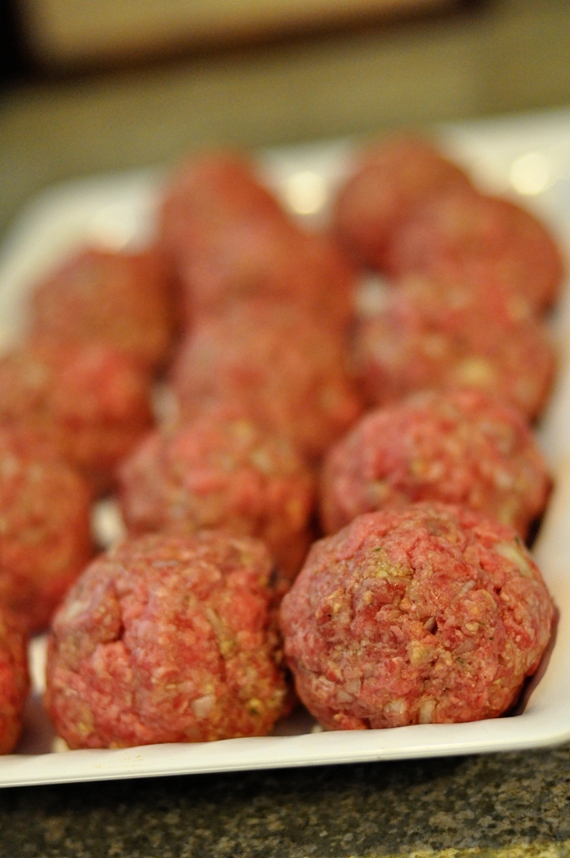
4)  You want them to be sticky, but not too sticky.  (Yeah, that helps, right?)  Then form them into balls.  I think I got about 14 balls out of my 4 or 4 1/2 lbs. of meat.  You can really make them as big as you’d like.

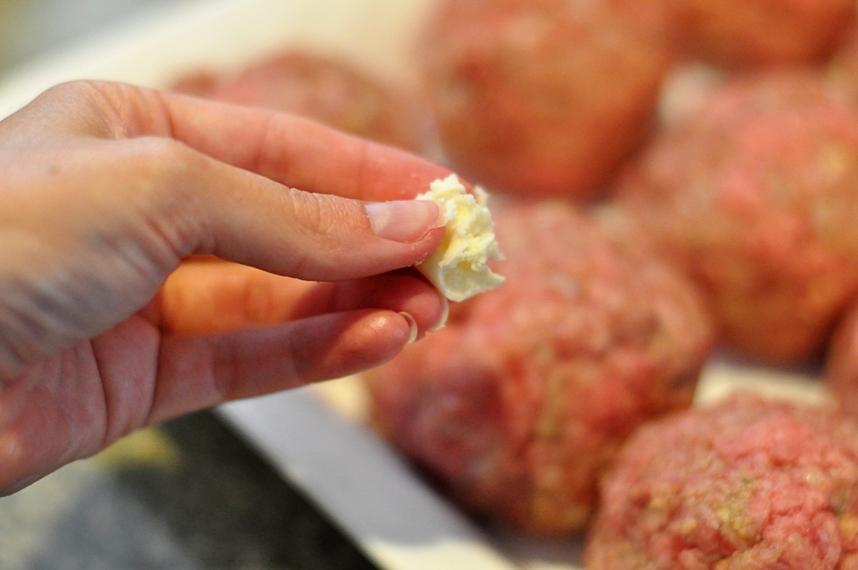
5)  Break off chunks of your mozzarella cheese (wash your hands first), and then press them inside the meat, making sure to cover the cheese completely with meaty goodness.

I only used half of this block of mozzarella:

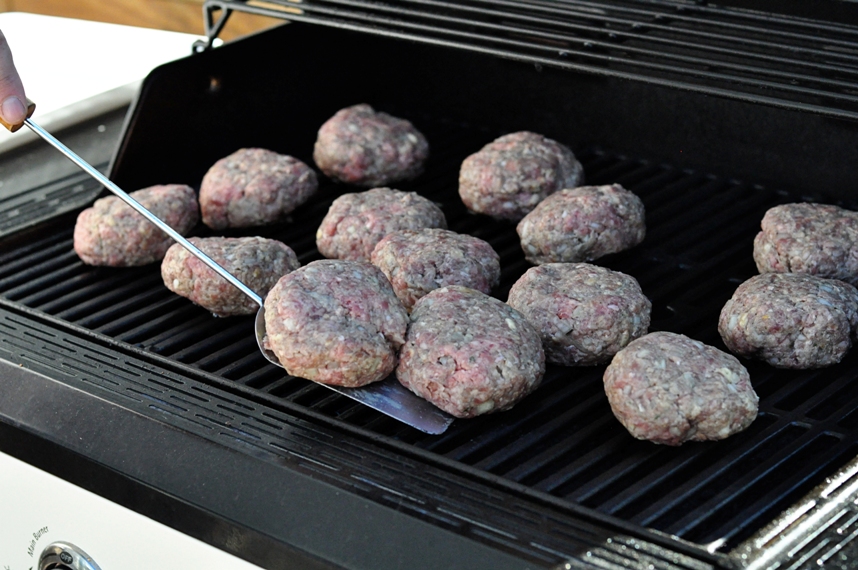
6)  Once each burger ball is stuffed with 2-3 pieces of the cheese, it’s time to slap ’em on the grill.  Now I’m not about to tell anyone how to cook your meat, but FOR THE LOVE OF ALL THAT IS HOLY, PLEASE don’t make them well-done.  I know it’s not veal, but it’s not tire rubber, either.  You want to taste the meat, don’t you?  (Unless you’re a vegetarian, in which case I’m not sure why you’re even still reading this post.)

ranch burgers

Now is when I have to admit I’ve failed you.  I’ve failed you as a blogger and as a human being.  Every person who blogs about food knows you’re supposed to have a photo of the finished product.  They know this.

But here’s what went down:

We took some really good buns and slathered butter on the insides and stuck them on the top rack of the grill so they could get nice and toasty (you could also do this on an indoor griddle).  Then we added condiments of our choosing and finally bit into the ranchy, cheesy goodness that is these burgers.  It was the cheese, friends.  (Okay, it might have partially been the beer), but it was mostly the cheese that made me forget about picking my camera back up and snapping a photo of the finished product.

I promise you I will probably forget to take the final picture on more than one occasion.  That’s just me.  But it’s like the Gin Blossoms said, “Don’t expect too much from me, and you might not be let down.”

Make these (or some variation there-of) this summer.  You won’t be disappointed.  Unless you screw ’em up.

What’s your favorite kind of burger?

Guilty Pleasure

One of my all-time favorite foods is the avocado.

Case-in-point.  Here’s the DELICIOUS avocado salad I ordered at a sushi restaurant in Frederick, MD a few weeks ago:

Avocado Salad

If I can eat – and love – a “salad” comprised almost entirely of avocado, you know I love ’em.

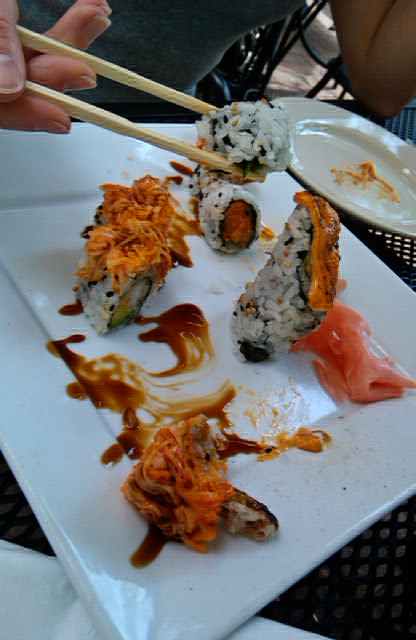
Of course, it didn’t hurt that it was followed by this:

Sushi

(Sorry, took the sushi photo with my phone.)

And this:

Cocktail

But anyway.  You wanna make me happy?  Don’t bring me flowers.  Don’t bring me jewelry.  Bring me a couple of ripe avocados.

(Or a can of black olives.)

But today, I’m talkin’ about the avocado.  A luscious, buttery, and green (happens to be my favorite color) fruit that tastes great plain, but even better when adorning a BLT, salmon, or whipped up into a dip for chips.

I make avocado dip all the time in the summer.  It’s my favorite weekend snack, especially when the hubs is out of town.  It’s not exactly a healthy treat, but a girl’s gotta have some guilty pleasures, right?  Right?!

I’m sure you’re all familiar with guacamole, which is made from avocados mixed with various seasonings, tomatoes, and onion.

The dip I make is quite a bit simpler because it’s really just all about the garlic.  And I usually have all of the ingredients on-hand (besides the avocados).  I play with the proportions all the time – you’ll notice the amounts in my photos don’t exactly match the amounts below, but below tends to be the proportions I stick with the most and should give you a good base to adjust according to your tastes.

What you need:

  • 3 ripe avocados
  • 3 cloves garlic, minced (or more if you love garlic like me – less if you plan on making out with someone who didn’t eat this with you)
  • 6 Tbsp. sour cream
  • 1 1/2 Tbsp. lemon juice
  • Salt
  • Pepper

1.  Start by dicing up your garlic.  Mmmm…. garlic.  They say garlic smell starts coming out of your pours when you eat it.  I say, why is that a bad thing?  There are worse things to smell like than garlic.

minced garlic

2.  Then slice your avocados length-wise (you’ll have to circle around the seed), chop your knife into the seed, twist, then pop it out.  Use a spoon to scoop the delicious avocado innards into a bowl.

avocado

3.  Add the minced garlic to the bowl.

avocado dip

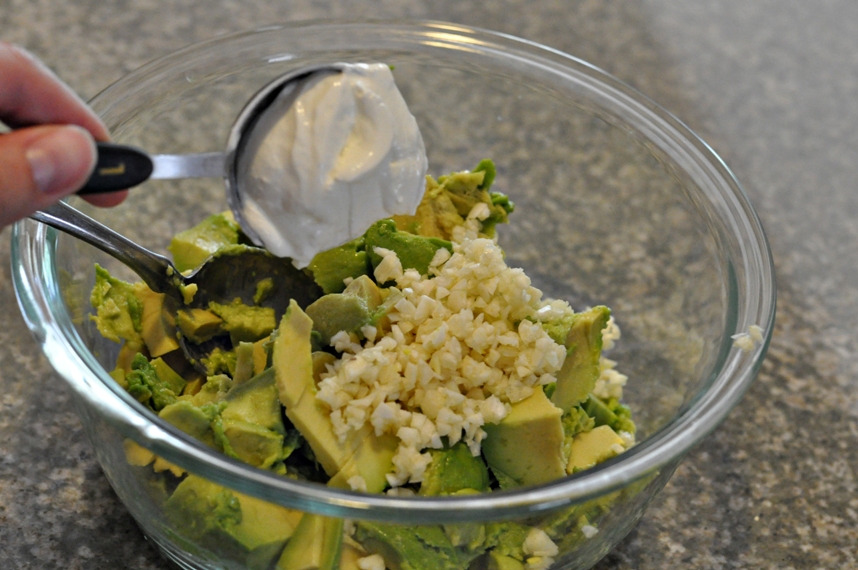
4.  Then add the sour cream and lemon juice.

avocado dip

The lemon juice helps keep your avocado from turning brown.

avocado dip

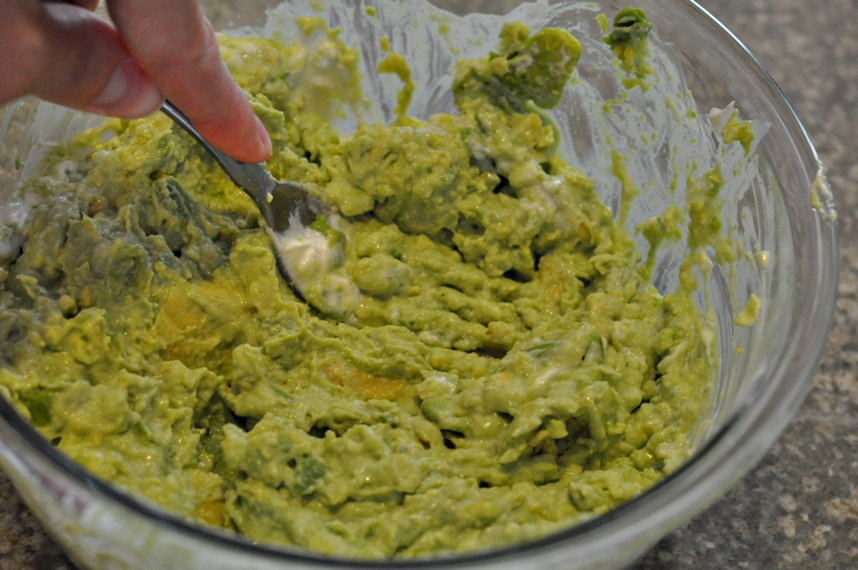
5.  Mix everything together with a fork.  (You can also do this in a food processor if your avocados are still slightly hard, but usually mashing it up with a fork works pretty well.)

avocado dip

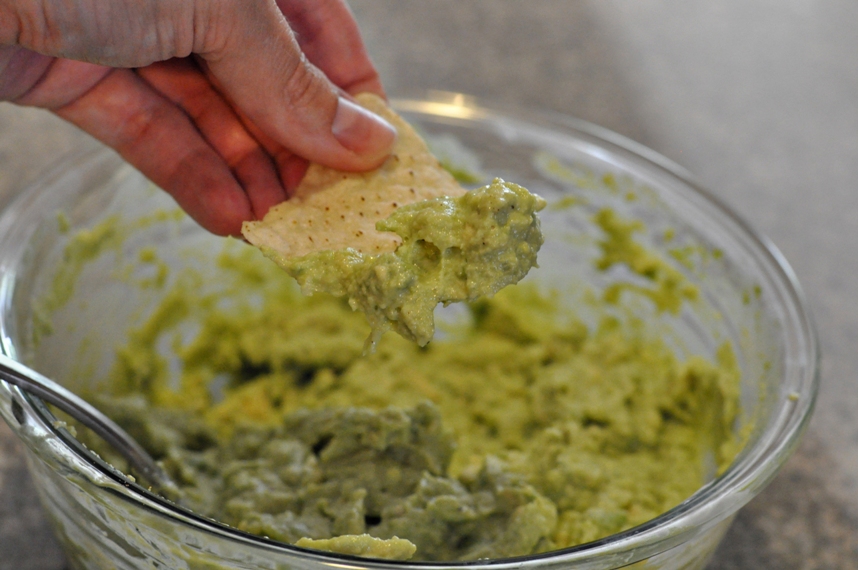
Okay I realize this doesn’t exactly look appetizing, but trust me.  It’s yummy.

6.  Season to taste with salt and pepper, dip in a chip, and enjoy!

avocado dip

Rice and Veggies and Sausage and Such

The new site is still a work-in-progress.  But it’s coming, I promise.

But in the meantime, you know what’s fun?  Besides walking 100 yds. out onto a bridge just to get a crappy photo?

Taking some food that might – in its purest form – have some type of health value, and then adding enough other crap to basically negate that as much as possible.

Rice and veggies, meet oil and sausage.  And a bit of mayo.  But it’s SO worth it.  Trust me – you’ll see.

This is kind of my “fall-back” dinner – the thing I make when I have no idea what else to make.  So we basically have it like once every other week.  I enjoy cooking, but I’m not exactly creative.  The ingredients are easy, the process is easy (plenty of chopping, which I find therapeutic – is that weird?), and this makes enough to keep us rich in work lunches for at least 4 days.

And because it’s loaded with vegetables and grains, I can do my girl-thing and justify my wittle brain into thinking it’s healthy.  And then I add mayo.

So here is where I found the original recipe.  I didn’t change anything this time, but you could get creative – add teriyaki if you don’t like soy sauce, change up the veggies, etc.

Here’s what you’ll need:

  • 1 pound ground sausage (I use Jimmy Dean’s Hot sausage.  He’s yummy.)
  • 5 eggs, beaten (Get the free range “happy chicken eggs”.  That’s what I call ’em.  You’ll feel better about yourself as a person.)
  • 3 tablespoons vegetable oil  (I suppose you could sub a “healthier” oil.  But I’ve always made it with the veggie oil, and I’m afraid to change because I know I like it this way.  Plus, it’s VEGGIE oil – can’t be that bad, right?  RIGHT?!)
  • 1/2 head cabbage, cored and shredded  (Screw the shredding – I just chop it up with a big fat knife)
  • 3 carrots, chopped
  • 6 cups cooked white rice, cold*
  • 1/4 cup soy sauce, or to taste
  • 1 (14.5 ounce) can bean sprouts, drained (I actually use fresh sprouts – about half the weight in ounces does the trick)
  • 1 (6 ounce) package frozen green peas, thawed (These really don’t even need to be thawed)
  • ground black pepper to taste
  • 3 green onions, chopped

*The reason the recipe says the rice should be cold is because day-old rice tends to be less sticky than freshly-cooked rice.  The problem?  I NEVER think that far ahead.  I don’t know I’m making this until I’m making it.  The solution?  Stick your cooked rice in the freezer for about an hour or so (while you prep your other ingredients, run to the store for the ingredients you forgot, paint your toenails, etc.) and I don’t usually have a problem.  You  might want to stir halfway through to make sure it doesn’t freeze together in clumps.

1.  Cook your rice according to the package directions.  I use a rice cooker to justify its existence.  I simply add 2 cups of uncooked rice, 4 cups of water, hit the “cook” switch, and end up with 6 whopping cups of cooked rice.  This is a LOT of rice, friends.  Consider yourselves warned.

2.  Get your sausage cooking over medium-high heat.  You don’t need any oil yet – this is greasy enough.

3.  While your sausage is cooking, chop up your carrots, cabbage and green onions.

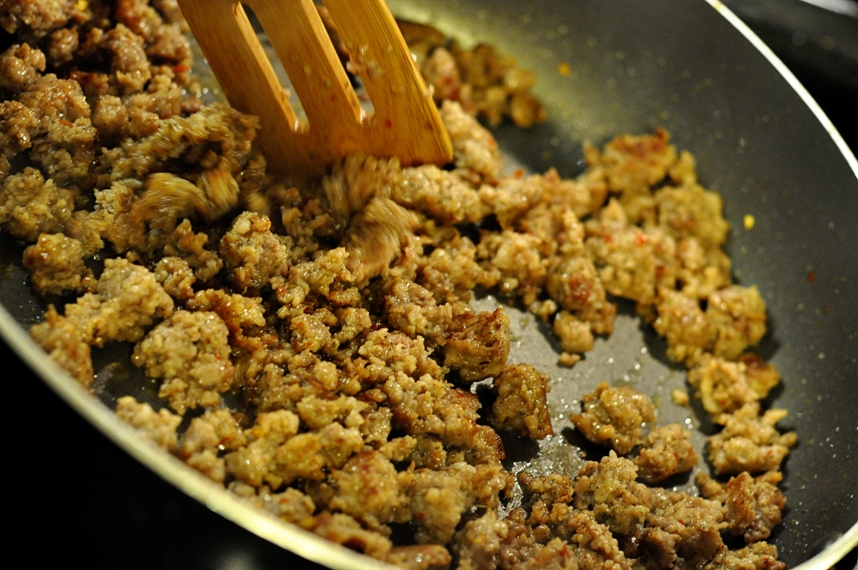
4.  Meanwhile, your sausage should start to look like this:

Once it’s cooked, set it aside on a plate covered with a paper towel to soak up some of the grease.  Don’t forget to feed a couple pieces to your pups.  They deserve it.

AND FOR THE LOVE OF ALL THAT IS HOLY, DO NOT drain the grease from the pan!!!

5.  Yep, that’s right.  You’re using that grease.  Crack open 5 eggs into a bowl and beat the heck out of  ’em with a fork.

Am I the only one impressed with myself for taking a photo while cracking an egg?  Okay, so the timing could’ve been slightly better, but I assure you that this is egg-cracking action here – I’m not just holding it next to the bowl.

Then scramble them up (over low heat) in that sausage grease-laden pan.  YUM.

Take the cooked eggs out of the pan and set them aside as well.

6.  Here’s where things really get moving.  Heat 3 Tbsp. vegetable oil in a VERY LARGE pan (if you’re making the full recipe) over HIGH heat.  When you stir fry, it’s all about the heat, baby.  This should go QUICK.  Add your carrots and cabbage, and cook until the cabbage is wilted.  This should only take a couple of minutes…

7.  Add the cold rice and stir it up until the clumps are gone.  Can’t get rid of the clumps?  No worries.  I think it tastes better that way.

8.  Add the cooked sausage and 1/4 c. soy sauce.

9.  Then stir in your bean sprouts, peas and eggs.

10.  Add a bunch of ground pepper and your chopped green onions just before you remove it from the heat.

*I couldn’t actually grind the pepper and take a photo at the same time, so pretend there’s something happening here.

11.  Sit back and admire your handiwork.

And, if you’re feeling extra frisky, you can add some Japanese white sauce (also known as duck sauce, seafood sauce, etc.) to your bowl.  We tend to use a combination of this recipe and this recipe.  Pick your poison.  Oh, and this is where the mayo comes in – so you see, it’s completely optional.

It’s probably not for everyone, and doesn’t exactly look gourmet, but I love this.  Nay, crave this.  Yes, I said nay.  And I might say “good morrow” later this evening.  It’s a Renaissance kind of day.

Parmesan Tilapia & Asparagus in Balsamic Butter Sauce

This is one of my favorite recipes for 2 reasons:

1.  It’s VERY simple to make.

2.  It doesn’t look or taste very simple to make.

It’s not like it looks fancy or anything – in fact when I make it, it looks quite sloppy – but put it in a fancy restaurant-style dish and slap some fresh parsley on top, and you have a meal fit for company.

For those of you who might not know, tilapia is a white-looking fish.  It can be semi-fishy tasting (but not too bad), but this recipe covers that “fishyness” right up.  I highly encourage you to try it if you’ve never had it.

I made it a couple of nights ago because I happened to have some frozen tilapia fillets and all of the other ingredients on-hand.  I also had some leftover asparagus from this recipe, so I decided to make one of my favorite side-dishes to go with the fish.

Here is the link to the original tilapia recipe.

Here is the link to the original asparagus recipe.

First, I thawed my tilapia fillets in the sink under running water.

Actually, first I poured a glass of wine.  I always cook with wine – sometimes I even use it in the recipe.  (Ha! No, I can’t take credit for that… heard it somewhere.)

While that was happening, I got the asparagus baking.

1.  Preheat your oven to 400-degrees F.

2.  Rinse your asparagus and clip off the fat, woody ends.

3.  Spray a cooking sheet with non-stick cooking spray and spread your asparagus evenly onto the sheet.  Spray cooking spray over the top.

Balsamic Asparagus
Asparagus with Balsamic Butter

4.  Generously season with salt and pepper.  Just go for it!

I keep my kosher salt in a small, covered container next to the stove for easy access.

Okay, I might have gone a tad overboard with the seasoning…

5.  When the oven is preheated, just pop ’em on in on a middle rack.  Let ’em bake for about 10 minutes.  They should be somewhat floppy, but to me they’re good if they retain a bit of a snap.  You just don’t want them too tough.

While your asparagus is baking, you can start working on your Parmesan sauce for the tilapia.

By the way, I make these recipes so often that they’ve ended up in my “special” cookbook.  It was a gift from my sister.

Kate's Cookbook

Okay back to the Parmesan sauce.  I didn’t halve the recipe for the sauce, even though I probably only used 1 lb. of fish (the recipe calls for 2 lbs.).  What I’m trying to say is, doubling the sauce is perfect.

You will need:

  • 1/2 c. Parmesan Cheese
  • 1/4 c. Butter, softened (softened – not melted! ~10 seconds in the microwave worked for me)
  • 3 Tbsp. Mayonnaise
  • 2 Tbsp. Lemon Juice
  • 1/4 tsp. Dried Basil (I used fresh from the garden)
  • 1/4 tsp. Ground Black Pepper
  • 1/8 tsp. Onion Powder
  • 1/8 tsp. Celery Salt

The pepper was feeling anti-social.

All you need to do is measure this stuff out and mix it in with your softened butter.

Then realize your bowl is too small and switch to something larger.

And that’s all there is to it!

Take your asparagus out of the oven if it’s finished and set it aside.

See my art?  Yeah… still in the kitchen.  Home might be where the heart is, but the kitchen is where the art is.

Sorry.  The cheese-factor is unforgivable.

Immediately set your oven to broil.  You’ll want one of your oven racks to be up near the top of the oven (if your broiler is at the top).

Line a baking sheet with tinfoil and set your fillets on top.

Stick ’em under the broiler for ~2 minutes.  Leave the oven door open a couple inches!!

Meanwhile, get your balsamic butter sauce for the asparagus going.  Things are really rolling now…

Melt 2 Tbsp. butter on the stove over low heat.

While the butter is melting on the stove, check your fish.  When the 2 minutes are up, flip over your fillets and stick ’em back under the broiler for another 2 minutes.

Once your butter is melted, remove from heat and add 1 Tbsp. of Soy Sauce and 1 tsp. of Balsamic Vinegar.

Pour the sauce over the asparagus, and that’s DONE!

Take out your fish (so far they’ve only cooked 2 minutes on each side) and spoon the Parmesan sauce over the top.  Remember that halved the amount of fish but not the sauce – that’s why mine looks extra gloopy.  It’s still very good with less sauce and will form more of  a not-quite-crust.

Put them in for 2-3 more minutes.  Watch closely, because things can darken under the broiler fairly quickly.

Take them out when the look about like this:

Mmmm… melty, cheesy goodness.

This would look even better if I’d remembered to add the chopped, flat-leaf parsley from my garden.

But the fish is nice and flaky – kinda like me – and the balsamic butter sauce on the asparagus is oh, so good.

Shrimpy, Garlicy, Asparagusy Pasta. With Wine.

Hawaii was amazing.

Spectacular.

Too good beyond words.

I’ll probably share bits and pieces of the trip for awhile because my heart just doesn’t want to let it go.

But I won’t talk about it every day, because I know how exciting it is to look at other peoples’ vacation pictures.  (Actually, I might be one of the few people who actually enjoys it.  But I’m weird like that.)

So tonight, to celebrate being back in my own, newly-remodeled kitchen after nearly 24 hours of travel to get here, we cooked dinner for ourselves.

Since this blog is called DomesticatING Kate – not DomesticatED Kate, I’m going to share with you another recipe I found somewhere else.  I can’t make these things up, people.  I’m just not that good.  BUT, if I find something good, I like to share it with you.

Here is the original recipe.  Extra crispy.  This food blogger calls herself Cookin’ Canuck, and hopefully she doesn’t mind me sharing her delicious recipe with you.  Even with my inferior photography and cooking skills, this still turned out great.  If you want to really impress someone with a restaurant-tasting dinner, give this one a try.

I didn’t change it much – just halved it (which still made more than enough for the hubs and me).  In spite of the fact that it didn’t contain any butter or heavy cream (two major proponents of tastiness in my book), it was still absolutely delicious-o.  Oh, and it only contains minuscule amounts of cheese (again, unusual for me).

Here’s what you need to make it the way I did – except remember to cut it in half if you’re cooking for less than a family of 4:

  • 1 lb. linguini
  • 1/2 lb. fresh asparagus (cut off the thick white parts at the base and cut into 1-inch pieces)
  • 1/4 cup extra-virgin olive oil
  • 3 garlic cloves, minced (I did NOT halve the garlic – according to me, you can never have too much garlic)
  • 1 pinch crushed red chili flakes (I actually used red pepper flakes, since that’s what I had on hand)
  • 3/4 cup dry white wine (I used an inexpensive chardonnay, since that’s what I had open from last night.  To cope with the jet lag.  Yes, that’s it.  To cope with the jet lag.)
  • 3/4 lb. large shrimp, peeled and deveined (I bought the pre-peeled, deveined and cooked stuff.  Easier and on sale.  Didn’t halve this either.)
  • 12 sun-dried tomatoes, thinly sliced (This comes in a dry pouch or in a jar of marinade.  I bought the jar.)
  • 1/2 tsp. salt
  • 1/2 tsp. pepper
  • 1/2 cup finely grated Parmesan cheese, plus more for serving
  • 1/4 cup (packed) chopped fresh flat-leaf parsley

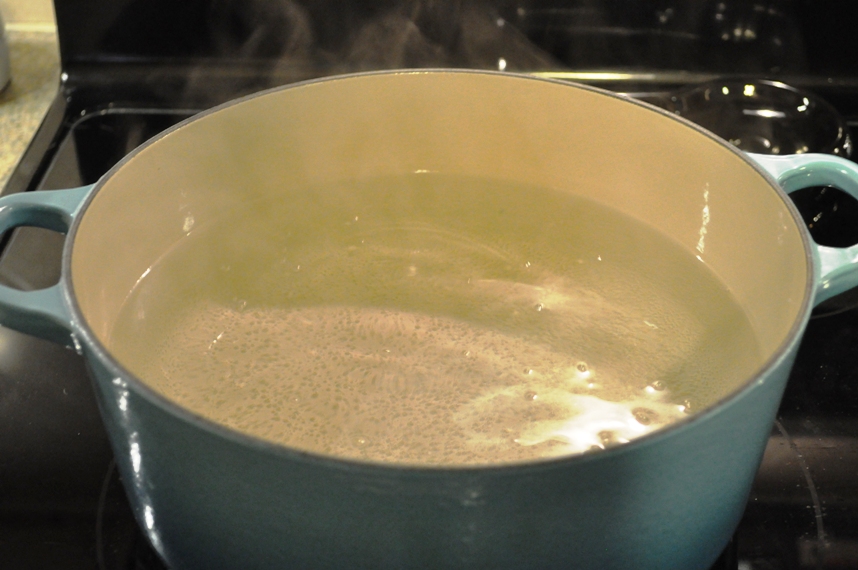
1.  Start by getting some salted water boiling so you can cook your noodles.

Boil Salted Water

2.  while your water gets going, chop up the asparagus.  The hubs was good at that.  (We only used about half this pile, by the way.  I didn’t realize until we got going that we should halve the recipe.)  Set the asparagus aside – you won’t be seeing it again until your linguine is almost al dente.

Chop Asparagus

3.  If you have frozen shrimp, thaw it according to the package directions.  We ran ours under water for a few minutes, then the hubs pulled off the tails.

Defrost Shrimp

4.  Your water is hopefully boiling by now (or close to it), so go ahead and throw in your linguini.  Cook according to package directions.  (I set my timer for 10 minutes – my Life ADD causes me to forget about minuscule dinner details like pasta cooking, so this step is imperative for me.  I also wanted to make sure I added the asparagus at the right time so I wouldn’t overcook it.  No one likes mushy asparagus.)

Cook Linguini

4.  Next go ahead and mince yourself up some garlic.  And slice your sundried tomatoes (I didn’t drain them completely, but let them sit in some of the yummy garlic bits and capers.  I think it probably added to the sauce immensely).

Minced Garlic
Sundried tomatoes
Sundried Tomatoes

I realize these look a uncomfortably close to the lungs you unearthed from the frogs you dissected in high school, but I promise you they smell and taste much better.  Not that I ever tasted frog lungs.

Sundried Tomatoes

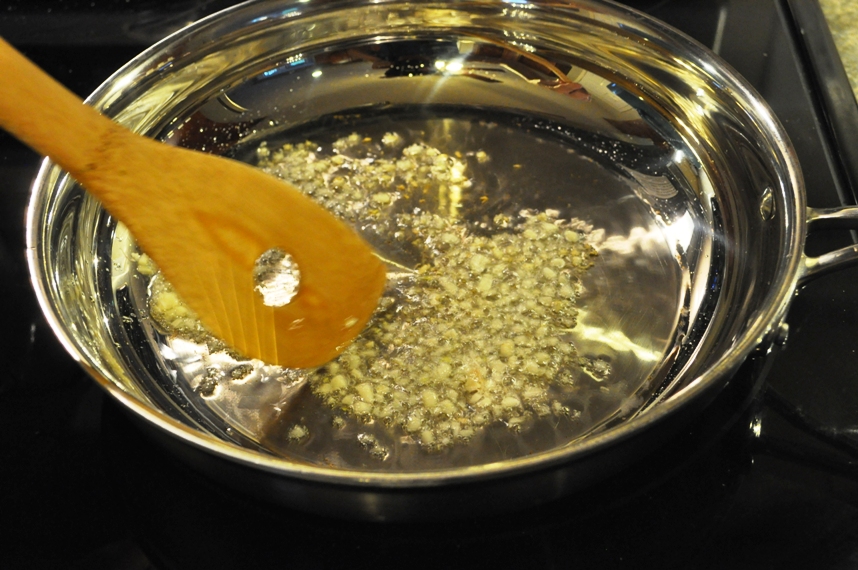
5.  Heat the oil in a skillet over medium heat.  Throw in your garlic and pinch of dried red pepper.  Cook for about a minute.

Sauté Garlic
Red Pepper

6.  Pour in your white wine and simmer 1-2  minutes.  (You might want to take a sip of the wine, first.  You know, just to test it.)

White Wine Sauce

7.  Add the shrimp and stir 1-2 minutes until it’s pink and cooked.  If it’s pre-cooked (like mine), just stir a minute or so until it’s heated.  In retrospect, this would’ve been a bit easier to eat if I had roughly chopped the shrimp first.

Sauté Shrimp

8.  If your pasta is about 1 minute away from al dente, throw in your asparagus.  Cook for about a minute, then drain.

Pasta and Asparagus
Pasta and Asparagus

9.  Add the sundried tomatoes, salt and pepper to your shrimp pan.

Garlic Wine Shrimp Sauce

10.  Pour your shrimp/asparagus/sundried tomato/wine/garlic sauce to the pasta and stir.

Shrimp Asparagus Garlic Wine Pasta

11.  Add the parmesan cheese and parsley (the hubs chopped parsley fresh from our garden!).

12.  Eat up!  For how easy this was, it was surprisingly yummy (despite my yellow photography).  We will definitely be making this again.  Even if you think you don’t like asparagus or tomatoes – open your mind to something a little different.  The hubs, for all his claim to not liking tomatoes (he still won’t eat them raw), gobbled this down.

Oh, and don’t forget to sprinkle on a bit more cheese.

Yum!  Don’t let my dark and yellow photography turn you off – this stuff will impress anyone.  Thanks, Cookin’ Canuck!  I always knew I liked Canada.

Pancakes with a Side of Kidney

Monday night we decided to give my aunt and uncle a break and head out to Waikiki with my cousin Leah and her husband Scott.  It was a nice change from the low-key days of drinking coffee out on the lanai, lolling around the beaches and perusing shops along the North Shore.

And the great thing about being on an island – albeit a different part of the island – is that there’s still a beach.

Waikiki Beach

There’s always a beach.

And an ocean.

Waikiki Beach

The evening was fun, with a couple bar hops and a delectable sushi dinner at Sansei.

It was breakfast the next morning, however, that proved to be the highlight of our over-nighter in Waikiki.

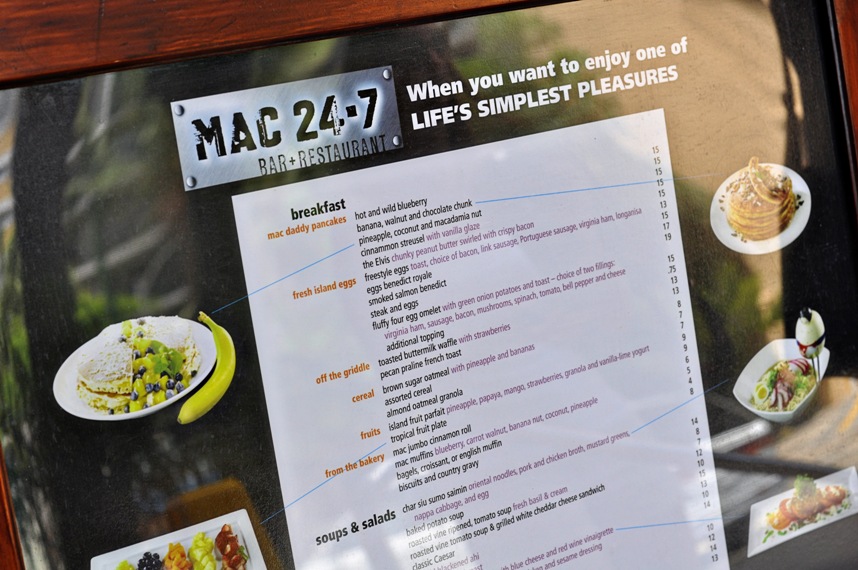
Mac 24-7

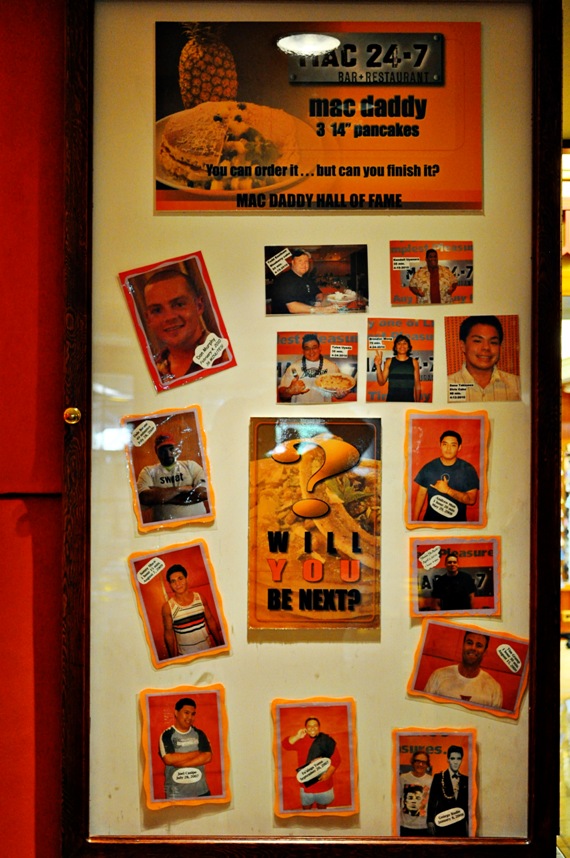
We’d heard about a restaurant called Mac 24-7 from that disgusting show on the Food Network (Man V. Food) where the guy travels around stuffing his face with as much food as he can find.  It’s so gross, we can’t help but watch it.  One of his challenges was to finish a stack of 3, 14-inch pancakes at Mac’s.  Do that, and you earn yourself a spot on the Wall of Fame.  Easier said than done.

Mac 24-7

Anyway, the 4 of us thoroughly enjoyed indulging in our various delicacies of choice:

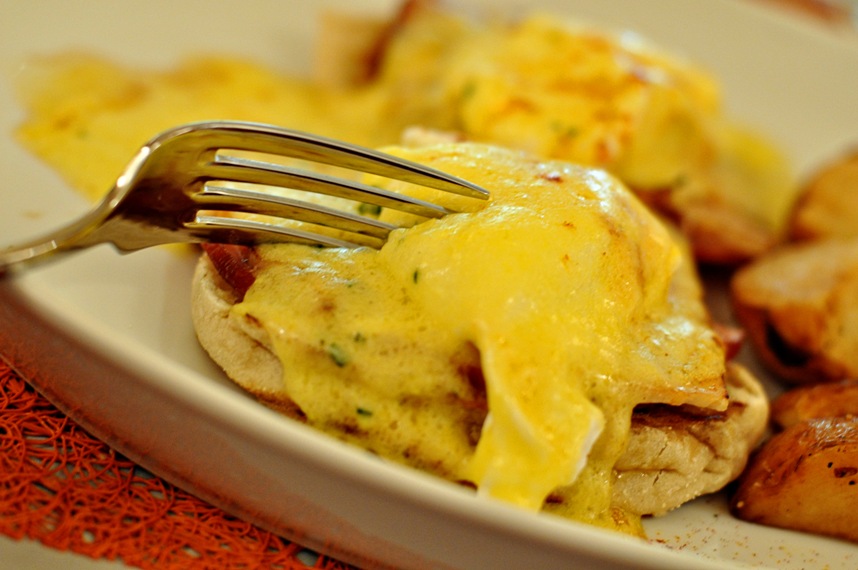
Eggs Benedict Royale for me…

Eggs Benedict Royale

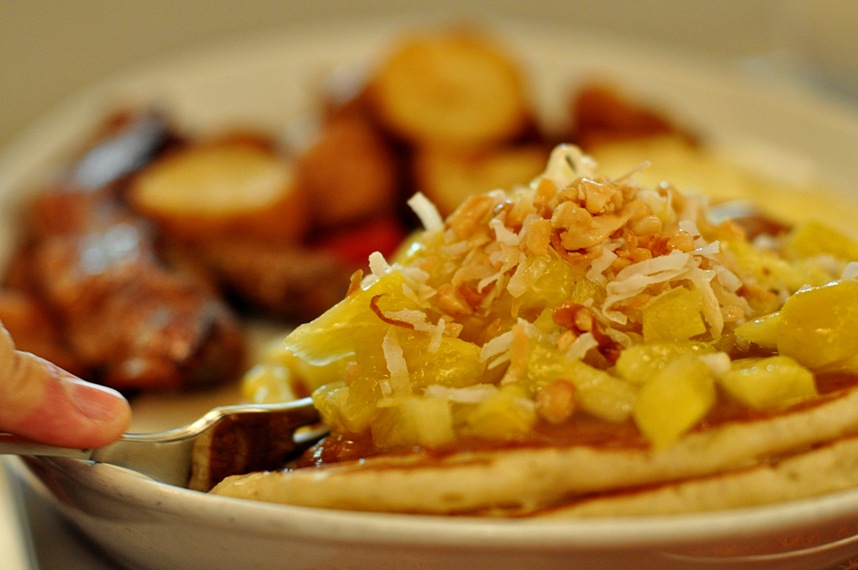
Mac Attack (with pancakes topped with pineapple, macadamia nuts and toasted coconut with coconut syrup) for the hubs…

Mac Attack

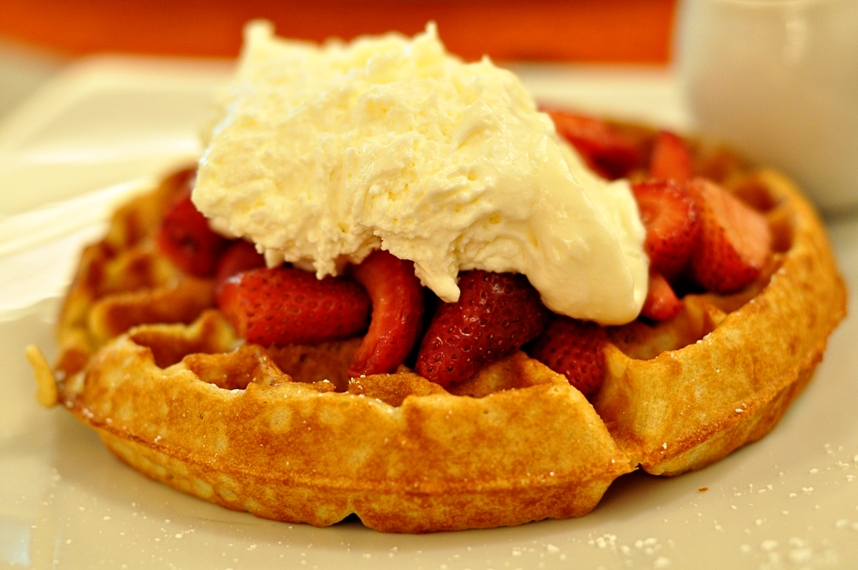
Toasted buttermilk waffle with strawberries and whipped cream for Leah…

Toasted Buttermilk Waffle

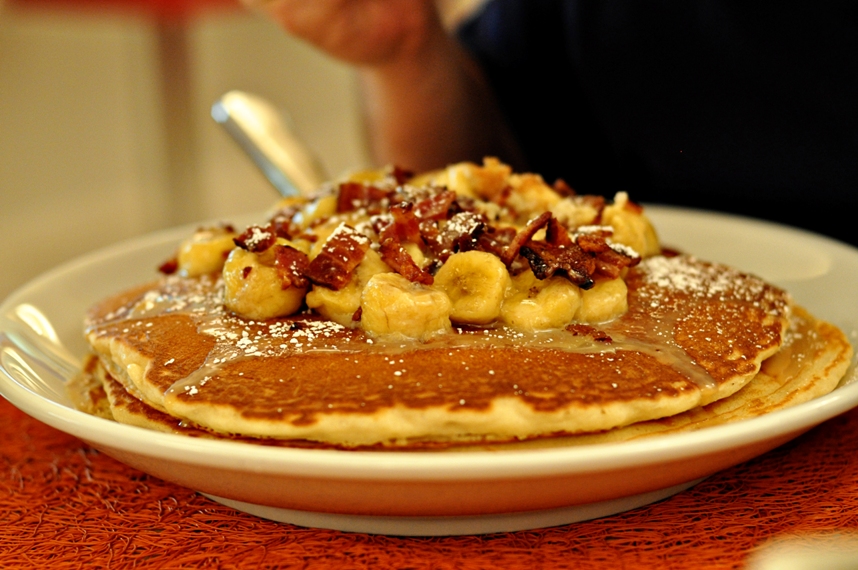
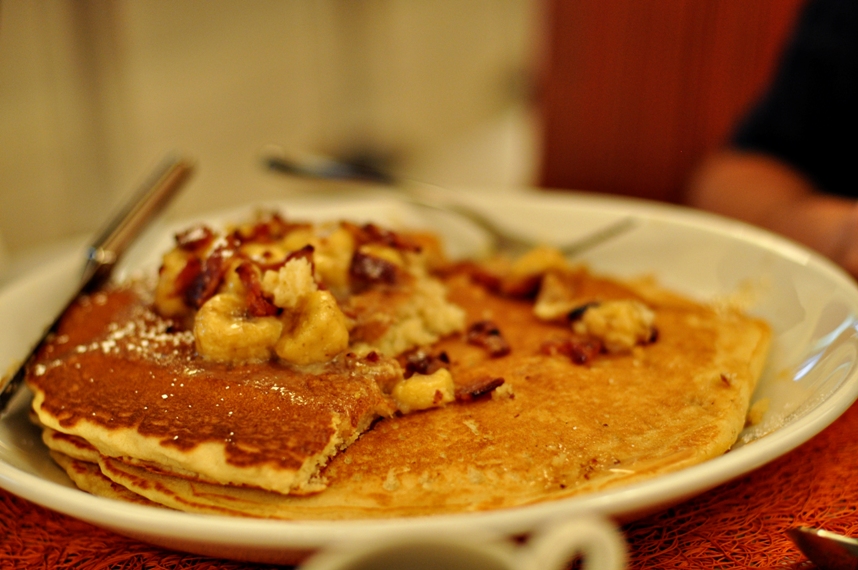
And the infamous 14-inch Mac Daddy pancakes for Scott (“The Elvis”, topped with bacon, bananas, and a peanut butter syrup-type substance).

The Elvis Mac Daddy Pancakes

Between heaping mouthfuls of pure goodness, we chatted with our server a bit about the area.  He was an extremely friendly man named Jose.

Turns out Jose has worked at Mac’s since 1980!

And he had the most interesting story to share.

In 2002, Jose had a regular customer – a rather brusque man who always seemed to be in a hurry.  When the customer came in to eat after neglecting to show up for his regular meal for a few weeks, Jose asked him where he’d been.  The man told him he was very sick and had just been put on the list to receive a kidney donation.

Long story short, Jose learned he was a match as a doner and actually donated his own kidney to the man.  Talk about superior customer service.

This is the type of person I’m always grateful to meet – warm, cheerful, and automatically puts those around him at ease.  Even though I only knew him for an hour, Jose is someone I’ll never forget.

And he makes a mean latte.

You can read Jose’s story here.

And in case you’re wondering, Scott did not earn a spot on the Wall of Fame.

Mac Daddy

Nice try, Scott.  Nice try.

Mac 24-7 on Urbanspoon