
How To Tile A Backsplash For Less Than $200. BAM.
It seems odd to write about something like a backsplash right now. On one side of my life, serious things are happening. Friends are losing loved ones, job applications are pending, and people are leaving ignorant, condescending comments on my harassment piece, which was syndicated on The Huffington Post yesterday. (I’m talking to you, Thomas O’Duffy.) And these things take up valuable real estate in my consciousness.
Then on the other side of my life, there’s this kitchen. This never ending time-and-money-suck of a kitchen.
Remember her?
And while it seems trivial comparatively speaking, it’s like this nagging mosquito buzzing around my ear, and I can’t move on until I sufficiently KILL IT.
Or slap a backsplash on it.
Which, if you’re subscribed to my newsletter, you already know is exactly what my phenomenal husband did over the past two weekends.

The fact that I will no longer be splattering grease onto raw drywall makes me happy beyond measure.
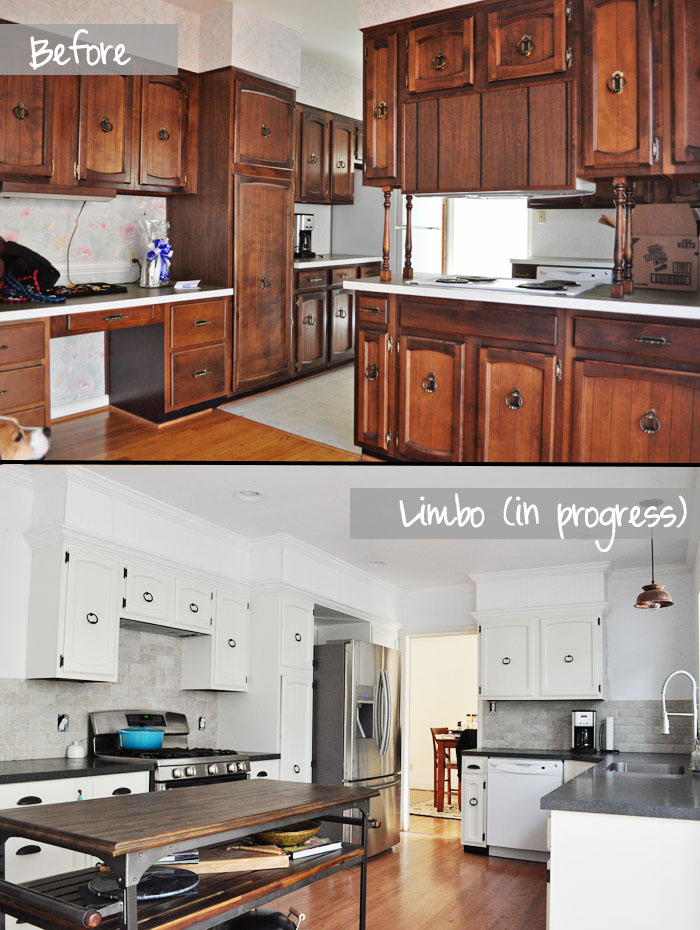
In case you’ve forgotten, here’s what it looked like pre-splash:
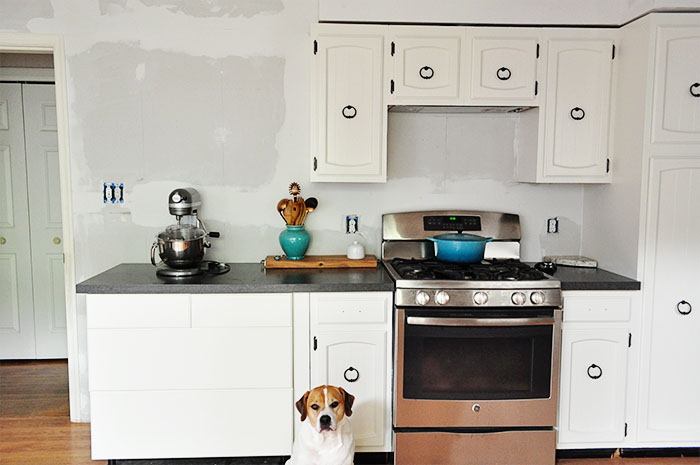
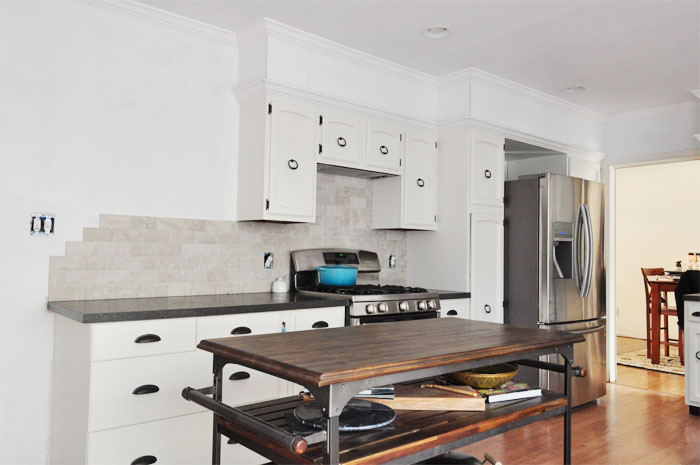
Notice something else a little different?
Last I showed you, Justin had added the beadboard around the soffits, and our decision to bring the cabinets to the ceiling was looking a little… questionable.
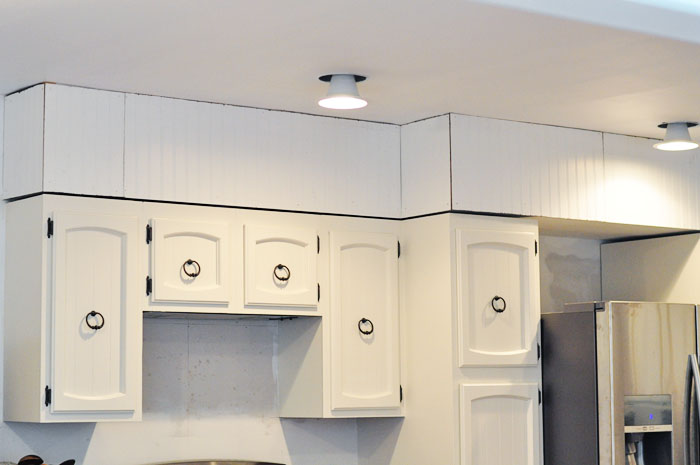
But since then, he added the crown!
And once again, I’m a believer.
I still need to paint the beadboard and crown to match the cabinets, but this has made a world of difference in the finished look of the space.
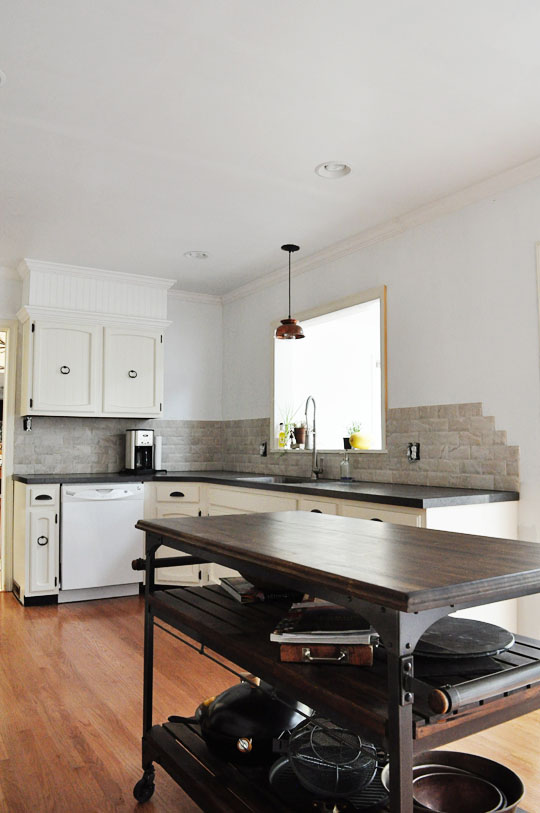
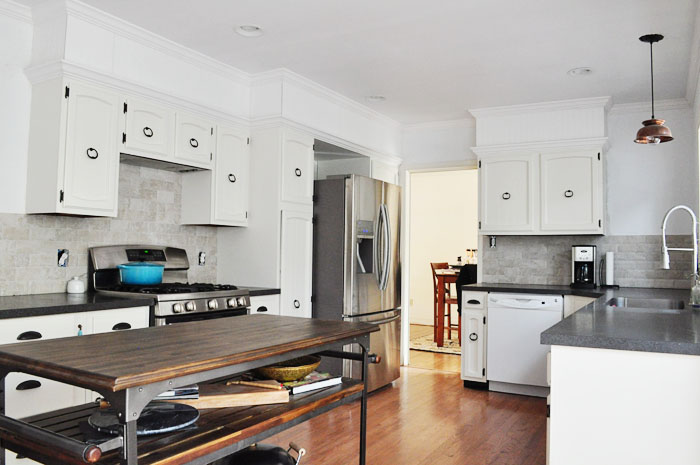
You might have noticed that we oh-so-cleverly “stepped” the two ends of the backsplash because I neglected to have the foresight of making sure the switch plate next to the door that goes into the hallway wouldn’t be in the way. You can’t have a switch plate halfway covering a backsplash — it just wouldn’t work. So we made the executive decision of avoiding it completely, and then mirroring that look on the other side of the room.
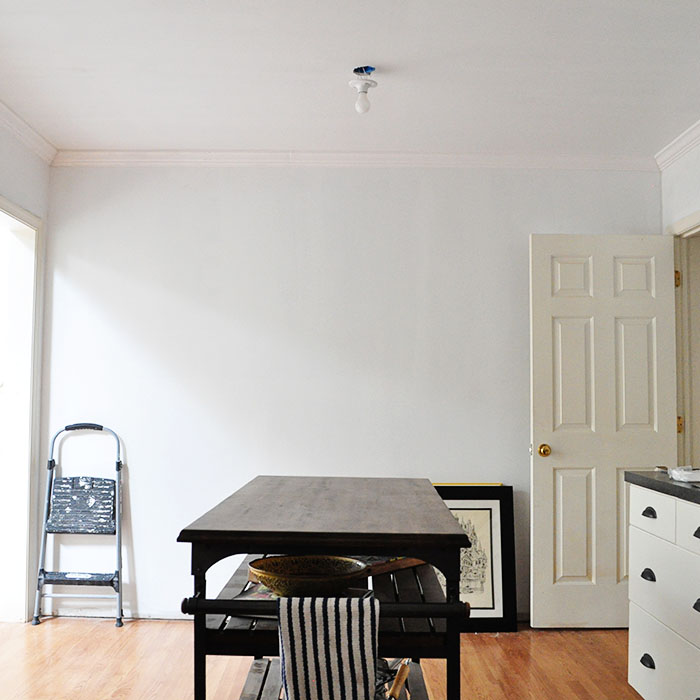
And in case you’re wondering, no. My counters are not always this clean. We still need to seal and caulk the backsplash, so you can see through that doorway above that most items that belong in here are piled up on the dining room table.
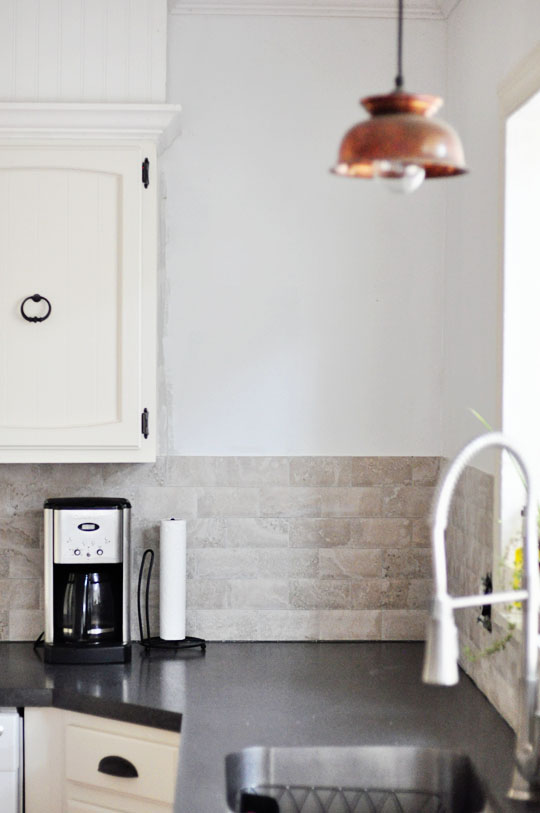
Also, note this coffee maker. Now that you’ve seen it, you will notice it on every commercial and television show from this point forward. Apparently Cuisinart has the market cornered on decent looking, affordable, stainless coffee makers.
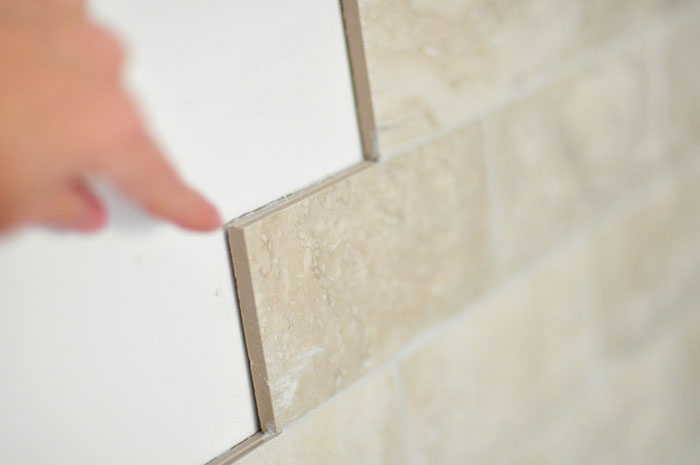
But back to the tile. Isn’t it puuuurty? We chose a porcelain tile that’s made to look like travertine — Del Conca Classica Cream. The guy at Lowes actually told me it was travertine when I went back to buy it (it’s deceiving because it says “travertine” on the box) and I thought I was getting a killer deal at $0.49 a piece, but on closer inspection, it really is porcelain. There are a few repeating patterns, which is a dead giveaway of a man-made product. I’m totally okay with that because it’s not nearly as porous as travertine, which is a natural stone, and I’d spent $32 on a stone sealer which I now get to return. The other cool thing about these tiles is that they’re “pillowed.” They have a bit of a beveled edge all of the way around to make them a little more 3-dimensional.
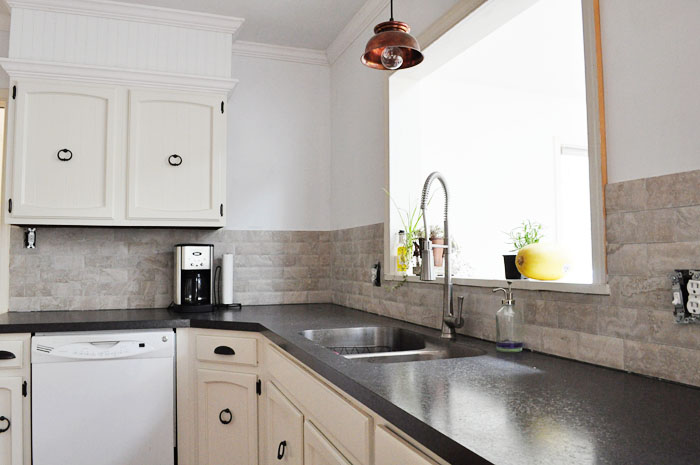
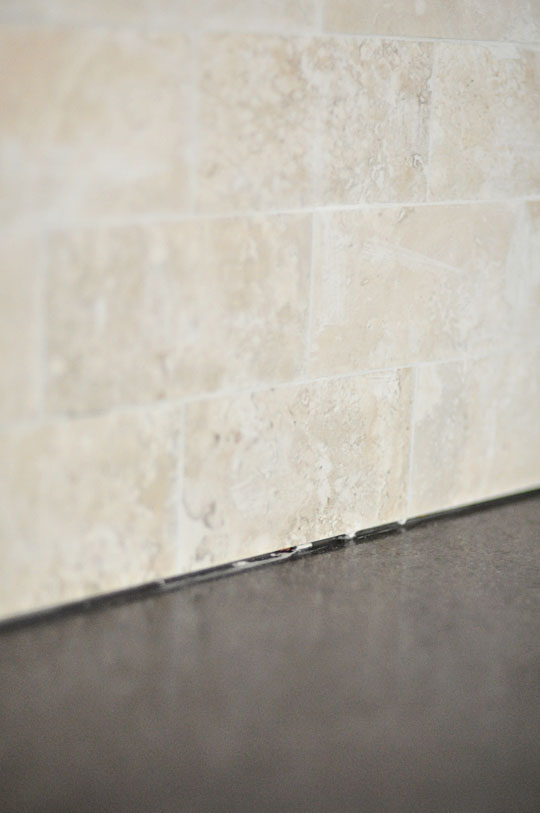
This particular tile didn’t come with matching beveled edge pieces or pencil liners, which means we’ve left the raw edge exposed. (I can see your eyes twitching, Roxanne and Missy!) I could have ordered contrasting liners, but they easily might have added $100 to this project, and at this point we’re working very hard to keep costs low. I’ve ordered caulk in a color that matches the grout, so once that arrives we’ll be caulking along the edge of the tile to cover any gaps between it and the wall.
Caulk is also what goes between the backsplash and the counter:
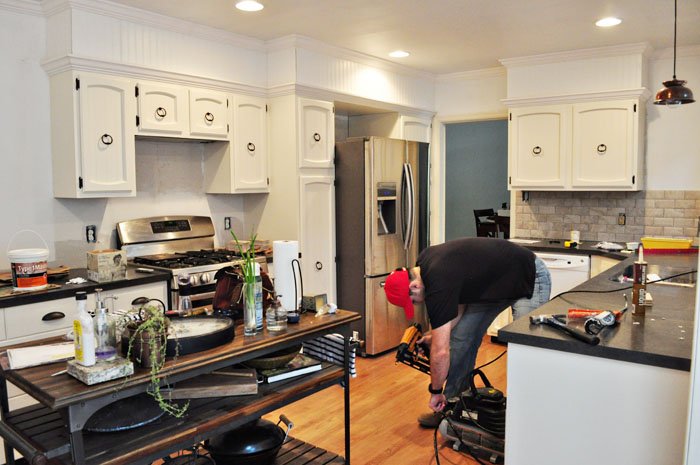
I’ve already written a super comprehensive tutorial on installing a tile backsplash, so check that out if you need more details. It’s a bit labor-intensive, and we had to deal with yet another mess for a while:
But it was nothing compared to this stage of yore:
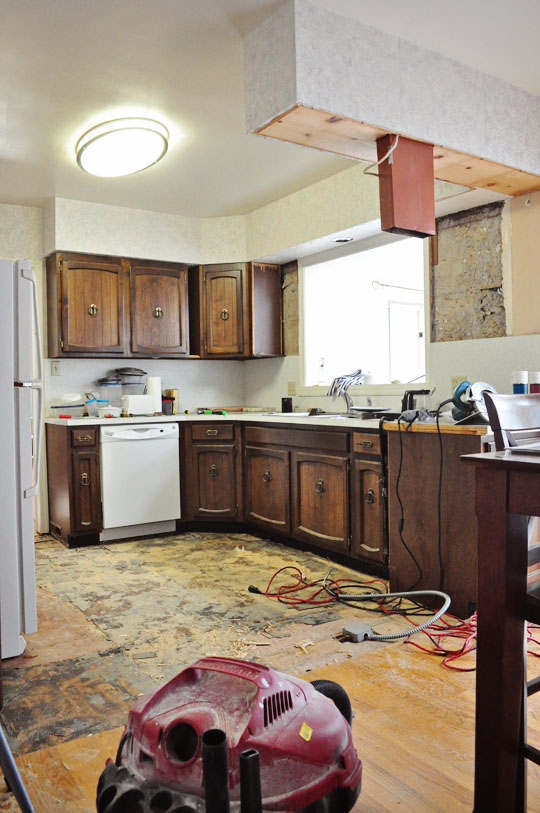
And for that, I am eternally grateful.
So how much did this little project set us back?
- Tile: 300 tiles @ $0.49/ea. = $147.00
- Grout: $9.98
- Caulk: $14.98
- Mastic: 2 @ $11.97/ea. = $23.94
- 10% Military Discount
= $176.31 TOTAL
Not too shabby! Of course, we already had the tile saw, trowel, grout float, etc. which can add a lot more to the cost of a project like this.
And here’s where we stand:
And here’s what we have left to-do:
- Caulk and seal tiles
- Paint trim to match cabinets
- Paint walls
- Finish toe kicks
- Add shelving
- Install outlet extenders and switch plate covers
- Install statement piece on this huge blank wall:
Hey. Everyone loves a good cliffhanger.
Comments
Your post makes me tired, I need to take a nap now – so much work and it looks fabulous! You should be super proud. Can’t wait to see the statement piece!
You are going to LOVE the statement piece. Maybe not for how it looks, but definitely for what it is. ;)
your kitchen looks beautiful! i can’t believe it was less than $200. i feel like the white cabinets open up the space so much more too. I bet you can’t wait till the project is finally over.. but love the progress you’ve made so far. :)
Soooo ready to be done! I’m totally procrastinating on the painting. So tired of painting. :)
Really, you could do my job! It looks fantastic and I only had a tiny little eye twitch regarding the pencil tile, but it’s gone now. I’m down with the caulk. And the statement piece? I think for the eye twitch annoyance I deserve a sneak peek. Okey dokey?
Ha! *Maybe* if you help me pick a paint color, I’ll give you a sneak peek. ;)
My kitchen is a mess. This post was timely for me. I have no backsplash. I will be back to review it and make notes when I have more time. Thanks!
I don’t think a backsplash is *super* necessary, except for behind the stove! Anywhere else, as long as you have a super wipeable paint, you should be fine. :)
Love the look! It reminds me how badly I want a white kitchen, too. Saving these tips for later when we redo ours :)
We were somewhat limited, given what we had to work with in those 70’s cabinets and pulls (I know those ring pulls aren’t for everyone), but I’m pretty happy with how it’s all coming together! Thank you!
Wow, wow, wow! I am so impressed by your vision (I struggle to see the potential in spaces like that) and your execution. How nice that Justin is so handy. I’m pretty sure I’d be the one working the saw around here ;)
I’m such a crazy perfectionist, if I were the one doing the woodwork, we’d never ever ever have it done. (Seriously, though — I’d really love to take a wood class. Justin’s great at doing, but not so great at teaching, and I think we’d both love it if I knew how to do more of these things. Come teach me!) :)
looks great….we have redone two houses now…..and it is a TON of work and always takes at least 5 times longer than you estimated…..so hang in there……clearly there is a payoff….look at your progress!
You’re right — 5 times longer AND 5 times more expensive!! This is our second, and I’m constantly asking myself why we did this to ourselves again. :) But it’s worth pushing through just to get it done!
You’re so talented! I am a baby when it comes to reno and redo… i.e. have never had to do it… I may come crying to you someday… and then we can bring out all the cheese and wine and hooka pipes and life will be ok, right?
I think my parents have that exact coffee maker, ha – and the market is cornered, right? Not corned? :)
I have loved watching the development of this space… I felt despair when you first published photos (I’m not kidding… but that’s probably only me projecting my own helplessness and lack of experience)… the outcome is seriously uplifting! Bravo!
Well Justin’s the one who installed it, so I guess HE’S the talent. ;) But I’m all for letting someone else stake that claim while we sit back with the cheese, wine, and hooka! And CRAP. This is why you need to read my posts sooner — to fix my typos! :)
[…] I’m not even speaking of the nearly finished look I showed you last, after we tiled the backsplash for less than $200; painted the cabinets and rearranged them to fit our needs; added hardwood floors, recessed […]