
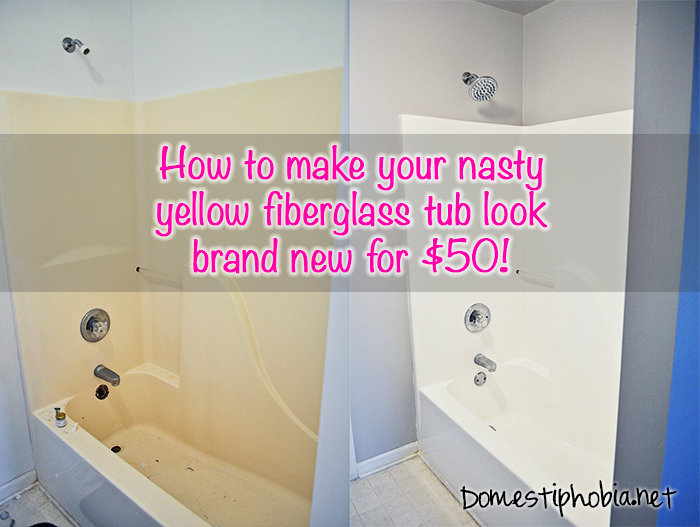
How To Refinish Your Nasty Yellow Fiberglass Tub for $50.
Want to know how to refinish your bathtub to make it look new for just $50? Read on!
I’m so glad we did this. This project made the tub look cleaner, newer, and most definitely helped with the re-sale of our home. All it took was some elbow grease, minimal tools, and this nifty product:

It saved us the hassle and expense of trying to rip out and replace it or having it professionally refinished (something we did in our other bathroom to the tune of $400!).
I’ll admit though that I did something with the title of this post.
That’s a fancy marketing technique called lying.
I used it to lure you into the post because if I’d titled it, “How To Make Your Nasty Yellow Fiberglass Tub Look New for $50 Plus The Cost Of A New Shower Head, Fancy Curved Curtain Rod, Curtain, Paint Rollers, Roller Pads, Paint Trays, Lots Of Elbow Grease, At Least 6 Hours Of Your Time, And 40% Of Your Brain Cells,” it might not have sounded as enticing. But I promise you it was still worth it.
When we moved into this house almost six years ago, we knew both bathrooms would need to be renovated.
We started with the guest bathroom, thinking we’d save money by having the tub re-finished rather than replaced. Then, down the line, we’d fully remodel our master bathroom to give it a separate tub and standing tiled shower.
We were so cute.

And deluded.
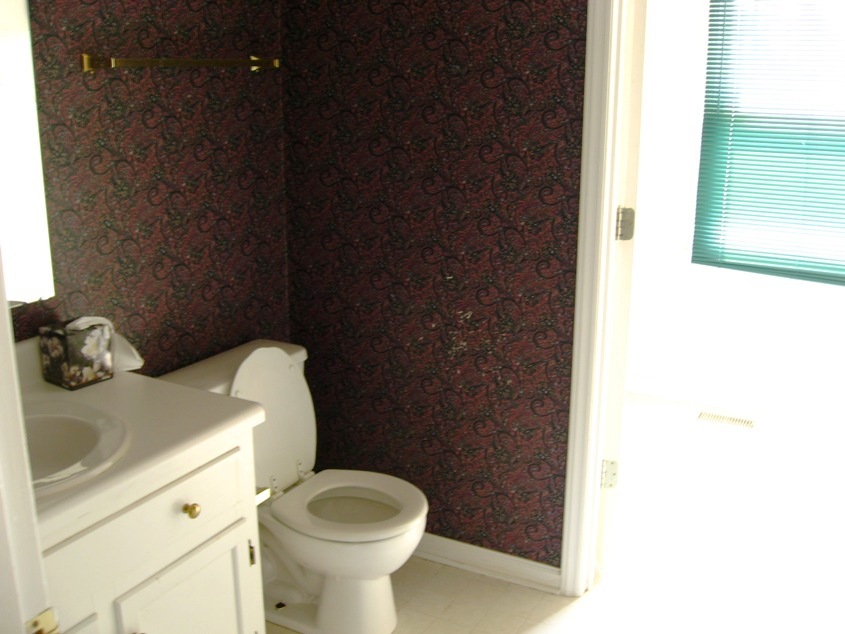
And while we did take the guest bathroom from this:
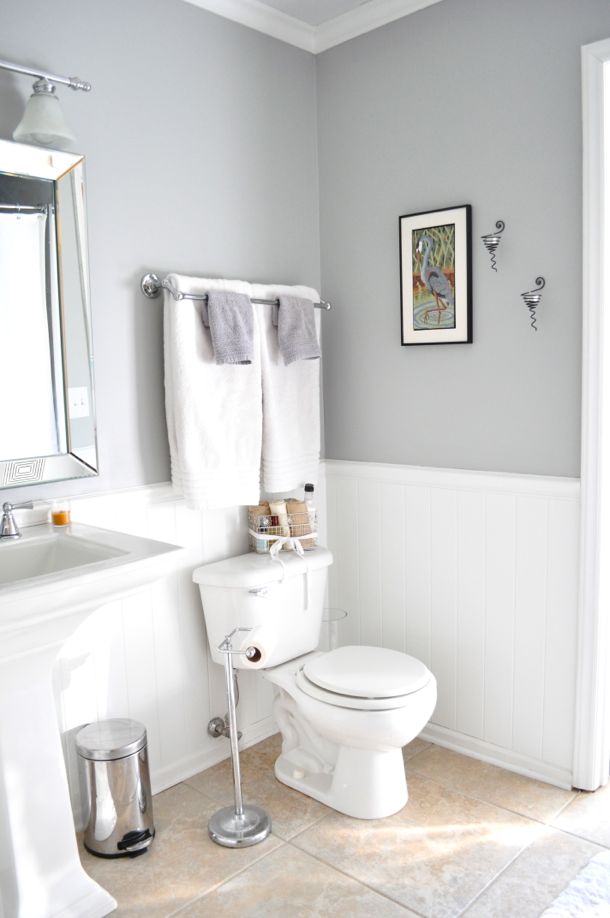
To this:
We had no idea how much renovations actually cost. From the hundreds of dollars we spent having the tub professionally re-finished, to the time it took to peel off that horrific wallpaper, and to the near-filing of divorce papers when I knocked over and broke our last, intricately cut porcelain tile for the floor, we were clueless.
I have donated blood, sweat, and tears to every room we’ve touched.
See, every project you take on actually has three costs involved:
Three Costs of Home Renovation:
1. Money.
As first-time buyers, this is the only factor we took into account. Big mistake.
2. Time.
Thinking we’d save ourselves a bit of cost factor #1, we sacrificed cost factor #2. Time. And it’s important to understand that your time is precious. If you’re adamant about at least attempting to DIY, you need to factor in the cost of your time. And not only the time it takes to complete a project, but the long-term time it takes to “complete” a home. Six years ago, we thought we would only be living here for four years. We thought four years was plenty of time to get this place ship-shape before it came time to sell. And for some, that would be true. But we didn’t realize how little we actually like working on the house — and how we’d rather be going to Spain.
3. Sanity.
This, my friends, is the most important and often least factored cost when it comes to home renovations. If the very idea of heading out to Restore Warehouse and picking out a ten-million pound pallet of deeply discounted porcelain tiles and matching grout, then Home Depot for huge chunks of cement board and bags of mastic, then coming home to spend two full days shoved into a 4’x6′ space with your significant other breathing tile dust and sporting knee bruises and passing the time pulling each others’ nerve endings like little loose sweater threads gives you an uncontrollable eye twitch, you may want to reconsider DIY.
My point is that sometimes, the unseen costs of #2 and #3 might outweigh #1.
So this time around with our master bathroom, we’re getting a little smarter.
We know a move late this year is inevitable, but we just don’t know when or where. (Oh, the joys of military life.) Realizing the stresses that are soon-to-be upon us, we’ve ultimately decided to make cost factor #3 a priority. We like our sanity. In doing so, we’ve found we’re saving ourselves a little of #1 and #2 as well.
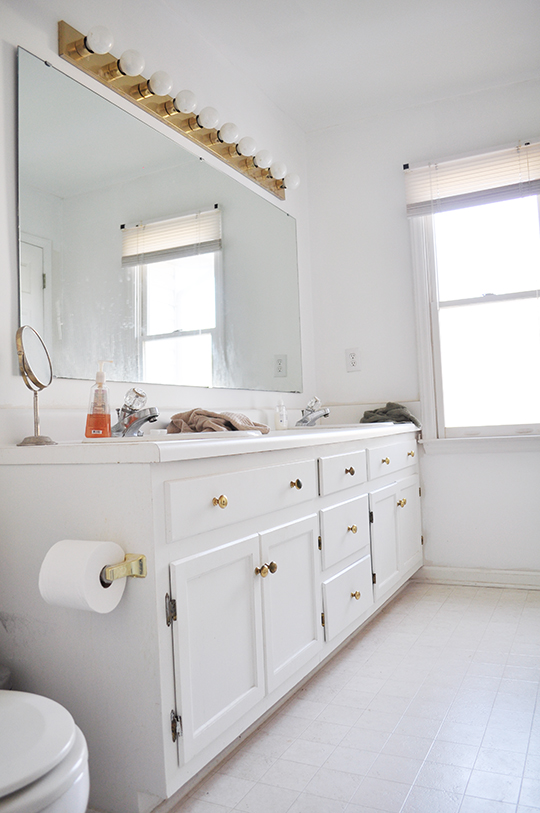
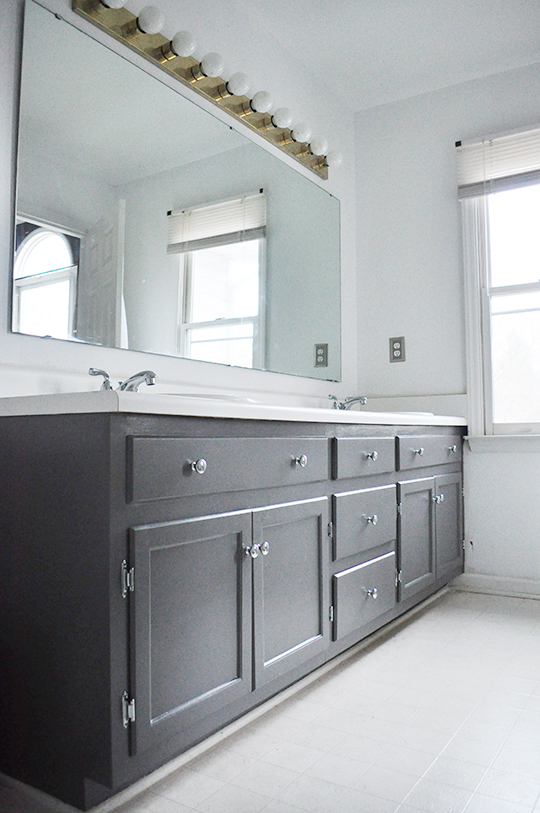
As you already know, we decided to paint the huge vanity rather than replace it. The choice made sense by saving us the stress of having to find something else that fit and the substantial cost of buying a new one or the time cost of searching for and retrofitting a piece of furniture. Since this isn’t our “forever home” and we’ve already put more money into it than we’re likely to get out, it’s not worth it for us to spend money on things that at this point we’re not going to be able to enjoy for long.
Before:
After:
Since that seemed to work so well, we decided to take the same approach with the tub.
Having the guest bathtub professionally repainted cost, if I remember correctly, $400-$500 last year. We’d figured that was still substantially less than what it would’ve cost us to bring in a new one, so we felt justified. But now? Notsomuch.
After pouring through reviews, I ordered two of these tub refinishing kits by Rustoleum from Home Depot. They appear to be no longer available, but you can get the same tub refinishing kit here.
When I bought them, they were $25 a pop. Based on the reviews, it looked like we may have needed the second kit to cover both the tub and the fiberglass surround (which we did). If you just have the tub with a tile surround, you can probably get away with just one kit.
I’m not going to go into step-by-step details about exactly how Justin accomplished this, because that’s what the instructions are for. What I will tell you is that the prep work was the most important. He spent a lot of time scrubbing and sanding and cleaning before he even started the painting process. Also, plan on throwing away whatever rollers you use. This stuff is potent and you will likely not be re-using your tools. We did not use foam rollers because we read in the reviews that this stuff would eat right through them. Justin said not to worry if it goes on a bit bubbly — it tends to smooth out as it dries. He also said to work quickly because it does tend to dry fairly fast.
Finally, I will tell you to work in a WELL ventilated room. We had the window open and a fan blowing for 3 days, and it still smelled like fumes in there.
In the end, though, the effect was worth it.
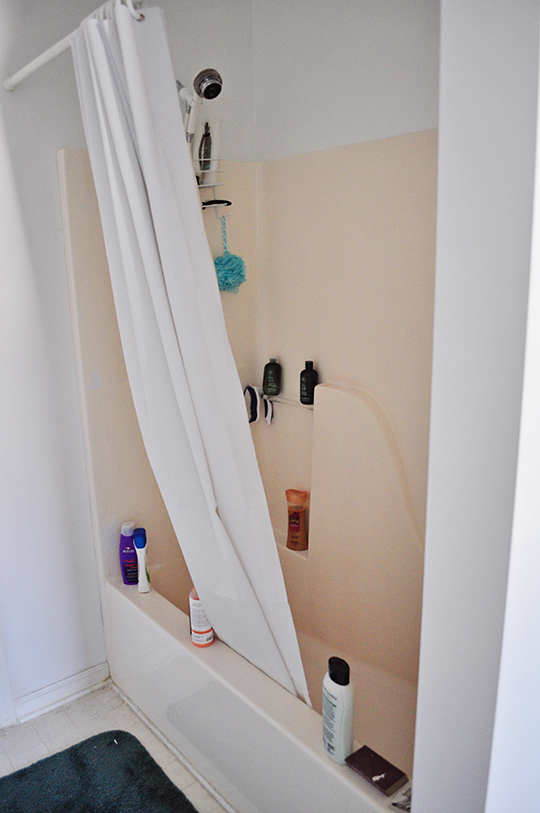
Before:
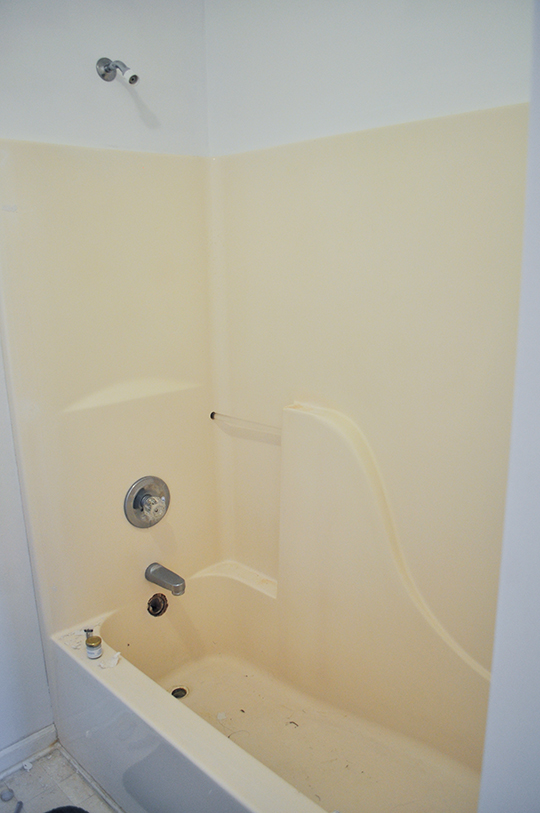
Prep:
After:
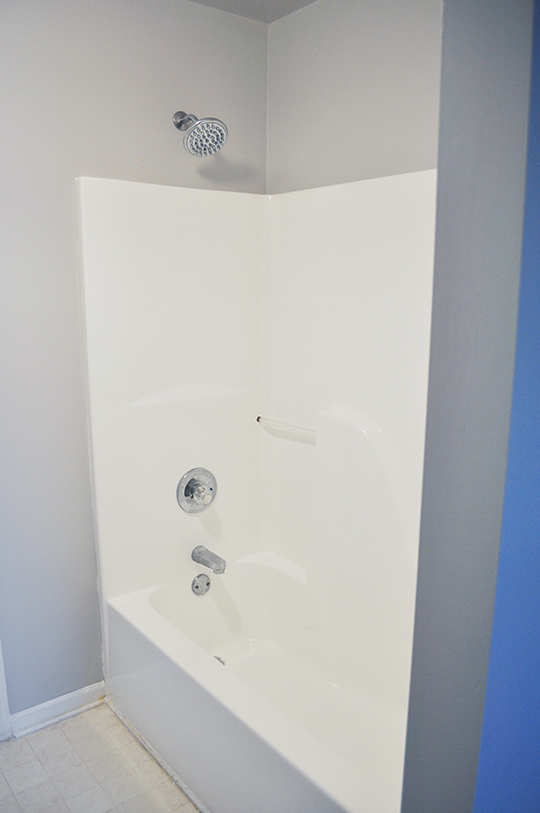
The walls and ceiling are also painted in the “after” picture so that makes a bit of difference as well, and in the interest of full disclosure, we are probably going to put that plastic showerhead back on (this one is from the guest bathroom) simply because I like the pressure better, but can you see the difference?
Obviously we still need to grout around the outside, scrub the bathroom floor with a toothbrush (how embarrassing) and paint the trim a clean, crisp white, but I’d say this is a vast improvement.
And also:
Remove the “popcorn” ceiling finishRepair rotting drywall above tubRe-finish nasty bathtubPaint walls and ceiling- Replace brass fixtures
Paint and fix vanityReplace faucets(?)- Frame mirror(?)
- Accessorize
We haven’t actually used the shower yet, but I suspect since we’ve let it dry for a couple of weeks, we hopefully won’t have any issues.
I’ll let you know if we do.
How about you? Have you been killing brain cells with any toxic epoxy lately? Or is that just us?
UPDATE 8/5/2015: This is by far one of my most popular posts (thanks, Pinterest!), and I frequently get email questions about how well this project held up. The truth is, I don’t know! We moved about 8 months after painting the bathtub, but in that 8 months we had absolutely zero problems. By the time we left, the finish showed zero signs that it planned on going anywhere anytime soon, and I’d honestly be shocked if it has. That stuff was seriously noxious, and it meant business. If you have excellent bathroom ventilation and can spend a couple of days far away from it, I’d still highly recommend this project for old yellow fiberglass tubs.
In case you’re curious, here’s the final tour of that home!
*This post contains affiliate links.
Comments
OMG it looks soooooo good!!!!!
Thanks! It’s nothing luxurious, but it’s definitely getting better than it was!
Looks great. I’m always amazed by your DIY posts. I just couldn’t be bothered. I sanded and repainted a wooden table when we moved, and it bored me to tears. I just don’t have the attention span.
That’s the thing – I always thought I would enjoy DIY projects until I *had* to do DIY projects in order to get this house sold and not go broke. I think once we’re renters again, I’ll be happy with small-ish projects like painting furniture. (Thinks I want to do – not things I have to do!) :)
My mom spent a lot of my childhood on DIY renos. I’ve been in their midst plenty. It turned me right off the idea. :)
Ha! I can definitely see that. :)
I too have the same problem with yellowing faux tile tub surround…but now I have an even bigger problem. I fell last night hitting hard and into the bath tub. Once I figured out how to get out of the tub, not knowing for sure if I hadn’t broken anything, I got out. Then I found out I broke the shelf built into the one section and now I have no shower. Does anyone know if they have replacement parts for something like this? Thank you, Rob
Yikes, I’m not sure! It sounds like you have one of those fiberglass surrounds – is there a big hole in it now? It might have to be replaced… You might want to snap a photo and take it to your local home improvement store to get some pro advice!
We downsized a few years ago after retirement and really needed to redo the bathrooms completely but now we find we’d rather do other things that are more fun. We’ve done a lot to the house like paint, carpet, kitchen work etc but the master bathroom tub is a disaster. So I called a plumber, got estimates on even an inexpensive replacement acrylic walk-in shower and the numbers started adding up so fast I tucked my tail and ran for now at least.
So, we’re on our way to pick out new Delta fixtures (faucet, handles etc) and the plumber will come and install those in a day or two. In the meantime I did a little surfing and came upon your site and the photos of your tub redo which looks very nice.
Question: If you’re older than Cinderella but not quite dead yet would you attempt this procedure if you were me/us or would you just install pretty new tub/shower doors and enjoy the new hardware. What goes on behind the shower doors should maybe “stay” behind the shower doors. lol
Thanks,
Rita in the Hills of Oklahoma
Ha! You crack me up.
I asked my husband because he’s actually the one who did all the tub work, and he said it really was not a big job. The biggest pain was prepping and making sure everything was super clean before painting. If your back gets sore easily, that’s something to keep in mind because there’s a lot of bending over, but the painting itself goes fairly quickly. In fact, I think you have to go fairly quickly because it dries fast. The fumes are AWFUL. So if you’re extra sensitive to fumes, it might not be something you want to tackle.
It is, however, WAY cheaper than installing a new tub. If you think you might not be up to the task, consider buying the stuff and hiring a handyman to do the painting! It will still cost a lot less than doing a whole new tub, and it’ll still save you the work of painting it yourselves. :)
I’m curious, how has it held up to use?? I think I’m going to need to tackle this project myself soon….
We ended up moving at the end of November last year so I couldn’t say with 100% certainty how it’s doing these days, but after 10 months of pretty much daily use, it was exactly the same as when we first applied it. For all of the hard-core fumes it emitted for days, that stuff isn’t going anywhere once you get it on. Just make sure you spend the time on the prep work — it’s worth it!
As I only have one bathroom, how long do you have to wait to use the bath? Thanks.
I don’t remember exactly what the directions said, but I’m pretty sure it was at least a couple of days. And it’s SUPER volatile — the fumes are really bad. If you only have one bathroom, I’d honestly recommend staying with friends for a couple of days for it to air out.
Looks great! In the bathroom remodel process right now. what is the gray paint color on the walls called?
Thanks! The gray is Valspar’s Filtered Shade (4003-1B) — love it!
Did you paint it white?
Yep!
Do you remember the paint color you chose? It’s exactly what I’ve been looking for, for months now! We used a kit on our fiberglass jetted tub we bought for $75 (yay)! I don’t think we did enough prep, it was very humid in there, and we used it to soon as months later it’s still our only bathroom out of three! We’re getting there though, and without fighting, doing all the work ourselves! (Pats on back) I’m glad I found you on pinterest! I’ll be reading your blog! I still haven’t had the guts to post on my blog!
Add I see the comments above -oops!
What did you use to clean the tub after painting?
Just regular tub cleaner!
Just want to say thank you for finding that paint color. It was exactly what I have been looking for – it’s georgeous!
I just separated from the military in January! Moving back in with mom was bittersweet to say the least. On top of that, I brought a pregnant lady with me lol. We found a deffinate fixer upper and bought it.. Biggest concern is the bathtub though.. I bought a similar refinishing kit from lowes a couple weeks ago but it is in spray form.. I have seen alot on the web about the prep work involved.. After taking a hard scrub to it, even with laquer thinner, it is still not coming clean..From grime stains to onld dried paint, I wanted to know, how clean should it be? I havent really read much of the directions but it comes wil some brillo pad like stuff.. did your husband need to scrub until all dirty imperfectioins were gone, and did he need to sand it down some for the paint to stick? Any information would really help because im worried that if i start this project…i might end up making it worse.
Hi Cecil, I would definitely recommend reading the directions that came with your kit — that will be the best way to get the info you need. That said, my husband did spend a good amount of time scrubbing the tub clean. I didn’t see before he started whether it was perfectly spotless, and I doubt it *has* to be. The biggest issue is removing any particles that might come up when you paint and leave nasty bumps. I’m guessing the paint itself would cover more permanent stains. I hope yours worked out!
We did our kitchen sink with the spray stuff you mentioned. It didn’t hold up in the sink at all. I’ve been peeling the paint stuff off from it for 2 yrs now. Unfortunately we have an odd shaped sink that is no longer made, so can’t replace it. Think twice about the spray on stuff.
Great job. The color combination is wonderfully elegant. Love the gray and white, it’s very classic. Kudos for sharing all the helpful safety tips.
I am definitely doing this! Thanks for the awesome inspiration! We were about to buy a new tub :)
You’re welcome! Glad I could be of help. :)
I love it! I live in a mobile home… I have a huge garden tub that is a ombre yellow to white. I think it’s plastic.. can this technique be done on it as Well? My shower has come clean.. but I used toilet cleaner and a whole collection of other cleaners (wonder I haven’t blown my house up) but that tub! I can’t afford to replace, nor would I want to wrestle with it as it’s a corner soaker. My son just redid my floor and my walls are a pale silver blue.. I’d love to paint my vanity white but it will make my tub look filthy, please help!
I wish I could help, but I have no idea. You would have to consult with the product manufacturer to see if they would recommend using it on your material. It sounds similar to mine, though!
I have a Formica material around my tub, I would like to paint it white. Do you think this product would work?
It would definitely be best to consult with the product manufacturer. I wish I could be of more help!
Did you use polyurethane after you finished?
Did you use polyurethane after you finished painting?
can u use the kit on a cast iron tub?
I love the work!! Do you know around when was the bathtub and the fiberglass wall first installed? I am wondering how many years do they last before turning yellowish! Thanks
Thanks for this! I am going to attempt this in my apartment but I wanted to ask about the peeling parts. It has peeled around the drain revealing like a glassy layer. Do I strip off all of the peeling later or repair that section around the drain and refinish as normal?
Thanks!!
Amanda
Easy mirror framing: Buy cedar fence boards and use an aging stain to finish. Costs about $20 per mirror.
Thanks for the encouragement…it looks terrific!!
[…] How To Refinish Your Bathtub For. How To Refinish Your Bathtub To Take It From Yellow And Dingy To Crisp White And Brand New For Requires A Little Elbow Grease And A Special Product. domestiphobia.net […]
Thanks for sharing such an amazing article.