
Get Into The Groove: How To Paint Wood Paneling.
It’s probably about time I show you what’s been happening with my laundry room.
I’ve been hesitant to do so because after a lot of work, a semi-disastrous flooring mishap, and not an insignificant amount of money, the “after” doesn’t feel much more impressive than the “before.” At least not in a design sense. But Justin and I have a lot of things to bear in mind when it comes to renovating this little gem of a house:
1. We can’t over-improve for the area
Um.
Okay I guess we really only have that one thing to bear in mind. Our home is already one of the priciest for its square footage in our neighborhood, and since Justin is still Active Duty Air Force, the odds are very slim that we’ll stay here long enough to recoup all of the extra money we spend. This means it’s important that we keep renovation projects reasonable for our neighborhood and concentrate on things that will add immediate value. So while I’d love to go all glitz and glam in this room with some high-end tile work, fancy lighting, and a manicurist who emerges from a hidden wall panel at the press of a button, it’s just not going to happen.
This time.
Even though this room is ideally located for a laundry room with a doorway to the garage and a doorway the back deck, the last owners used it as an office. And a place to store the cat litter box. Which, you can imagine, made for a really pleasant working environment. Here’s how it looked on move-in day:
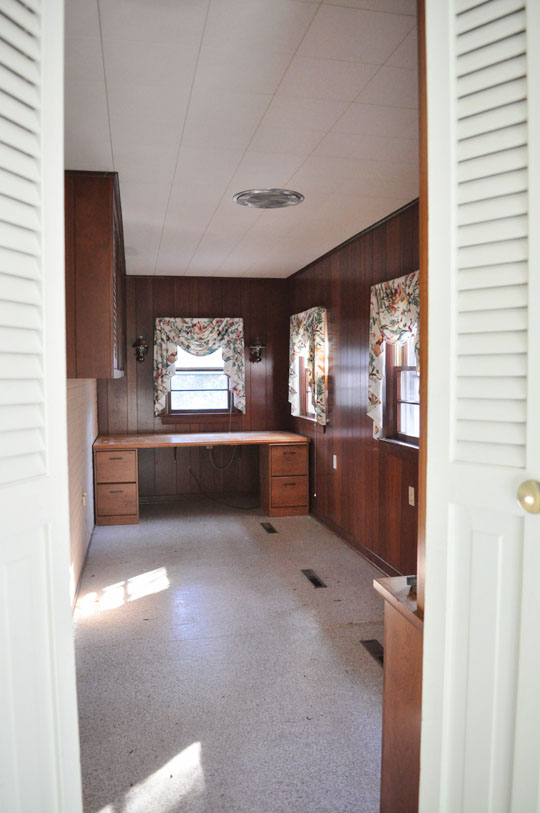
This photo is taken from the dining room, looking into the would-be laundry room. The door to the garage is just inside this room to the left and the doorway to the back yard just inside this room to the right.
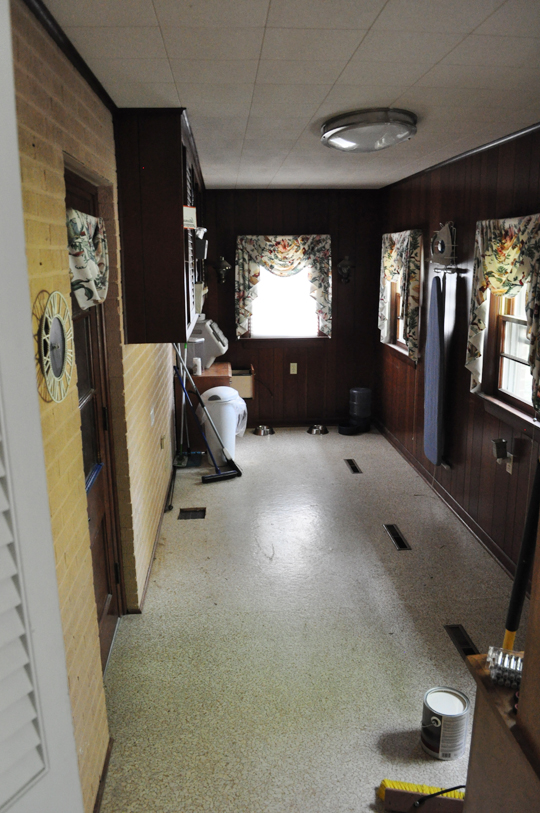
So our first round of improvements involved cleaning and rearranging this space to make sense as a laundry room.
It looked better, but even after scouring it still smelled like cat pee.
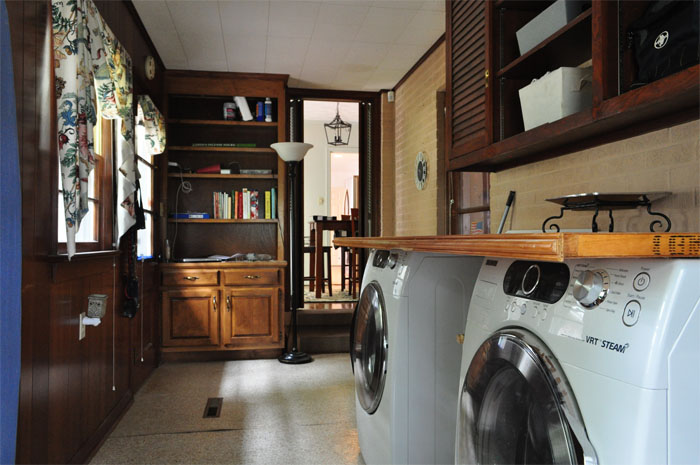
At this point we procrastinated for a year because we were working on the kitchen and we knew the biggest cost in the laundry room was going to be the improvement you don’t see — adding plumbing and a proper dryer outlet. Yep. Right now it’s just a mud room with some really fancy paperweights holding down the linoleum and, like most other houses in this area and price range, the actual working washer and dryer are hooked up in the garage:

Last year our trusted plumber quoted us $1,200-$1,300 to run the water and drain to this room. The problem is that it doesn’t have a crawl space, even though it’s 4-ish feet off the ground. They left about a foot of air space for ductwork beneath the subfloor and then filled it in with cement. Probably to keep anyone from ever finding the bodies.
So our plumber is going to have to get creative and run his pipes through the garage. And as much as I’d love to have the washer and dryer located on the far wall beneath the window, placing them against the brick wall that backs up to the garage is our only option to ensure proper slope for drainage. It will all be worth it though, because an indoor laundry room will absolutely add value when it comes to re-sale.
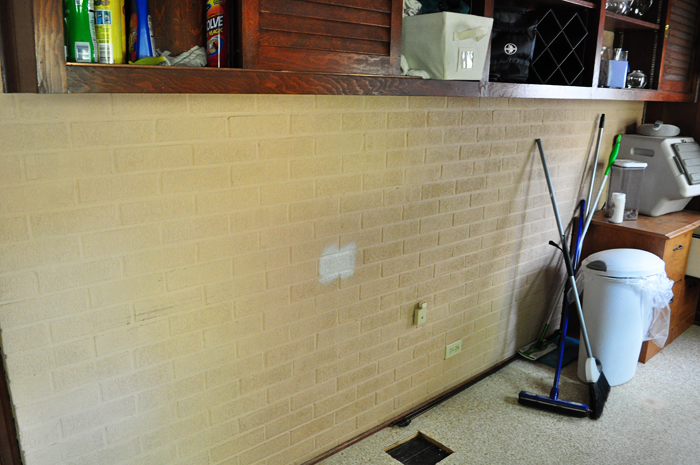
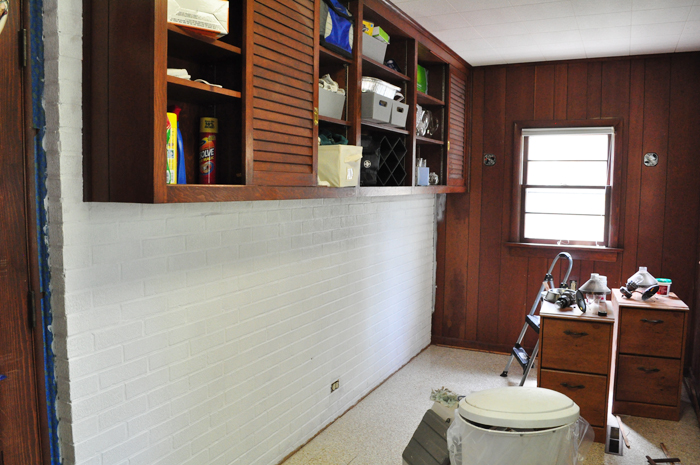
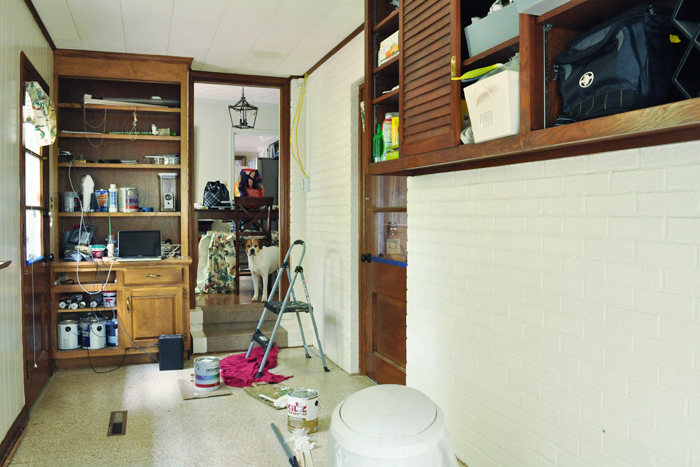
Speaking of that brick wall, our second round of improvements involved one massive attempt to cover the unsightly pink salmon color it had already been painted, lighten the wood paneling, and possibly entomb the cat pee stench behind a layer of latex as a bonus. To get the room ready, Justin moved our expensive useless paperweights out to the garage and we were left with this:
It’s kind of hard to tell in the photos just how oddly fleshy pink that wall was, but it was disturbing. I didn’t realize how disturbing until we started painting it.
I had almost an entire gallon of expensive cabinet paint (Benjamin Moore’s ADVANCE) left from the kitchen remodel, and since I knew it would work really well on the wood paneling (which had a smooth finish very similar to the interior panels of my cabinet doors), we just went with that.
Off-white wouldn’t have been my first choice for “color” in here, but money is money, people.
It needed a second coat, but even just one was a vast improvement.
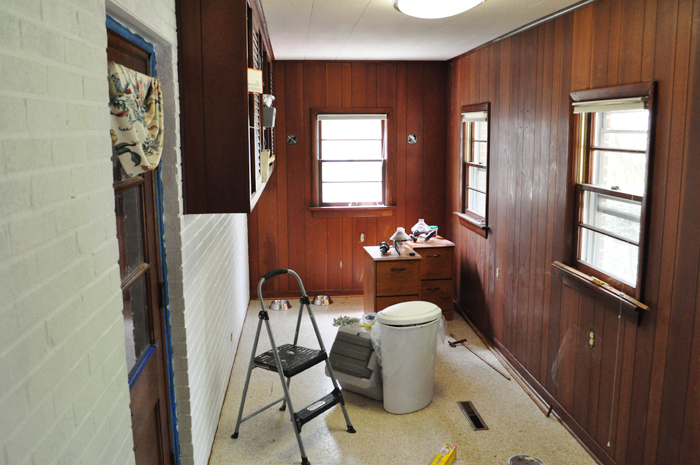
I actually considered leaving the paneling un-painted at this point because the brick looked so much better, but Justin had already wiped a liquid deglosser over the paneling to rough up the texture and prep for paint:
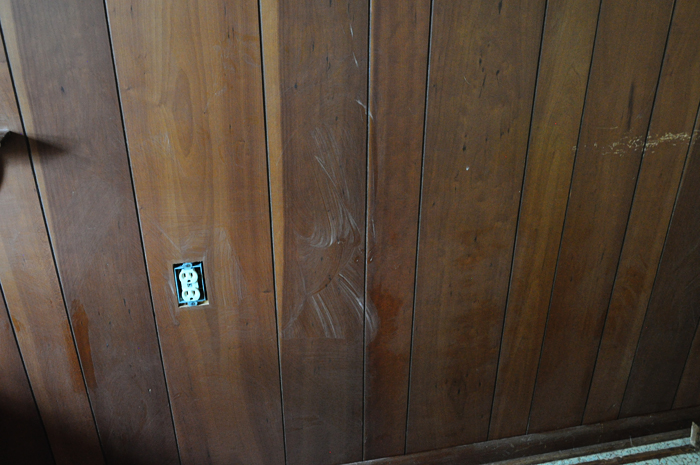
Plus, the paneling wasn’t in great condition. The white streaks are from the deglosser, but there were also some massive scratches across these old walls.
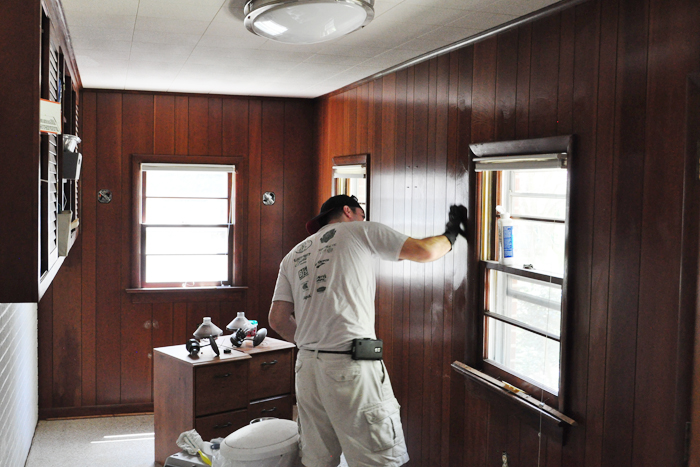
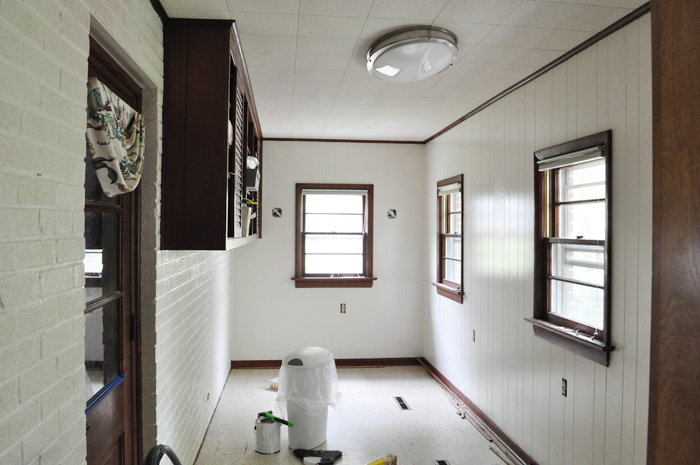
So we popped Jerry Maguire into the laptop, cracked open a couple of beers, and got to work. Unfortunately, painting wood paneling is not a straightforward job. The deglossing is simple, but then it needs priming. Using Zinsser’s Bullseye 123 Primer, I cut in with a paint brush around the molding, outlets, and window trim and did my best to dig paint into the deep grooves along the top and bottom. Justin followed behind with a roller and a thicker-than-normal layer of primer to fill the grooves. Just like when I painted the kitchen cabinets, this stage looked pretty scary:

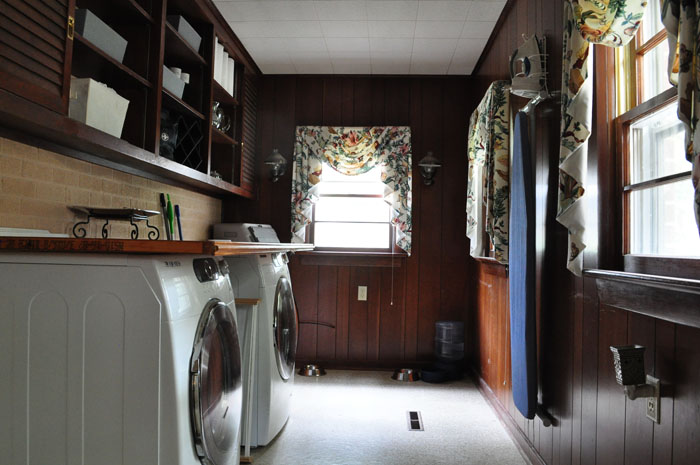
And then, after following with paint, not so much:
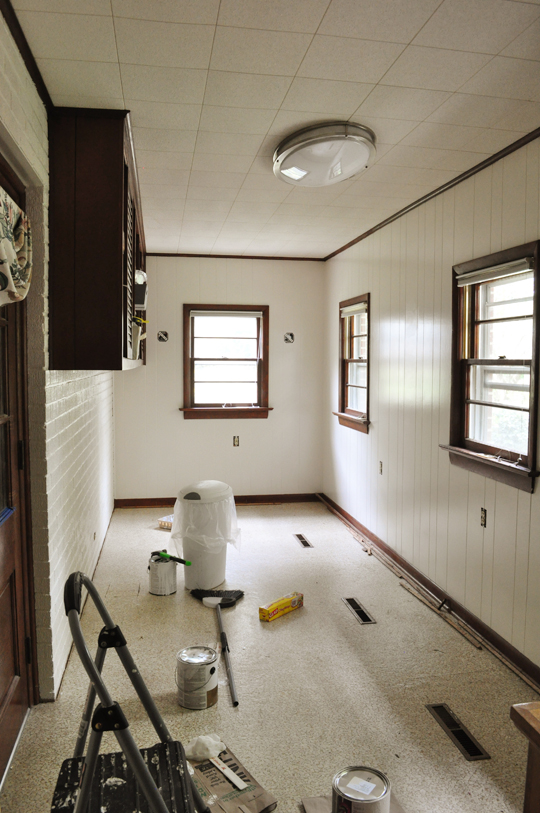
The room feels much, much brighter now.
Before:
After:
Before:
After:
Lighter, cleaner, and the cat pee smell was almost gone.
The thing is, as much as we’d like to go crazy with this space, it’s very possible to spend too much on improvements. And as a military family with limited income and the uncertainty of how long we’ll be living here, we can’t afford to dress this space to the nines. We can dress it to the fives — maybe sixes — but that’s about it. And we still had the floors to contend with (which would, once and for all, remove all remaining evidence of feline excrement.)
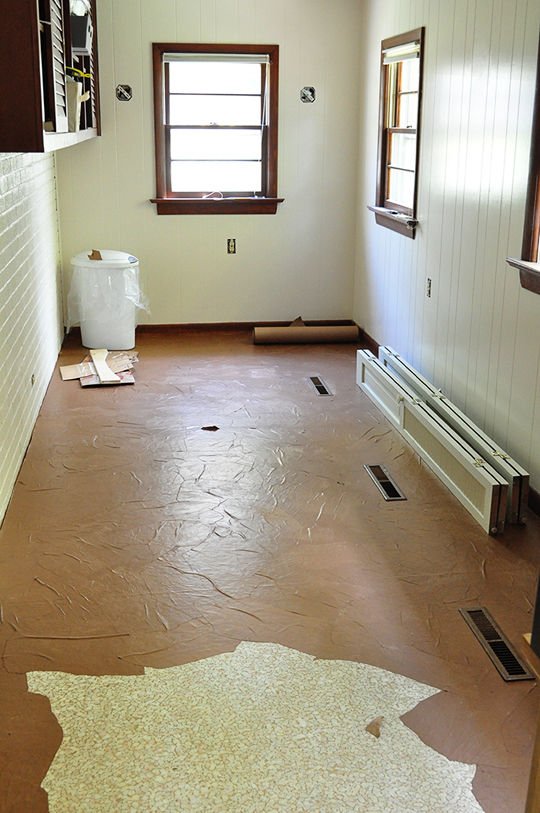
After filling in some divots and gluing down peeling seams in the existing worn linoleum, Justin wanted to try the brown paper treatment to cover it.
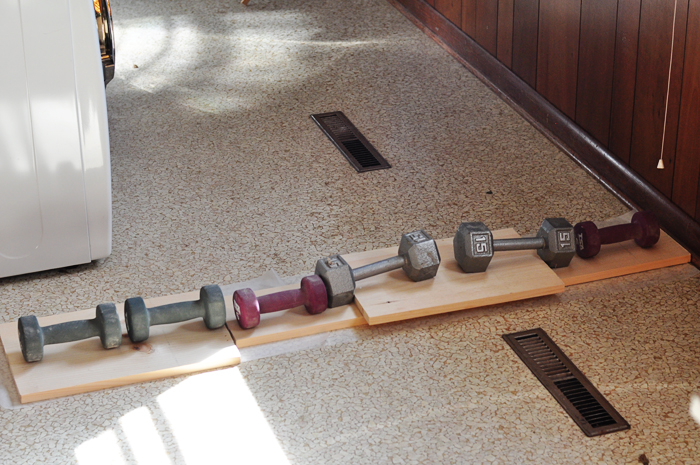
We used weights to hold down the seams for several days so the glue would set.
We needed something flat (so we wouldn’t have to mess with the thresholds in our two exterior doorways) and cheap. I wanted to paint over them, but even with a high quality porch paint, the surface would likely scratch and mar within a few weeks thanks to a couple of 60-pound mutts who frequent this space. The brown paper flooring, however, was supposed to be fairly durable once coated in exorbitant amounts of polyurethane, and who doesn’t love the look of old leather?
Now.
If you’re subscribed to my mailing list, you already know how that experiment went down.
Or didn’t.

In fact, it bubbled and peeled like sunburned skin and pretty much stayed that way.
So we had to come up with something else, pronto, because our plumber was not-so-patiently waiting to get started. What we ended up using is actually my new favorite DIY flooring material but that, m’dears, will have to wait for another post.
Diggin’ the goods?
Subscribe to my mailing list to learn before everyone else that mod podging your floors isn’t all it’s cracked up to be:
And check out my page of our other home improvement projects here:
Comments
Tomato soup neutralizes cat pee smell
Well NOW you tell me that. ;)
Looks wonderful!!! Love it!!! We painted over wood paneling too…anyway…..y’all did a great job. It is hard work…but so satisfying! Your before and after pics are so fab. Hope you are doing well!
I actually kind of like the look of the painted paneling! It’s a little more visually interesting than flat walls — just not quite as simple to paint. :)
I know I’ve been a bit MIA lately — we’ve had visitors and have been doing a lot of local traveling. I hope all is well with you, too!
[…] I last showed you our laundry room progress, I mentioned a little SNAFU with the flooring […]
What a difference you made!
Was the cat pee smell *really* that bad??
[…] from painting the brick and paneling and installing new vinyl floors, the room had to actually function. That […]