
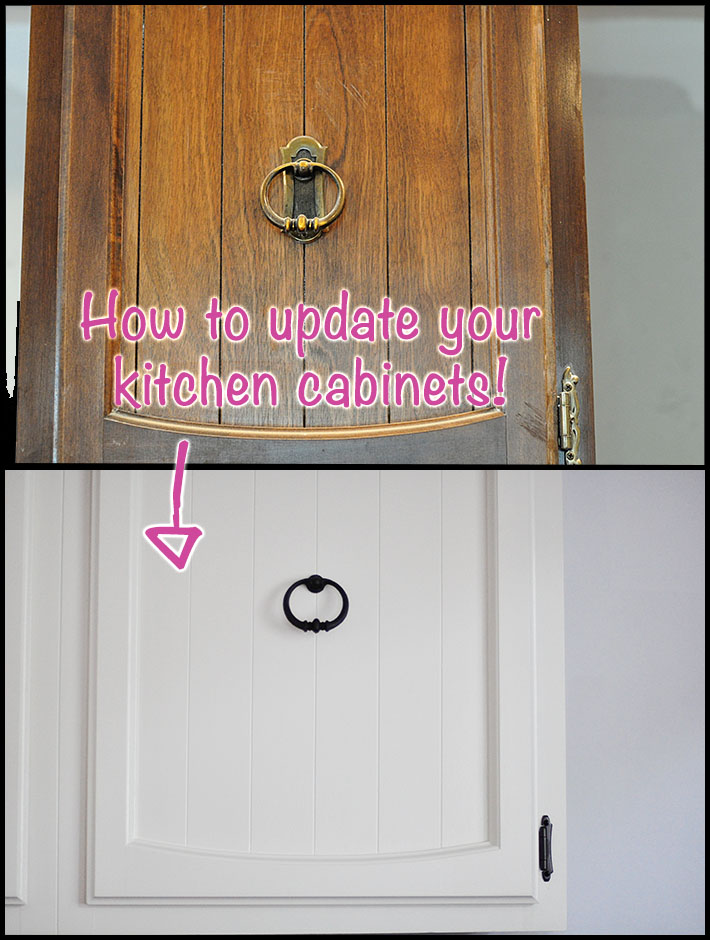
How To Pretend The 70’s Never Happened. (By Painting Your Kitchen Cabinets.)
Okay, you guys.
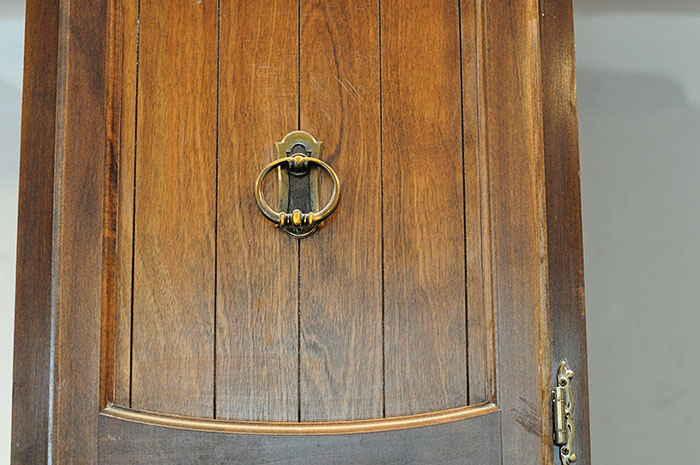
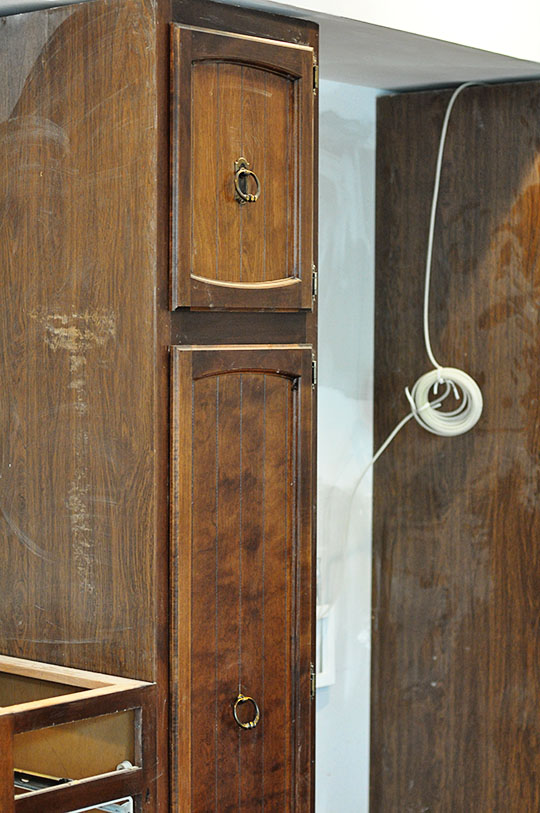
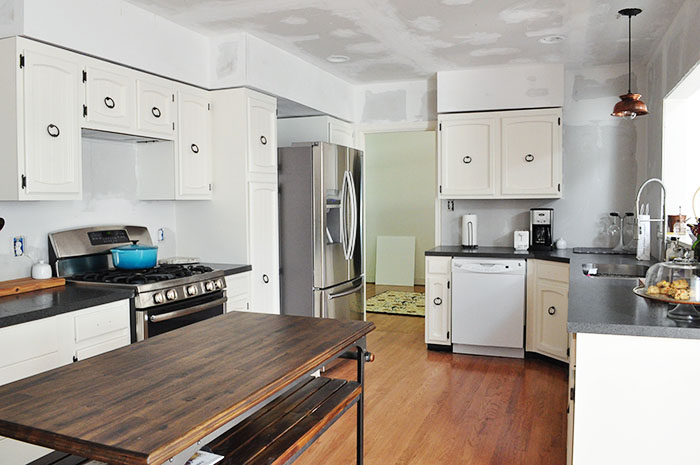
First, thank you so insanely much for all of the positive feedback you gave me about my painted kitchen cabinets. I was super worried it was one of those things where I was all, I *think* it looks good, but maybe that’s just because I’ve been envisioning it a certain way this whole time and now I can’t even see it for what it really looks like and omg who puts ring pulls in the middle of their cabinet doors so they don’t have to patch the holes because THAT’S JUST LAZY.
And crap I probably shouldn’t put these pictures online where people who actually know what they’re doing can look at it and judge me and COULD YOU PLEASE PASS THE WINE.
Plus, it’s hard to be sure in the digital world — hell, even in the real world for that matter — whether compliments are genuine or if people are just trying to be nice, like —
Sure, honey. Your ring pulls are really… um… retro. You were so smart to re-use them. Bless your heart.
But even if that’s the case, I’m going to take it and RUN because compliments — even the ones that are fake but I can pretend are true — totally make me feel better about myself.
It’s a head thing.
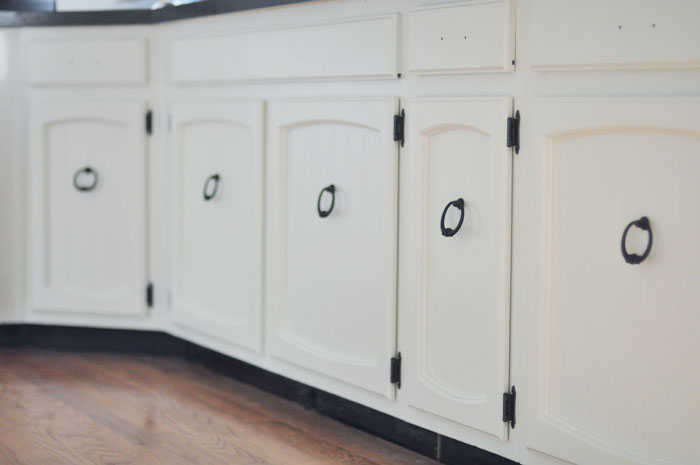
And seriously — I’m actually really kind of digging the ring pulls.
At the very least, we are back to using our kitchen for cooking, rather than treating it as a desolate sinkhole into which we throw all of our life savings.
So that’s a plus.
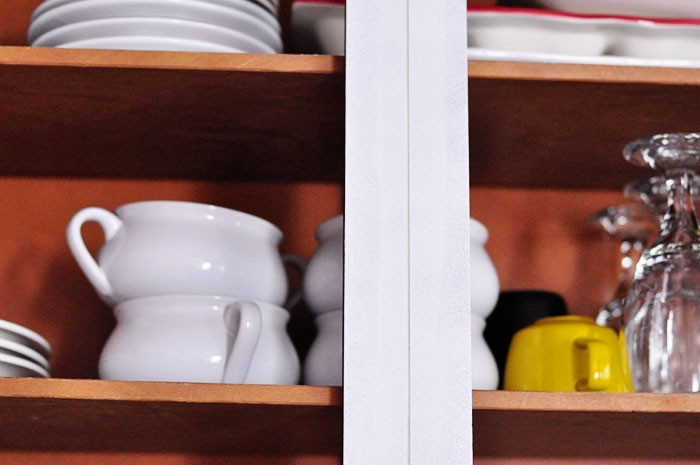
(Although we do still need a backsplash, a light fixture, some shelving, and some wall paint.)
So I’m not going to lie. Updating your cabinets (and you know how I feel about painting) is a lot of work. If we hadn’t already blown our budget and I wasn’t terrified of destroying the new hardwoods, it probably would’ve been worth it to hire someone to spray them professionally. But after some unexpected expenses with the wood floors and the drywall, I contracted myself as the official cabinet painter.
I was compensated with Thai takeout and promises of one-day vacations to exotic, far away lands.
Way cheaper than hiring a pro.
The idea of updating outdated cabinets is pretty straightforward. Examine your boxes and doors to make sure everything’s in good shape, then:
1. Paint the boxes and doors.
2. Paint/replace the knobs and pulls.
3. Replace the hinges.
Easy, huh?
Yeah not exactly.
Painting the Cabinets
A few of you emailed me asking how to do this. The truth is, there are a great many ways to go about painting your cabinets — anywhere from the super detailed full-on putty and sand-down perfectionist job, to the slap some paint on ’em and call it a day job. My method was somewhere between the two, and so far I’m very happy with the results.
My Basic Steps:
1. Remove all of the doors and drawers and prep the work spaces.
2. Rub the doors and boxes down with a TSP substitute to remove 30 years of grease and grime.
3. Wipe with a liquid sander deglosser to lightly mar the smooth surface and prep for paint.
4. Use some wood filler or Bondo (recommended by my awesome countertop guy) to patch deep scratches and hardware holes if you’re using a different size hardware. (I didn’t do this part because I was re-using the hardware and didn’t mind keeping some of the minor hinge indentations and imperfections in the finish.)
5. Prime.
6. Paint.
7. LET CURE.
8. Top coat, depending on the paint.
Details:
If you plan on painting your cabinets by hand, you’re going to need a lot of space. And you’re going to need it for quite some time.
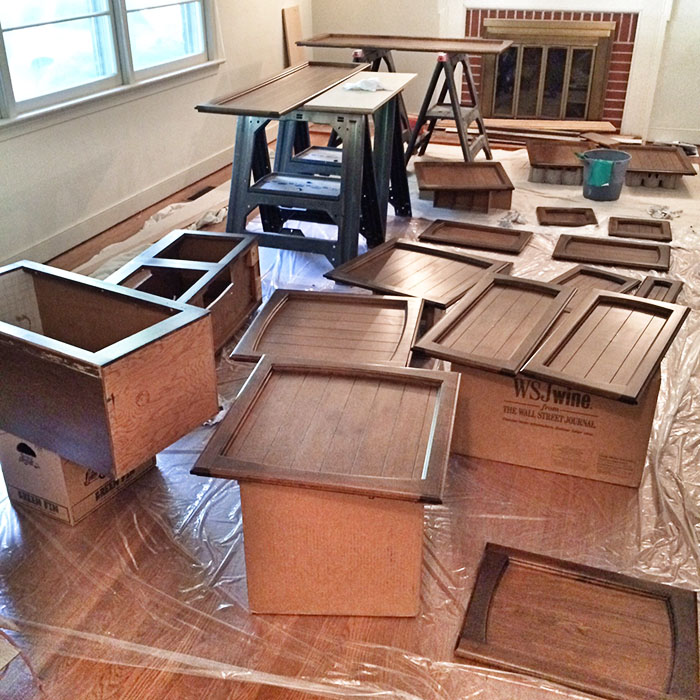
Our living room, which we really never use, looked like this for months.
Of course, I’m a total procrasti-hole and you can definitely do this job faster than that — but, if you’re going to take the time to paint by hand, allow at least a couple of weeks for the paint to fully cure (harden) before you re-hang the doors.
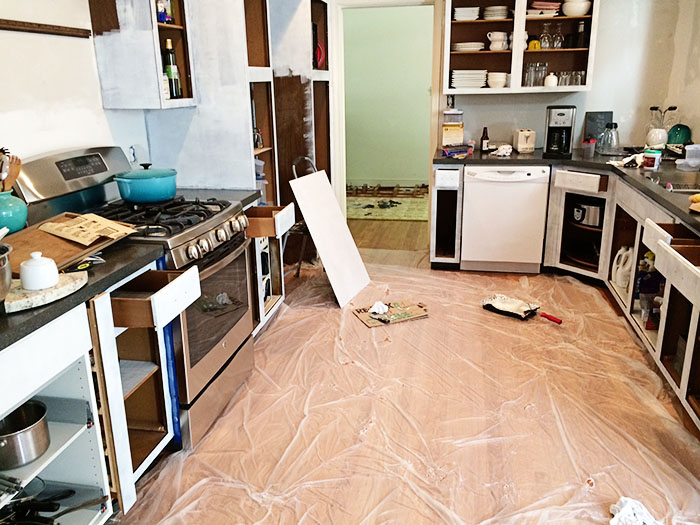
Don’t skimp on the plastic and drop cloths. While it takes some time to set up, the cleanup is MUCH faster to deal with than the hyperventilation that comes with spilled paint on new hardwoods.
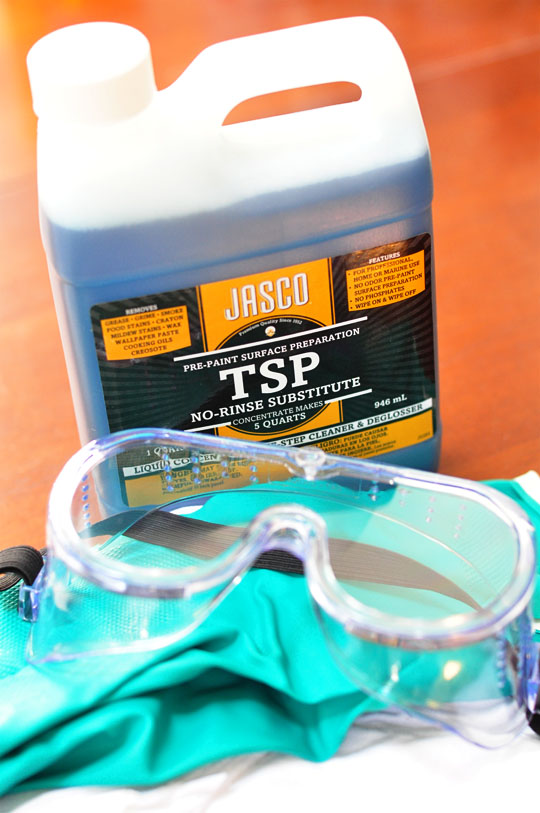
When working with potentially abrasive chemicals, I like to be prepared:

I’m quite fond of the makeup-less, goggles-over-bangs look.
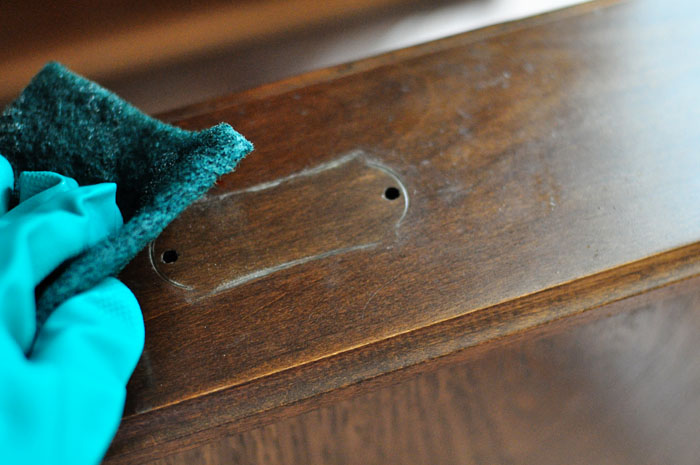
You might be tempted to skip the cleaning step, but trust me — DON’T DO IT. My cabinets didn’t look particularly dirty (just dusty from the drywall), but when I wiped them down with the TSP substitute, you wouldn’t believe some of the gunk that came off. If you’d rather not use chemicals, some simple soap and water should work, but be warned — if you paint over old stains, there’s a chance they could end up showing back through the paint after you’re done.
Dilute the TSP substitute according to the package directions…
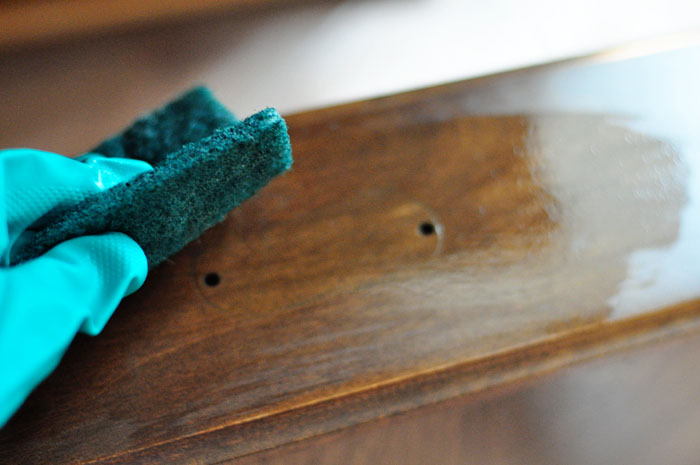
Then use an abrasive pad to remove the scuzz.
GONE.
I kept a bag of rag scraps nearby and wiped the doors and boxes dry to remove even more scuzz.
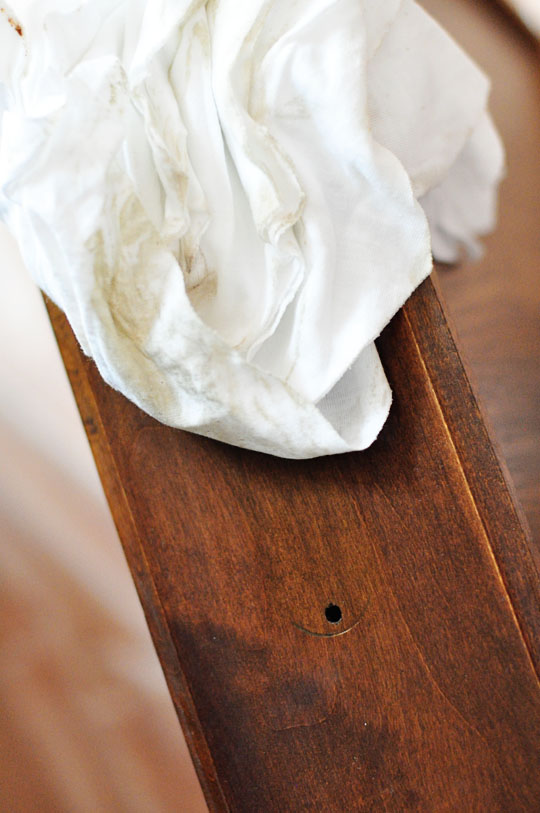
Gross.
The JASCO TSP no-rinse substitute I used advertised itself as a deglosser as well, but listen. I’m the type of person who would rather go through the work of a few more easy-steps up-front than re-doing work I’ve already done. So I took the time to do a quick wipe-down with this Klean-Strip liquid sander deglosser to scuff up the surface, just to be on the safe side.
I don’t have any photos of the deglossing step, but it was fast. I just wiped the cabinets down according to the directions on the bottle — it left them looking a bit milky white and feeling grainy.
When it comes to priming, the key is to work quickly. I used a good quality Kilz Premium Primer, a small foam roller, and my favorite little paint brush for getting into all of the grooves.
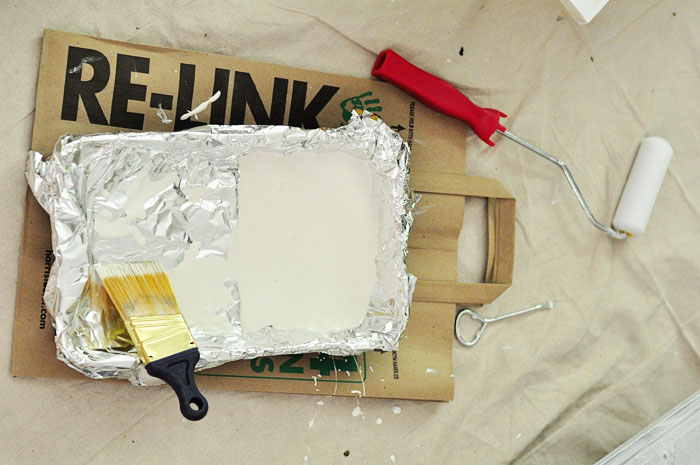
TIP #1: Line your paint tray with foil for super-easy cleanup. Plus, you’ll only need one tray for the entire project!
TIP #2: Wrap your brush and roller in plastic wrap and store in the refrigerator between coats so you don’t have to wash them as frequently.
Tip #3: When priming or painting, do all coats on the backs of the doors FIRST — then flip over to do the fronts and let cure. That way, if the finish gets marred at all, it will be on the backs of the doors.
Tip #4: Use the paint brush first to get into the grooves and cracks. Then use the foam roller to cover the flat surfaces and edges.
Tip #5: Use a rag to wipe the edges of the back of the side you just painted to remove any drips. This is SUPER important for getting a nice, smooth, professional-looking finish!
I’ll admit it — the coat of primer looked a little scary:
Okay, a lot scary:

And it was very obvious where I’d used the brush vs. the roller:
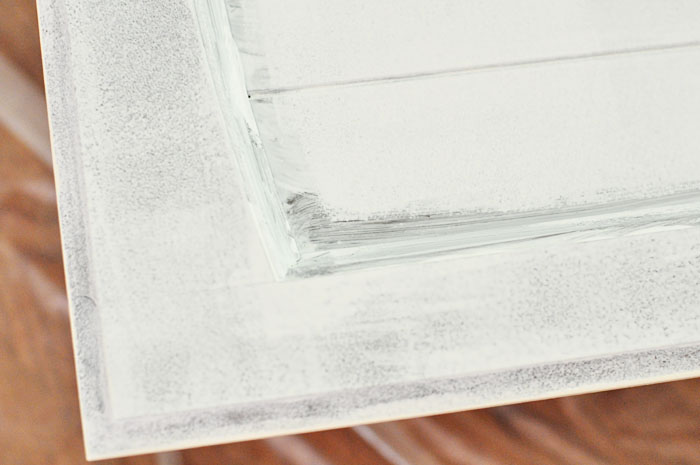
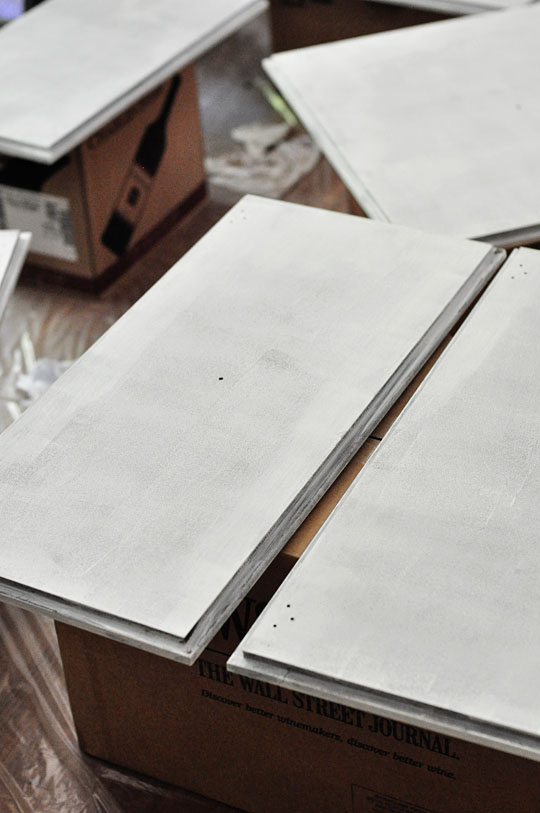
But don’t freak out because this is how primer is supposed to look — it just further preps the surface so your paint can stick. I used the same method for painting (first the brush to get the details, then the roller to smooth it all out):
It was still very obvious where I’d used the brush, which didn’t get as much coverage as the roller:

But I tried my best to stay patient and use very thin coats.
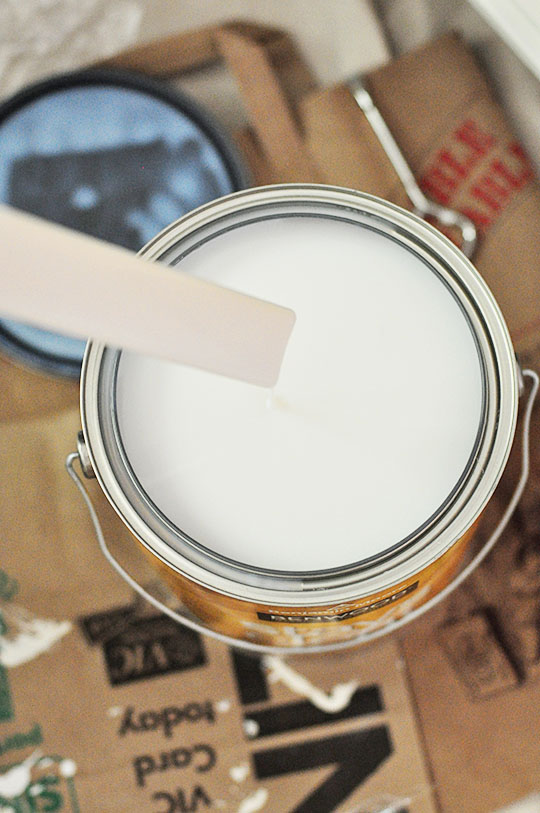
Tip #6: Use Benjamin Moore’s ADVANCE paint. Just do it. I used the satin finish. It’s not a cheap paint, but when it came to this project, I wouldn’t do it any other way — this is a latex (water-based) paint that has finishing properties of an oil-based paint. What this means is that it levels itself out nice and smooth and dries nice and hard without all of the noxious fumes and gasses. (Look. I sleep in the same room as two 60-pound dogs and one hairy grown man. I have enough noxious fumes in my life, thankyouverymuch.)
After many painstaking days of procrastination and dawdling and practically an entire season of Sex and the City on my laptop while I worked, I had done it — one coat of primer and two coats of paint on the backs and fronts of the doors and the fronts and sides of the boxes. I promptly left for Florida to let everything cure while I was gone, but when I returned, I saw this:
What. The. Dooce.
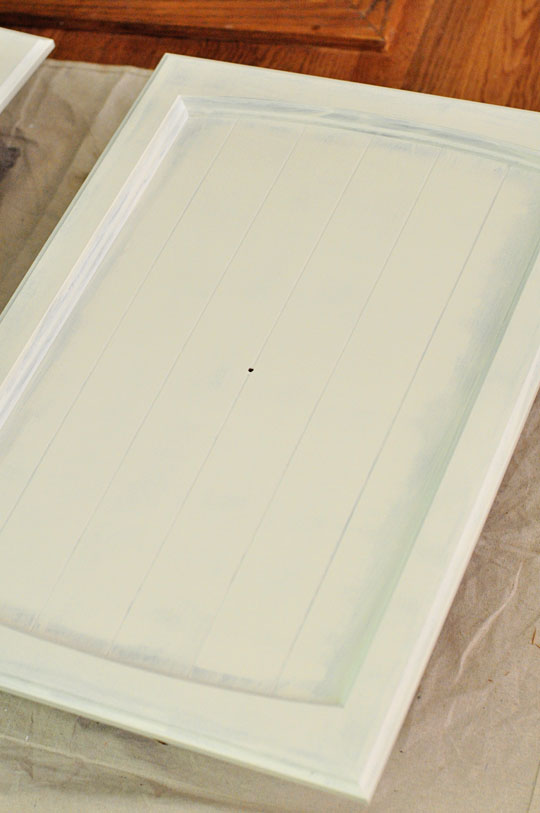
It’s hard to tell in the photo, but basically on the doors around the inside edges where I’d used the paint brush, I could still see strokes and see through the paint. So I contained my eye twitch, grabbed a beer, and added one more coat of paint to the fronts of the doors. (The boxes and door backs were fine with two coats because I’d mostly used the roller.)
Once done, the coverage was perfect. I could still see a bit of the wood grain on the veneer side panels of the cabinets, but everything else was a beautiful smooth finish:
Note: After all of that work, I’d fully intended to use a top coat of Benjamin Moore’s Stay’s Clear Acrylic Polyurethane to protect my efforts.
But after two maddening attempts — first with a recommended expensive brush and then a not-recommended foam roller to get it applied to the backs of the doors, I frustratedly called Benjamin Moore to find out why it looked like ass. They calmly explained that since I’d used their amazing ADVANCE paint, I didn’t actually need a top coat due to its superior hardening qualities. And bonus? They let me return my opened $80 can of poly. That kind of service alone makes it worth spending the money on their products.
Painting and Purchasing the Hardware
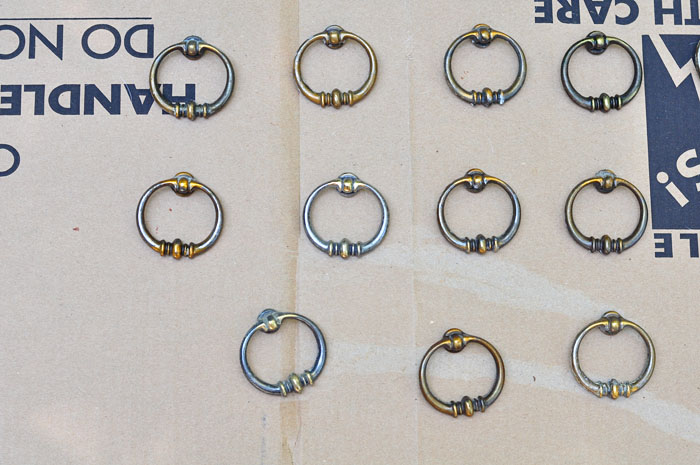
So while my paint was fully curing, I got to work spray painting my hardware. I removed those art deco plates from the backs of each ring —
Let them soak in sudsy water for a few hours, scrubbed them with a toothbrush (this was SO gross), and let their lovely brass shine:
I protected my deck from the overs-pray like so…
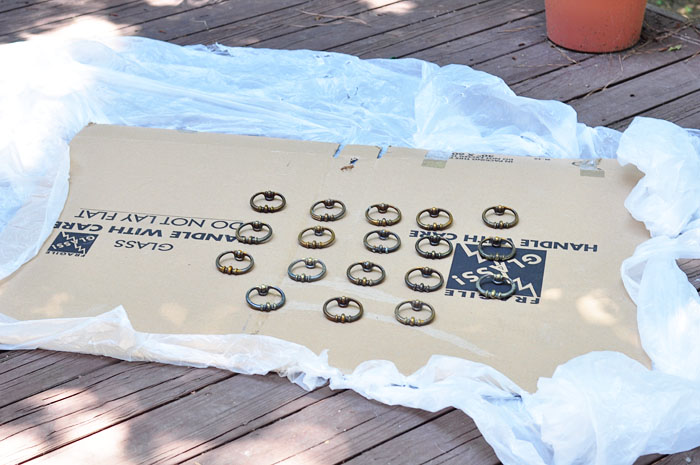
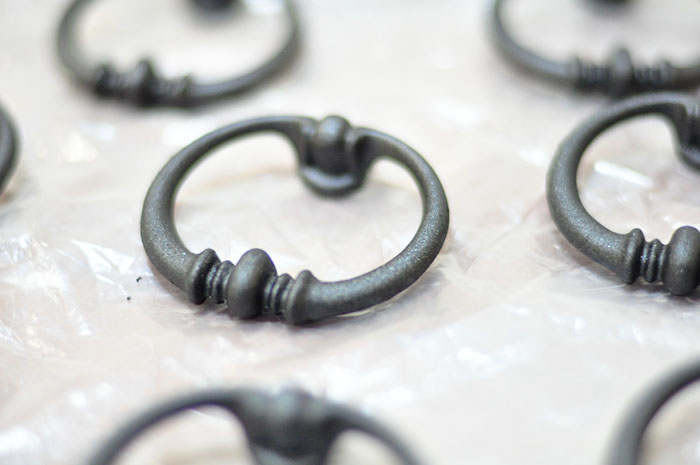
And went to town with 4 or 5 thin coats of Rust-oleum’s Universal paint & primer in-one with about an hour of drying time in between each coat.
And finally, the update wouldn’t have been complete without new hinges. The old ones were falling apart and looked like little golden mustaches:
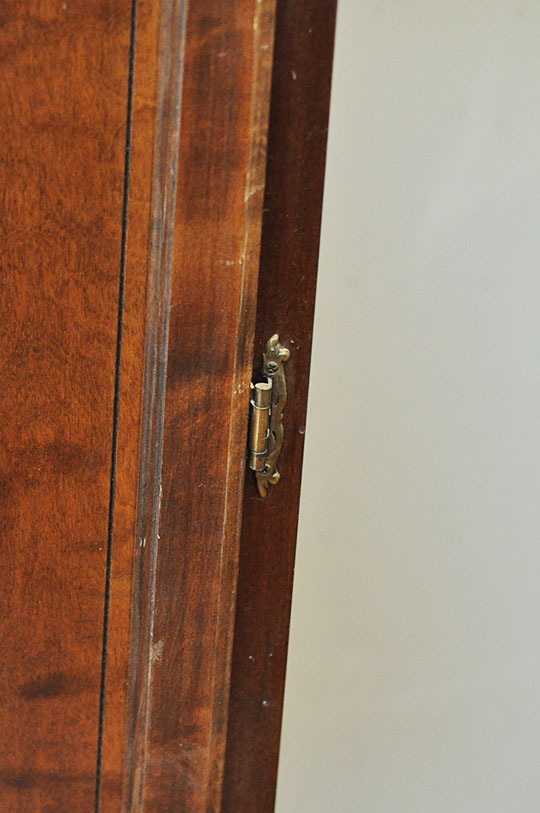
So I ordered these from Hardware Source in oil-rubbed bronze. They’re self-closing (meaning they “snap” the doors closed), and I completely lucked out that the screw holes matched those on the backs of my doors:
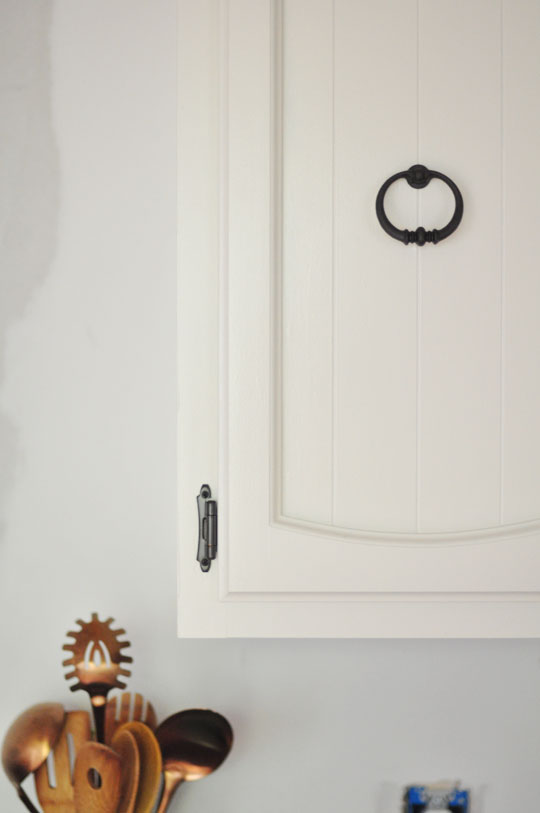
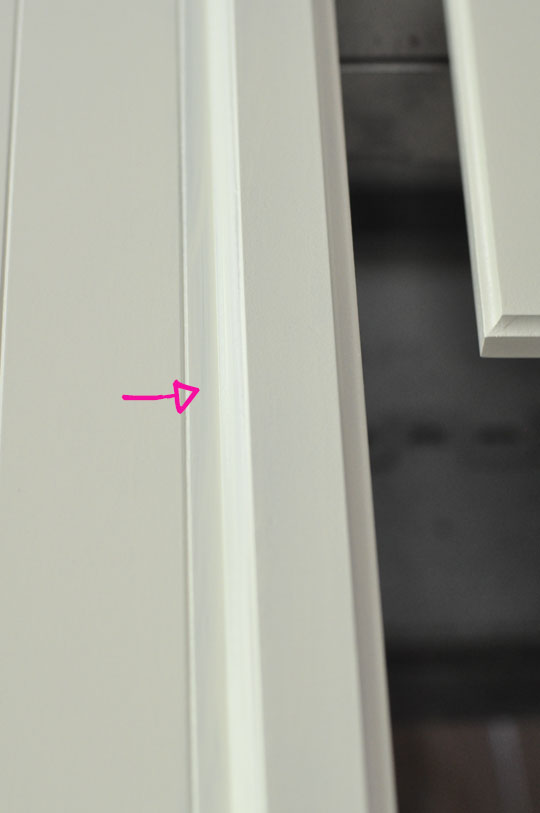
The difference in how these look is immense:
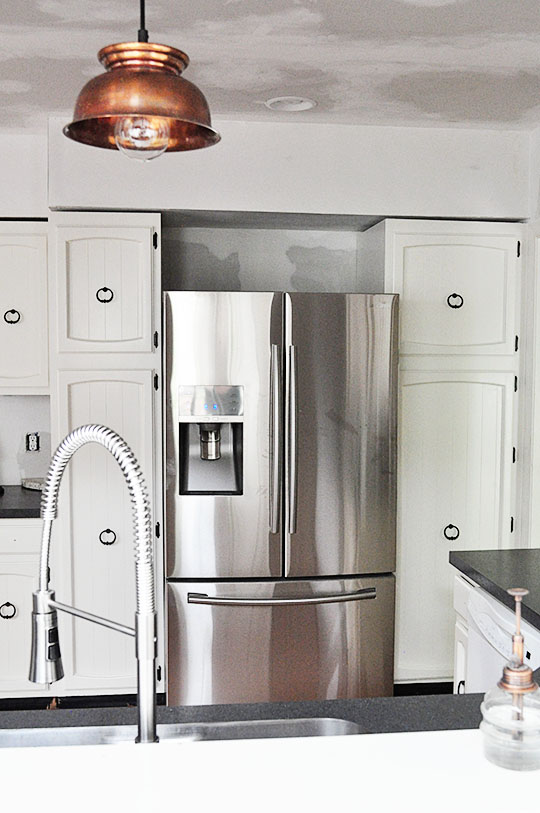
And while I seriously considered abandoning the house and moving to Fiji several times during this process, I’m very glad I stuck it out.
Questions?
Comments
I dig the ring pulls too. Everything is the same lately and they are different. In a good way.
Aw thanks, Melissa!! That’s totally what I was hoping for. (That, and saving money from buying new pulls.) :)
i like that you kept pieces of the old homes character in tact during your reno. i see so many kitchen remodels on apartment therapy where they completely gut the ktichen, and in some cases its necessary but i prefer it when people incorporate old with new like you have done. any chance you can tell us what color youre going to paint the kitchen? I’m very invested in this kitchen renovation haha
Thank you!! I’ll admit our main reason for re-using the cabinets was budget, and it was MUCH harder to work with what we had than completely gutting (like we did in our last house), but I’m actually surprised with how well I like them now. I think since this house is so old, it really does work. I would LOVE to share what paint color we’ll use for the walls, but I have no idea what that is yet. :) We first have to pick out a backsplash tile (which requires me to gear myself up for more money spendin’), and then we’ll decide on a paint. I’ll definitely keep you posted!
I think it looks great! I have an old house too and did exactly what you did – repaint the old cabinets. Your paint job and hardware turned out perfect!
Thanks!! There’s something kind of satisfying about giving new life to something you already had, isn’t there? I bought cup pulls for the drawers and I’m not loving them because they’re so trendy, but anything else I liked was either not the right size or too expensive — hopefully once I attach them, it doesn’t ruin the overall look. :)
The goggles over bangs, gloves up to your elbows, expression of subtle terror is a good look. You could cut yourself out of that shot and superimpose it over a pot of spaghetti, dogs being washed, glassware being picked off a Kmart shelf, and it works. Very versatile.
You know what? I just might do that when I don’t have a picture for a post… ;)
Looks beautiful Katie. You guys did a great job!
Thanks, Dad!! Not done yet… still need to cover those soffits, paint, and add a backsplash. :)
[…] How to Paint Your Kitchen Cabinets. […]
[…] How to paint your kitchen cabinets […]
Katie;
You’re seriously amazing!!! Ok I think I just may tackle this project over Christmas since the hubby is on block leave & I may be able to guilt him into helping:)
Thx for the inspiration!!!
Sweat and guilt! It’s what Christmas is all about!! Haha — It’s totally worth it, though. I hope you can knock yours out a lot faster than I did! :)
sorry maybe i missed it but are these mica cabinets or wood?
they look terrific, you did a great job. i admit i went backwards from your post about the map, then to the backsplash and even getting sidetracked in Firenze…but all worth the read.
Thank you, Candy! I’m glad you’re getting sidetracked on my site — it’s the highest compliment. :) I believe my cabinets are mostly wood, but there’s definitely some veneer along the sides. (I think the main door panels might have some kind of veneer as well.) The two biggest keys to getting these look awesome were 1) Quality paint (the paint I used was FANTASTIC for this application), and 2) Patience. I had to let them cure a full two weeks for the paint to dry evenly and super hard. Now, then they get dirty, I just give ’em a quick wipe with a wet towel and they’re good to go. I never thought I’d like having painted cabinets, but now I know if done right, it’s worth the hassle.
[…] of the nearly finished look I showed you last, after we tiled the backsplash for less than $200; painted the cabinets and rearranged them to fit our needs; added hardwood floors, recessed lighting, and a DIY pendant […]
[…] with a roller and a thicker-than-normal layer of primer to fill the grooves. Just like when I painted the kitchen cabinets, this stage looked pretty […]
[…] a 4 season sun room, where we spend the majority of our time.) Aside from the time I used it to paint our kitchen cabinets for two months, it’s mostly been a source of neglect and embarrassment — especially […]
Since it’s been a while since you did this, how is the spray paint on the rings holding up?
Really well! No change in the cabinet pulls. It’s rubbing off very slightly in some places on the drawer pulls, but I actually like the look. If it wears too much, it wouldn’t be difficult to take them off and re-spray.
Thank you for posting this. I opened your page, and was pleasantly surprised to find almost the same cabinets I wanted to repaint in the house we just bought; except these are in a misc. room in the basement. After seeing your job done, I can better visualize how to make my plans actually happen. Thanks again for the inspiration.
You’re welcome! I’m so glad this was helpful for you. It definitely requires work, but was totally worth it in the end — I think I like these better than new cabinets!
Katie,
I’m reading your post for the first time, I’m curious how the cabinets are holding up after the years. Have you had to revisit any painting due to original staining/cleaning bleeding through?
I have not used the products you mentioned, I’ve used other chemicals that cost more and are more time consuming. My hope is that your methods/products are more effective. I’m buying a house built in the late 70’s and there is just way too much varnished wood to appreciate the era. Hopes are that I can rehab the cabinets and trim quicker and pain-free as possible.
Thanks for the info,
Dolly
Hi Dolly, timely question since we’re just getting ready to move! We’ve had NO staining or anything bleeding through. I have had to do the occasional touch up due to chipped paint in tiny places, but other than that they’ve held up beautifully. They’re easy to clean and wipe down, too. I would use all of these same products if I did this again. :)
[…] and you’ll understand why. We decided to rearrange the layout to make it more functional and paint the cabinets and old ring pulls to save a little money. We installed recessed lighting, this chandelier, […]